Welcome to my blog!

Thanks for visiting my blog. As the title suggests, I love to scrapbook, stamp, and sing! I will share cards and scrapbook pages I create, as well as information about my music - Barbershop harmony.
Showing posts with label Day of the Month Card Club. Show all posts

Thursday, December 19, 2024

Starting 2025 Christmas Cards!

Hi everyone! I finished my 2024 Christmas cards and either mailed them all or am hand-delivering them. 80 in all - Whew! So, what better time to start on 2025 cards:


Supplies: Paper - Recollections Light Brights; Paper Studio Holiday;
Hero Art Glitter Basics; Neenah Solar White;
Graphic 45 Merry & Bright; scraps
Dies - Spellbinders Stocking Full of Joy (DOML-Jul23;  retired);
Stamps w/dies - Hero Arts Santa's Door Accessories
(retired at HA but found HERE at Frantic Stamper
Embossing Folder - Spellbinders Pine Cones & Berries (3EOM-Jul24);
Taylored Expressions Weathered (retired)
Other - Copic Markers for shading; foam tape

I wanted to do at least one card for Day of the Month Card Club #70 where it's National Sock Day. So I brought out a Spellbinders Large Die of the Month from last year that I used to make my December Card Chain card (to be revealed 1/2/2025).

Die cut a stitched rectangle from light blue cardstock and embossed it. Added to an A2 card formed from dark red cardstock. Die cut the stocking, foliage, gingerbread & candy cane from patterned paper and scraps. Embossed the stocking base with a weathered pattern before adding the cuff, toe & heel pieces. Assembled the accessories and added them behind the stocking, then to the card. A sentiment sign from an old Hero Arts set finished the card.

That's it for today, friends. Thanks for visiting and happy crafting!!


Tuesday, November 19, 2024

Baking Spirits Bright

Hi all - I'm back with my second card for National Gingerbread Cookie Day over at Day of the Month Card Club Challenge #69. I'm using new Simon Says Stamp dies with a newly used sentiment stamp I bought last season.


Supplies: Paper - Recollections A2 card;
Sunny Studio Critter Country; TH silver kraft metallic;
scraps of kraft and white
Dies - Simon Says Stamp Holiday Baking Essentials 
Stamps w/dies - Taylored Expressions Season's Sweetings (dies HERE)
Other - foam tape; white gel pen; Copic RV16 & E50

I die cut a rectangle from a Sunny Studio buffalo plaid paper & added to an A2 card top fold card from Michael's. I die cut the baking elements from various scraps. Stamped and die cut a sentiment. Added everything to the card after detailing with a gel pen and a Copic. Done! I thought it was fun to combine the rolled & cut out dough on the left with the baked cookies on the right.

I'll also add my card to Merry Little Christmas Challenge #59 where Anything Goes Christmas (5th entry of 8 max if I'm counting correctly) & to Darnell's November NBUS Challenge #68 since the sentiment and some of the baking elements were newly used.

That's all for now. Thanks for stopping by & have a crafty day!!


Tuesday, November 12, 2024

Gingerbread Couple

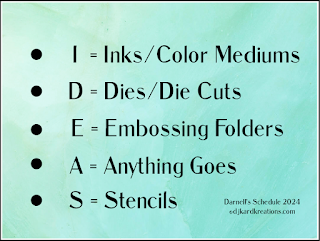
Hi everyone - it's been a while since I joined Darnell and her IDEAS program (see her beautiful cards HERE) so I thought I'd jump into D is for Dies this week. And the designers are celebrating National Gingerbread Cookie Day over at Day of the Month Card Club Challenge #69 so I got out a die set to play along. Thought it was past time to use a darling Spellbinders set I bought last year but hadn't even opened yet. 

Here's my gingerbread couple:


Supplies: Paper - Taylored Expressions Hot Fudge & Latte;
BoBunny Snowfall Collection 6x6"; vellum;
scraps of blue and glitter paper, plus pink for the cheeks; 
Spellbinders Betterpress Pebble
Dies - Spellbinders Dancin Gingerbread;
My Favorite Things Stitched Oval Scallop Frames (retired)
Press Plate w/die - Spellbinders Merry & Bright Sentiment Strips
Other - Spellbinders Betterpress Thunder ink

I die cut a rectangle from a BoBunny patterned paper pad & added to an A2 card formed from Latte cardstock. I die cut the gingerpeople from the same Latte. Their frosting and clothes were die cut from scraps. I adhered scraps of Hot Fudge cardstock behind the faces and inlaid the peachy cheeks, die cut from scraps. Assembled the gingerpeople.

Next I die cut a piece of vellum using a scalloped oval frame. What's left is a zig-zag edged oval which I used as my cookie platter. Added this to the card then popped the gingerpeople atop it. A Betterpressed sentiment finished the card.

I'll also add my card to Merry Little Christmas Challenge #59 where Anything Goes & to Darnell's November NBUS Challenge #68 since my gingerbread set is newly used.

That's all for now. Thanks for stopping by & have a crafty day!!


Monday, October 14, 2024

An Autumn Leaf Birthday Card

Hi everyone - hope your week is off to a great start! It's the second Monday of the month so Darnell (djkardkreations) is doing Dies for her IDEAS program. Thought I'd play along with some die cut leaves and also join a couple of other challenges. Here's my card:


Supplies: Paper - Park Lane A2 card; 
Basic Grey Herbs & Honey;
many scraps for leaves and sentiment
Stamps - My Favorite Things Itty Bitty Birthday
Dies - Lawn Fawn Small Stitched Leaves 
Other - foam tape

I had a pile of leaves left over from a previous card so decided to use them on a birthday card for my dad. Simply arranged the leaves along the edge of a patterned paper on my gold card, then popped on a sentiment strip. Kept it very simple for a more masculine feel.

My card fits at Day of the Month Card Club Challenge #68 where they're celebrating Tic-Tac Day with a Tic-Tac-Toe board. Once again (my second entry) I've used the top left to lower right diagonal - Die/Fall Colors/Leaf. 


I'm also playing for the second time at Just Us Girls Challenge #748 where the theme is Leaves.

That's all for today - thanks for stopping by & have a wonderful day!!


Sunday, October 13, 2024

A Gift Bag on a Card!

Hey everyone - Happy Sunday! I had a busy couple of days so just watched Craft Roulette Episode #236 on replay last night. Here's my project:


Supplies: Paper - Park Lane A7 card;
American Crafts (map); Basic Grey (bag); many scraps
Stamps - Sunny Studio Color My World 
Dies - Spellbinders For You Gift Card Holder (DOML-Apr19 retired)
& Stitched Fall Leaves (DOM-Sep22 retired) ;
Hero Arts Tag Frame Infinity Dies
Press Plate w/die - Spellbinders You Are Everything Sentiments
Inks - Spellbinders Betterpress Bark;
Taylored Expressions Pumpkin; Hero Arts Cup O' Joe
Other - Hero Arts Orange+Shimmer Spray & enamel dots;
DMC embroidery floss; Hallmark tissue

Host Mary Gunn FUNN had Charlene Madrid (YouTube Dream Craft Create; blog) as her guest for the 4th time! Charlene has only been card making since 2021 & started doing videos pretty quickly thereafter. She belongs to the Hero Arts, Picket Fence, & Honeybee Creative Teams so check out her blog. She's teaching at the Hero Arts Holiday Stamp Along this year (coming up 10/19-20/2024) and you can still purchase a spot HERE.

The wheel spun some interesting parameters, including "Guest's Choice" for random. Charlene very promptly named Splatters as her choice.


  • Project - Include a small bag: I made an A7 card with a gift bag atop.
  • Colors - Cornucopia: I found a Thanksgiving Cornucopia palette at Lemon Paper Lab showing colors goldenrod, rust, tangerine orange, olive green and moss green. Plus, I own a woven brown cornucopia basket so I used that color too but left off the greens.
  • Element - CAS from Last Week's Gallery: They meant copy & share (I've seen it as CASE) some element from an entry last week. There were 524 from which to choose - wow!! I kept it simple and picked from the first page I came to in the Episode #235 gallery when sorting by member contributions. I used the map paper and sentiment elements from Alisa Howard's card; that was her 80th card!
  • Random - Splatters: I splattered the map paper.

I had a gift bag die set that I've used before (see a previous gift bag HERE if interested). This time I added the completed bag to a goldenrod A7 card matted with map paper; tried a slimline but didn't like it. Adhered some stitched leaves in more cornucopia colors. 

There was a lot of discussion on the element because CAS to many means Clean and Simple. Plus, the idea wasn't to make the person's project so much as to be inspired by elements of it. I stamped the same worded sentiment on a matted label as did Alisa and added enamel dots. Also added a birthday sentiment among the leaves.

So, typical me, I'd photographed the card and was about to upload when I realized I forgot the splatters!! Had to bring the card out of the photo station & dilute some shimmer spray liquid to apply the splatters with a small brush. I first masked off the bits I didn't want splattered - note to self: splatter background before adding to card!! The splatters are hard to see but in real life they have a nice rusty shimmer.

My card fits at Day of the Month Card Club Challenge #68 where they're celebrating Tic-Tac Day with a Tic-Tac-Toe board. I used the top left to lower right diagonal - Die/Fall Colors/Leaf. 


And since my poor stitched leaf die set is getting first play after owning it for two years, I'll at my card to Darnell's October NBUS Challenge #67. And the theme for Just Us Girls Challenge #748 is Leaves so I'll play there too!

That's it for today - thanks for visiting & I wish you a crafty day!


Wednesday, September 11, 2024

Fun Fold for Autumn

Hi all - welcome! Many challenges have autumn themes right now - thought I'd play along with a few! I was trying to decide on a design when I spotted my friend Dawn's beautiful flying finch fun fold card. It looked like fun so I googled the fold and found Susan Campfield's video tutorial. Here's my take:


Supplies: Paper - Poptone Berrylicious;
Paper Studio woodgrain; many scraps
Stamps - Hero Arts Hello Autumn (retired but found HERE)
3D Embossing Folder - Spellbinders Mushroom Harvest 

Susan's instructions were clear & simple so I was able to assemble the card base quickly. Next I found a lace pattern among my scraps for the narrowest panels of the "wings". I thought the mushroom embossing folder would give a nice base texture on the other panels. Perfect for a leafy arrangement. Die cut an oval base & stamped the sentiment on it. Added it to the card front with foam tape. Next I die cut leaves from five different colors in the scrap bin. Arranged the leaves on & under the oval - done! Here's a flat view; it folds to fit an A2 envelope:


Here's a view from the top so you can see the "wings":


I'm sending my autumn card to these Challenges:

That's it for now. Thanks for stopping & have a crafty day!


Tuesday, August 13, 2024

Alpaca selfie

Hey there - good to see you here! I missed the previous Just Us Girls Challenge so really wanted to play along at JUGS Challenge #739 where it's Word Week - the word being FRAME. I was inspired by Lisa's darling polaroid card to break out a new MFT die that just arrived. Since it's alpaca time at Day of the Month Card Club #66, I decided to feature Mr. Alpaca in the frame (see previous cards with him HERE and HERE). 


Supplies: Paper - Hero Arts Dove A2 card; 
Neenah Solar White; Hero Arts Bermuda
Doodlebug Sugar Shoppe; many scraps
Dies - Marianne Design Eline's Alpaca;
My Favorite Things Polaroid Shaker Frame;
A Jillian Vance Design Stitched Dot Rectangle Backdrop Set;
Spellbinders Layered Mix Match Sentiments (DOM-Sep21)
Other - foam tape

Since my polaroid die is new, I'll share my card at Darnell's August NBUS Challenge #65. I'll also head over to Seize the Birthday #289, again using the Cute Critters option.

Thanks for visiting & have a wonderful day!!


Sunday, August 11, 2024

Another Birthday Alpaca!

Hello & welcome! How's your weekend going? I'm resting up from the chorus retreat and watching the last day of the Olympics, plus Twins baseball. 

Thought I'd fit a card into my day for two challenges: Day of the Month Card Club #66 - Alpaca Day and Seize the Birthday #289 - Cute Critters. Here's my creation:


Supplies: Paper - Recollections A2 card; 
Neenah Solar White; Tim Holtz Jewel cardstock;
Doodlebug Sugar Shoppe; many scraps
Stamps - Taylored Expressions Simple Strips Birthday
Dies - Marianne Design Eline's Alpaca;
A Jillian Vance Design Stitched Dot Rectangle Backdrop Set;
Taylored Expressions Simple Strips
Other - Copic Markers C2, C00 for shading;
preprinted sentiment strip (brand unk); foam tape

I was lucky enough to get an alpaca die set from friend Gundi (papierelle) for my birthday last year - perfect for this challenge, plus it's the only alpaca item I own!! Thanks again Gundi!! You can see a previous card I made for Craft Roulette with this set HEREGundi is on the DT at DotMCC and friend Hilary (Fiddling About) is guesting this month. Thanks for the inspiration!!

I simply die cut and assembled the alpaca, shading a bit with Copics. Isn't he the cutest?? Added to a die cut rectangle & onto an A2 card with some Doodlebug papers. The two sentiment strips were in my bits box. I liked using the Spanish one since alpacas come from South America. I think my baby sister will get a kick out of this for her birthday. We both speak some Spanish & often use it in our conversations.

For a change I'm actually using the "Topping" at Seize the Birthday. I usually just take the Anything Goes option. Friend Darnell (djkardkreations) is a Surprise Party Guest and inspired me to play along. Plus I know a couple of the DT from my Merry Monday Challenge (no longer with us) days. Thanks for the inspiration!!

Nothing else for today - hope you enjoy your week! Thanks for visiting!!


Thursday, July 18, 2024

Gingerbread Stamps

Welcome! As promised I'm back with a card using the new Waffle Flower Postage Collage Gingerbread Stencil. The four piece set just arrived in Saturday's mail along with a bundle.

I've been having fun using these stencils! This will be my third and final card for the current Day of the Month Card Club Challenge #65 where they're celebrating postage stamps. 


Supplies: Paper - Neenah Solar White;
Paper Studio A2 card; scraps of brown & lime green
Dies - Waffle Flower Postage Collage &
Stencils - Waffle Flower Postage Collage Gingerbread
Other - Hero Arts inks

I stenciled the 4-step design onto Neenah using various Hero Arts inks, masking as necessary. Next I die cut the stenciled panel with the collage die.  Then I die cut the banner from a brown & a green scrap.; layered them for a shadow effect. Adhered everything to an A2 card base. Did a small bit of detailing with a black & a white gel pen - done! Another quick and easy one!

Good for me - I used new stuff quickly!! I'll add my card to Darnell's July NBUS Challenge since the gingerbread stencil set got first play today.

Thanks for stopping by & have a crafty day!


Wednesday, July 17, 2024

Snowman Stamps

Hey there, friends! I'm back with a second card for the current Day of the Month Card Club Challenge #65 where they're celebrating postage stamps. I'm also playing along with Darnell who's doing Embossing for her IDEAS plan (3rd week of the month). You can see her gorgeous inspiration cards HERE.


Supplies: Paper - Neenah Solar White;
Paper Studio A2 card; scrap of black
Stamps - Waffle Flower Postage Collage North Pole
Dies - Waffle Flower Postage Collage &
Stencils - Waffle Flower Postage Collage Snowman
Embossing Folder - Spellbinders Hexi Snowflake (EOM-Jul24)
Other - Hero Arts inks; foam tape

I stenciled the 2-step design onto Neenah using two shades of blue ink, plus black and orange for details. Next I die cut the stenciled panel with the collage die. I trimmed off two of the stamps and kept 4 in a block. Stamped a couple of snowflakes with the darker blue ink.

Die cut the banner from a black scrap. Embossed the A2 card with snowflakes., then ran the darker blue ink pad over the raised bits. Adhered the block of 4 stamps to the embossed card base, then added a fifth stamp popped up with foam. Adhered the sentiment - done! Again, I could have done some shading and detailing on the snowman but I went for quick and easy.

Another case of using new stuff quickly (just got new Waffleflower in the mail on Saturday & the Spellbinders on Monday), so I'm very proud of myself!! I'll add my card to Darnell's July NBUS Challenge since the snowman stencil set & the embossing folder got first play today.

Thanks for stopping by & have a wonderful day!! I'll probably be back tomorrow using the final new postage collage stencil in the WF bundle...


Tuesday, July 16, 2024

Poinsettia Collage

Hello & welcome! I'm popping in with a quick post for a couple of challenges. The current Color Hues Challenge #91 features Red & Green - perfect for Christmas cards which I desperately need. For the current Day of the Month Card Club #65, they're celebrating postage stamps. Here's my card:


Supplies: Paper - Neenah Solar White;
Paper Studio A2 card; scraps of red & black
Dies - Waffle Flower Postage Collage &
Stencils - Waffle Flower Postage Collage Poinsettia
Other - Hero Arts red and green inks;
Park Lane gems

I stenciled the 4-step design onto Neenah. My Fiesta Red ink reads pinkish in the photo but it is red! I applied it lightly for the contrast with the medium red (unk name - from an old MMH kit). I used Red Royal for the flower centers but then covered most of it up with gems! Greens were Key Lime, another no-name one from an MMH kit, and Green Hills. Next I die cut the stenciled panel with the collage die (b4 adding the gems!). Adhered to A2 card. Die cut the banner from red and black scraps and layered for a shadow effect. Added to the card - done! 

You often see the collage in landscape but I chose to orient it as a portrait so my sentiment banner would stretch across the card. I could have/should have added some detail to the poinsettias but for this quick and easy card, I kept it simple. Oops - also meant to stamp some of the cancellation marks from the new WF Postage Collage North Pole Stamp Set - oh well.... 

I had placed a pre-order with Waffle Flower and just got the new Christmas bundle in the mail on Saturday - proud to use new stuff so quickly!! I'll add my card to Darnell's July NBUS Challenge since the poinsettia stencil set & banner die got first play today.

Thanks for stopping by & happy crafting!!


Tuesday, June 18, 2024

A Shell Shaker!

Hello & welcome! I'm part of a reminder post today as Guest Designer for Day of the Month Card Club Challenge #64 this month!! We have the theme of seashells and I had fun making a shell shaker card!


Supplies: Paper - Paper Studio A2 card; acetate;
Poptone kraft; scraps of green & white
Stamps - Hero Arts Cuckoo (c2010 retired)
Dies - Hero Arts Beach Frame
Other - Copic Markers; foam tape; Tea Dye Distress Oxide ink;


I die cut the beach frame into an A2 kraft piece & backed with acetate. Inked the edges with Tea Dye DOI. Added 4 layers of 3M foam tape around the back's perimeter. Added some seashell mix (found at Hobby Lobby), selecting ones that were thin enough to shake in foam depth. Added a watercolor printed A2 card to form the shaker.  Die cut the top of the frame from green, trimmed off the palm leaves and glued atop the kraft ones. Die cut the lower part of the frame from white and trimmed off the shells and grass; colored with Copics and glued atop the kraft ones. Stamped a rectangle with a sentiment; adhered to card with foam tape. Done!

I hope you'll visit DotMCC for loads of inspiration with shells, then play along with us!! Thanks again to Gundi, Rosi, Izzy & Elfi for having me as Guest Designer this month!!

I'll add my card to Darnell's June NBUS Challenge #63 since the beach frame is newly used - only 6 years since released - ha, ha. That's too long on Mt NBUS!!

Thanks for visiting & happy crafting!!