Welcome to my blog!

Thanks for visiting my blog. As the title suggests, I love to scrapbook, stamp, and sing! I will share cards and scrapbook pages I create, as well as information about my music - Barbershop harmony.

Tuesday, December 13, 2016

Winter fun

Well, we have plenty of snow after a winter storm this weekend. So it's fitting that Lori's challenge on Merry Monday is to showcase winter fun on your Christmas card.

Photo credit

I couldn't wait to use a darling ice skating penguin for my card. I've mentioned in the past that my dad used to flood the backyard when we were small so we could ice skate. Of course we outgrew that rink after a few years and ended up at the city park's rink. It had an old wooden shack for a warming house and we always had the best time. Here's my card:

Cool Yule
Supplies: Paper - Neenah Solar White, BoBunny Altitude, DCWV foil
Stamps - Whimsy Stamps Penguin Fun
Inks - Tim Holtz Distress Inks (Salty Ocean, Black Soot, Festive Berries)
Embossing folder - Darice Snowflakes and Flourishes
Dies - Whimsy Stamps Penguin Fun, My Favorite Things Blueprints 13, 20 & 21 and Oval Shadows

Well, all my Christmas cards are mailed except one to Aunt Dorothy who moved. I still haven't managed to track down her address so will wait until I get something from her with a return address. How's everyone else doing on their cards?

Thanks for stopping by and hope you're having a crafty week!

Tuesday, December 6, 2016

Candy canes!

I love a good candy cane around the holidays but even better - Lindt peppermint flavored chocolate truffles - yum!! I went to the Mall of America on Sunday and bought a big bag of their Lindor balls. This week Merry Monday brings a challenge from Linda to include a candy cane on your Christmas card - I started right away Monday morning on my card but got a bit sidetracked and didn't finish until today - more on that later...

Photo Credit

Last year Kristie, a former Merry Monday Design Team member, enabled me to buy some Whimsy Stamps. One of the cling images I ordered was this darling penguin quartet - yay, the sign they're holding is lettered with candy canes - perfect! Here's my card:

Candy Cane Joy
Supplies: Paper - Neenah Solar White, American Crafts Christmas from Target Hot Spot
Stamp - Whimsy Stamp's Penguin Joy; Die - My Favorite Things Blueprints 20 (stitched rectangle)
Other - Copic Markers, Hickory Smoke Distress Marker, foam tape; Ink - Ranger Archival "Watering Can"

Below is a card I made while being sidetracked from Merry Monday. I was looking through my overwhelming stash of stuff for something for my sister. Instead I found a little decorated Christmas box containing a bunch of dies and an old Sizzix metal emboss & cut folder. I didn't remember owning this item and don't think I had ever used until now! No surprise... I included the folder in the photo - it's black metal on the outside and silver on the inside - such a fun item and I'm sure they don't make them anymore! Do any of you have one? I couldn't resist making a card with it. After embossing, I ran an ink cube over the raised paper - black on the deer and silver on the frame. A bunch of us from chorus were heading to sing at a couple senior living centers; one is where a long-time member Jean lives. So I took this card to give to her. She arranged a holiday song we sing "Straw Carol". We had a great time singing and Jean loved hearing her arrangement!

Embossed deer

I'm doing well on my goal of writing out 5 Christmas cards per day for mailing. Will be done soon - yay - but like Bonnie points out, there's nothing wrong with getting some cards made for next year! Thanks for stopping by and have a crafty week!!

Wednesday, November 30, 2016

Some Christmas trees & my helper

OK - I've had some requests to post some holiday decoration photos so here they are. I don't decorate the outdoors at all but I usually put a tree in front of the living room window and a trio of lighted candles in the family room window. These can be seen from the street by passersby.

I bought this slim pre-lit artificial tree a couple years ago - a perfect fit in the corner by the family room staircase. This year I decided to give it the spot in front of the living room window - looks great in the center panel of a three panel window.


One of Mom's friends made the tree skirt. My brother gave me the topper - a crystal angel that he didn't need anymore. Most of the ornaments are by Hallmark but I also have a few on there from other companies. One - Newbridge Silver in Ireland - Heather sent me a couple (thanks again!!) and I bought one when I visited her in 2014. Another - Chico's (the clothing store) who has offered several beautiful metal and bead ornaments over the years. I love to open all the boxes and appreciate all the details of each ornament. Quite a few play music including "Feliz Navidad", "Santa Baby", "I've Been Everywhere", and my favorite - "I Want a Hippopotamus for Christmas". Every day I go around the tree pressing the buttons and singing along as the ornaments play. My brother's cat Misty was visiting me and "helping" with the decorating (she didn't bother the tree or play with the ornaments, thankfully). Here she is supervising from one of my packing crates:


One last "tree" - this one sits on the kitchen table. It has a cookie cutter for a topper, reminiscent of the antique star cutter I use for my almond shortbread cookies. The tree and the ornaments are all by Hallmark.


I have other decorations put around but didn't photograph them. There's plenty more I haven't put out but I wanted to get some decorating done because my brother and sister-in-law came to get Misty (boo-hoo) last night and I fixed them dinner. Donna makes lefse so she brought a large bundle of them. Brother wanted lutefisk so I picked some up at the grocery - very easy in Minnesota this time of year - LOL. Despite being of Norwegian descent, Donna doesn't touch lutefisk - that's why she wanted me to make it for my brother. She ended up with some rotisserie chicken; that way I didn't have to make Swedish meatballs (what we usual serve the non-lutefisk eaters). They will be with her family for the holidays this year so I enjoyed fixing a holiday dinner for them now.

No cards to share today - I've been working on getting my Christmas cards ready to mail. When I made my Merry Monday cards throughout the year, I didn't do the insides. I'm mass producing the insides with the help of the MISTI. I already have the cards in piles of horizontal vs vertical orientation and by theme. Hope this is a good plan - it worked great for the first batch! Wish me luck and thanks for stopping!!

Monday, November 28, 2016

Masculine Christmas Card

Yes - it's Monday and I'm managing another blog post. Seems that's all I can do at this time of year is get a Merry Monday post done - oh well.... This week, Kathy has challenged us to make a masculine Christmas card. Check out all the great cards by the Design Team here.


Well, masculine cards are not my strength but I recently got the Spellbinders die set with the stag head, inspired by some of the stag cards I've spotted, including this one by the amazing Rosemary. Quite a few of the DT included a deer or stag so I think I'm good to go! Here's my card:

Masculine holidays
Supplies: Paper - Hero Arts Grass Layering paper, Neenah,
American Crafts (Target dollar bin - plaid, woodgrain, foil), Authentique
Dies - My Favorite Things Blueprints 20Spellbinders S2-221 Aristocrat Etched Die
Hero Arts DI198 Rectangle Infinity Dies and DC117 Fancy Holidays Stamp & Cut
Stamp - SSS/Hero Arts Stamptember "Happy Thanksgiving" (Happy)
Ink - Pine Needles Distress Ink; Other - foam tape, Copic, enamel dot

I really liked the effect of the embossing on the stag head and the label (hard to see on the white) - gave some nice dimension. The enamel dot was too light so I darkened it up with a Copic marker - worked great! Anyway, that's my attempt at masculine and it's going to a friend I like to call my neffie-poo. He's the son of a guy who's like a brother-in-law to me. Now it's back to decorating my Christmas tree - well, the first one (I have several). This one is a slender pre-lit artificial one that usually goes in the corner of the family room. I decided it deserved a turn in the living room :) Just needs some smaller ornaments towards the top and I'll be done!! It's really starting to look like the holidays indoors - outside it's raining and unseasonably warm, ugh.

Hope you're having a crafty week! Thanks for stopping!!

Monday, November 21, 2016

Merry light/dark blues with pink!

Hi all - back with this week's Merry Monday color challenge from Debbie to use light and dark blues with pink. What a pretty combo!
I was inspired by Kathy's ornament card to go off and find a Spellbinders set I haven't used much. I thought it would be so fun to do an ornament in a bright pink with the blues behind it. Here's my card:

Happy holidays ornament
Supplies: Paper - Hero Arts powder folded card, Authentique for the blues, Doodlebug for background pink, 
Reflections for solid pink, Heidi Swapp for hot pink glitter paper
Dies - Spellbinders Heirloom Reflections (ornament), Blueprints 13 (stitched rectangle) and 18 (diagonal panels - cut to fit)
Inks - Hero Arts Navy and Cornflower; Other - navy ribbon (looks sort of black in photo but it matches the bottom paper in real life) recycled from a My Monthly Hero package wrapping, foam tape

If you look closely at the stitched rectangle, you will see the heart paper which I put upside down so it wasn't so it wasn't so obvious. It was the best of matches for my other papers so I went with it! Now I'm off to make a birthday card for a friend and to practice my clarinet! Last week's rehearsal of the Jingle Bell Band went great and we have another one coming up. Our three songs are "Angels We Have Heard on High", "Jolly Old Saint Nicholas" and "Deck the Halls". For practice purposes I also bought a Christmas carol book at my local music store. It came with a CD of accompaniments to the clarinet solos. I plan to record myself with the accompaniment and share it with my parents in Arizona - they will get a kick out of it after making me take lessons for 9 years growing up!!

Be sure to check out the great cards by the Merry Makers this week - awesome inspiration!! Won't be long and we'll need to start mailing out all the holiday cards we've been making - can't wait!! I put 10 cards in my former workplace's charity auction last week - they went for $180 dollars (packaged in a holiday book box from Michael's)! Anyway, thanks for stopping and have a great week!!

Monday, November 14, 2016

Time for Grey/White/Red

(photo source)

Hi all - Deanne challenges us on Merry Monday to use the colors grey, white and red on a Christmas card. She said this color combo reminds her of a warm and cozy sweater - the inspiration photo has plenty of knitted goodness too! This brought me to two new paper pads - one from Authentique and one from American Crafts (in Target's Hot Spot bins). Both had patterns that reminded me of a sweater, plus met the grey/white/red color scheme. Here's my card:

Winter Wishes
Supplies: Paper - Neenah Solar White, Authentique Wintery (grey/white sweater), American Crafts (reindeer & glitter)
Stamps - Hero Arts DC193 Kelly's S'mitten Stamp & Cut (cap), CM120 Winter Time Fun (skates & sentiment)
Dies - My Favorite Things DieNamics Blueprints 20 (rectangle); Spellbinders Ovals, Hero Arts dies to match the stamps
Ink - Ranger Archival Watering Can (Wendy Vecchi)
Other - foam tape, Copic Markers

This is just a quick card since I have a busy week ahead. For my chorus Christmas party, we created a "Jingle Bell Band". A bunch of us who played musical instruments in our youth will dust off our clarinets, flutes, etc and play a few Christmas songs for the rest of the chorus. Out of our 113 or so members, the band runs around 20 participants. We have our first rehearsal tonight - can't wait! Plenty of time to practice until the December party.... Oh - I'm playing the clarinet :) Thanks for stopping! 

Saturday, November 12, 2016

Scramble with a Tree

Hi everyone - I'm the hostess for a Scramble on the Hero Arts Flickr group (24 hr addition ends 11/13/16 at 8 a.m. PST). My theme: create a Holiday card with a tree on it. I thought it would be nice for participants to have a theme meeting the current Hero Arts Holiday Cardmaking Challenge. Feel free to join in, if you're interested!

Here are my two sample cards:

Merry Christmas shaker
Supplies: Paper - Hero Arts Sea Mix Layering Paper & acetate, Neenah Solar White, 
Paper Studio Glitter, BoBunny Tis the Season(green patterned for tree)
Stamps - Hero Arts CG697 Blizzard Bold Prints, CL997 Color Layering Snowy Tree
October My Monthly Hero (Santa in sleigh with reindeer - set sold out)
Inks - Tim Holtz Distress Tumbled Glass, Salty Ocean, Stormy Sky, & Picket Fence; 
Ranger Archival Watering Can (Wendy Vecchi)
Other - foam tape, Darice and Target sequins
(Note - the sequins were too cupped and wouldn't shake very well so I took them out later!)

Layered Tree
Supplies: Paper - Hero Arts Foliage Layering Paper, BoBunny Tis the Season 6x6; American Crafts glitter
Other - Foam Tape, Doodlebug star gem

Thanks for stopping by and I hope you're making progress on your holiday cards!! I think I have enough and was even able to donate 10 cards to the charity auction at my former workplace.


Monday, November 7, 2016

Outdoor Winter Fun


Hi everyone and a Merry Monday to you!! This week at Merry Monday, Colleen challenges us to create a Christmas card with a winter activity on it. I knew right away that I'd pull out the darling Whimsy stamp with a polar bear and three penguin friends on a toboggan. I first learned of Whimsy Stamps via a former Merry Monday Design Team member Kristie. She made an adorable penguin card for one of the challenges last year and I couldn't resist ordering the set she used, plus a few other winter stamps.

My siblings & I spent many happy winter hours tobogganing on the steep rolling hills around my cousins' house. And I've heard my Dad's story many times of him & his cousins taking a toboggan down the nearby hills. They headed towards a tree and all but one rider bailed. The crashed rider (broken arm) and toboggan meant no more fun for them that day! I decided to make a slider card but since I didn't have a channel die, I just used a hillside die cut twice. Here are three views to show the toboggan sliding downhill:

penguin bear sled at top

penguin bear sled mid way

penguin bear sled at bottom
Supplies: Stamps - Whimsy Stamps Snow Fun & Hero Arts CL983 Holiday Messages and Tags
Dies - Hero Arts DI318 Holiday Tags Frame Cuts & Lawn Fawn Stitched Hillside Borders; snowflake by ?
Inks - Ranger Archival Watering Can (Wendy Vecchi); Tim Holtz Distress Ink Fired Brick
Paper - BoBunny  Tis the Season Collection (6x6), Neenah Solar White
Other - foam tape, Copic Markers, Hero Arts red metallic accents, Michaels gem,
3M plastic furniture disks (I sandwiched two together to make a button for the slider).

Thanks for stopping by and be sure to check out the inspiration at Merry Monday - the Design Team created some fabulous cards with this weeks theme! Only a few weeks until it'll be time to start mailing out our Christmas cards - I think I'm ready!!


Wednesday, November 2, 2016

Decorating a Door


Happy Wednesday everyone! Today I finally had a chance to photograph a card I started on Monday for Bonnie's Merry Monday challenge to "decorate your door". Last night when I got home (more on that later in this post), I spotted this beauty by the amazing Rosemary using some of the same supplies I worked with. I'm almost embarrassed to post my wreath when hers was so gorgeous.
Oh well..... here's my "door" with wreath:

Poinsettia wreath
Supplies: Dies - Hero Arts DI327 Branch Wreath Fancy Die, September 2016 My Monthly Hero kit (wreath and branches), DC195 Christmas Trimmings Stamp & Cut; My Favorite Things Die-namics Blueprints 13 (washi label)
Stamps - Hero Arts CL787 Holiday Petals & Leaves (flower), CL887 Color Layering Christmas Tree (sentiment)
Paper - Anchor Paper (tan); Target (woodgrain), Authentique, Hero Arts, Paper Studio glitter
Other - Foam Tape, Copic Markers, Stickles

After I read the challenge Monday morning, I started to create a stamped wreath that turned out wonky - I just had to scrap it! Then I decided to try the wreath die from the Hero Arts September My Monthly Hero kit, plus add-ons. Layering the dies, I ended up with a full wreath I liked. The stamp set from the stamped wreath was still on the counter so I used one of the flower images, masking it to make a layered flower. I finished it with some holly and a bow from another add-on set. Now, more on why I couldn't finish my card on Monday...

Last weekend we celebrated my baby sister's retirement from Mayo where she was an educator. She's moving to AZ so I helped her pack boxes. Then I came home Sunday night due to a Monday appointment and chorus where we had a Halloween party (I dressed as Judge Judy...). I took advantage of a free Monday morning to work on my Merry Monday card. On Tuesday I needed to go back and help Kari finish with her move activities. The movers had picked everything up on Monday so I helped clean and polish her old house. I'll definitely miss seeing her as often as I could when she lived in MN! Here's the card I made for her retirement:

Retirement cactus
Supplies: Stamps - Hero Arts CL838 Stamp Your Own Cactus; Impression Obsession MC185 Fore Retirement
Dies - Hero Arts DI112 3D Cactus Pair Frame Cuts, My Monthly Hero travel kit (can't remember which month - camera, sun, glasses); My Favorite Things Die-namics Blueprints 18 (diagonal panel)
Paper - folded card by unknown; Neenah Solar White, scraps of black and yellow, Pressed Petals Woven Paper
Ink - Tim Holtz Mowed Lawn & Gathered Twigs Distress Ink, Ranger Archival Watering Can (Wendy Vecchi)
Other - foam tape, Copics, google eyes

I thought it was appropriate to include a cactus and a sun for AZ, plus a camera since Kari enjoys photography. The sentiment is from a fun Impression Obsession Leigh Hannan golf set which says Best Wishes Fore Your Retirement. I simply did surgery on this clear stamp to cut out the "Fore" and then stamped a little "on" to finish it off for a non-golfer. I love the inside sentiment from that set too - "The joy of retirement is having nothing to do and all day to do it!" Kari loved the card and said it was "a keeper". Anyway, I wish her well in AZ and will now have another place to visit!!

Thanks for stopping by and I hope you're having a crafty week! Not many weeks left until Christmas cards need to go out so be sure to head over to Merry Monday for some inspiration!!

Tuesday, October 25, 2016

Chillin' Bird

Hi all - if you didn't get a chance to hop with the Hero Hostesses on Monday and Tuesday, there is still time to hop and post comments for the chance to win prizes from Hero Arts. Comments on the hop posts will be included in a random drawn for Hero prizes as explain on their blog: Day 1 and Day 2. I had a great time participating on Day 2 and seeing the designs of my hosti sistas on both days - what amazing projects!! As usual, my wish list increased!! And trust me, I already have plenty of new stuff to keep me busy.

Speaking of busy, I got going with another new Hero Arts winter clear set - Winter Time Fun. An add-on to the October My Monthly Hero MMH) kit, it stands alone as as a versatile set. My MMH came the Saturday before I left for Vegas and I went crazy playing with the snowglobe of the kit (see that card here). So it didn't matter that the Winter Time Fun dies ended up being a bit delayed. I found them in my mail when I got home from Vegas on Sunday - yay!


Enough talk - here's my card which I made using this week's Merry Monday challenge from Sue to include a bird on your Christmas card:

Chillin Bird

Supplies: Stamps - Hero Arts CM120 Winter Time Fun (trees, bird, sentiment, snow); CG697 Blizzard Bold Prints
Dies - Hero Arts DI133 Winter Time Fun Frame Cuts; Spellbinders Classic & Scalloped Ovals; 
My Favorite Things Die-Namics Blueprints 20 (stitched rectangle); Lawn Fawn Stitched Hillside Borders
Paper - Hero Arts Pine Layering Paper, unknown scrap of beige, Neenah Solar White, Anchor Paper robin blue, glitter ??
Ink - Ranger Embossing Ink, Ranger Archival Watering Can (Wendy Vecchi), Tim Holtz Distress Ink Antique Linen
Other - Copic Markers, Icy Stickles, foam tape, Hero Arts Sparkle Embossing Powder

I just love all the sweet birds and animals in the Winter Time Fun set and the coordinating dies make creating a card a breeze. I stamped and die cut a pile of trees and birds, then colored them with Copics. I decided on a trio of trees with a single cardinal, then decided to arrange them on an oval. I stamped the blue oval with the falling snow stamp multiple times using the mini-MISTI and Ranger Embossing Ink, then embossed with Sparkle powder. I added a white bottom made by die cutting a white oval and then cutting the lower part with a stitched hillside (can't see the stitching after I covered it with trees). I actually trimmed down the bird a bit so the border wasn't so wide. I added Stickles to the snow on the trees for more sparkle.

Thanks for stopping and have a crafty day!

Hero Hostess Alumni Blog Hop


Welcome to Day 2 of the Hero Hostess Alumni Blog Hop featuring fabulous stamps from the new Hero Arts 2016 release and winter catalog. If you've come from the oh-so-talented Lin Brandyberry's blog Sending Hugs, you're in the right place!!

PRIZES*PRIZES*PRIZES!! 
Hero Arts will be awarding a $25.00 Hero Arts shopping spree to the winner randomly 
chosen from all of the comments left on the blogs included on today's hop.   
A second bonus prize of Hero Arts product will go to one lucky winner 
who comments on today's Hero Arts post.  
Deadline for comments is Sunday, October 30, 2016 at 11:59 pm Pacific time.
See the Hero Arts Blog posts on 10/24 & 10/25/16 for complete prize details.

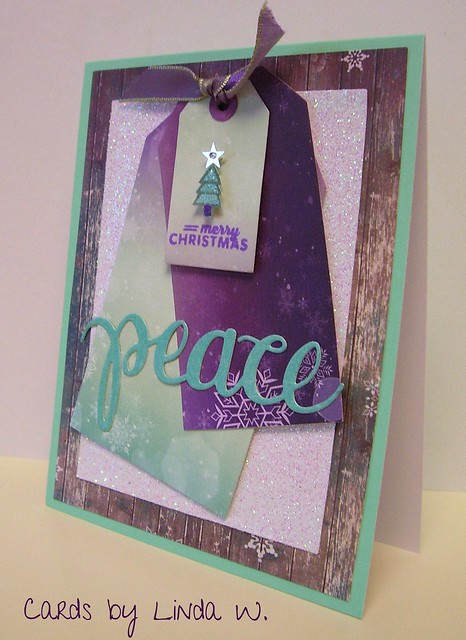
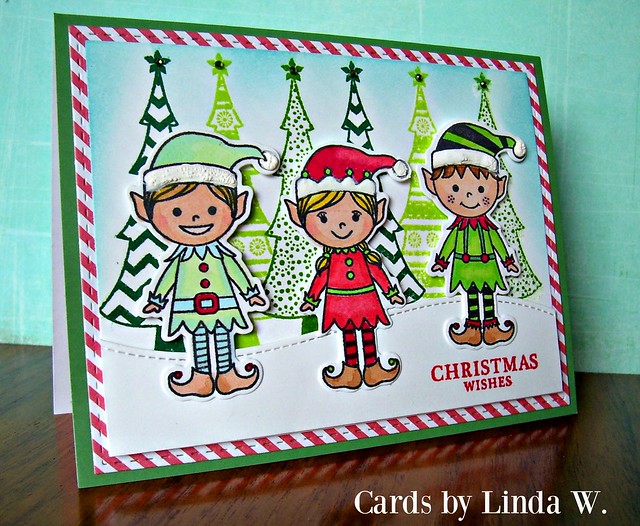
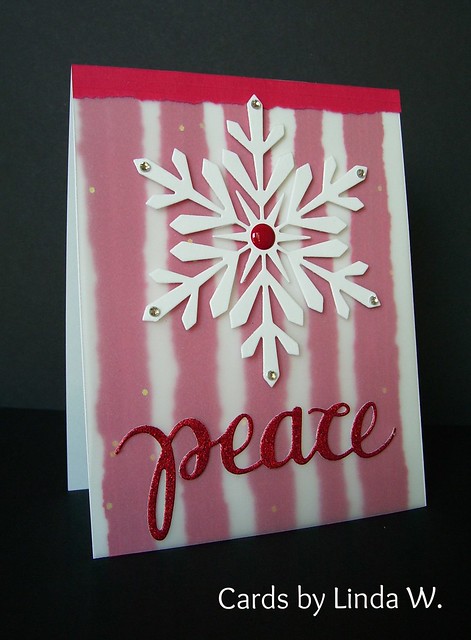
I was honored to be a Hero Hostess (facilitator on their 
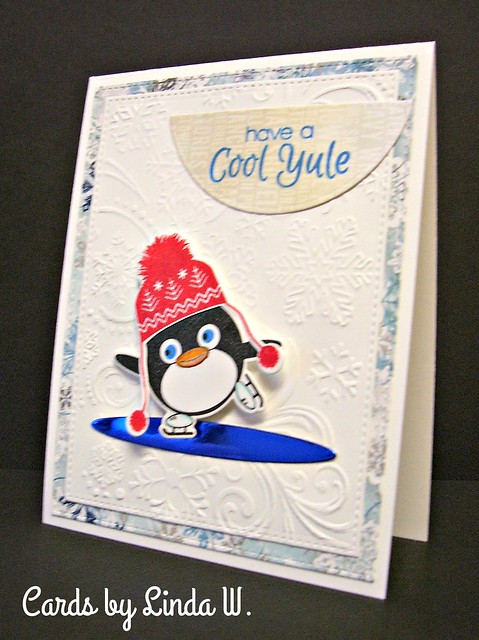
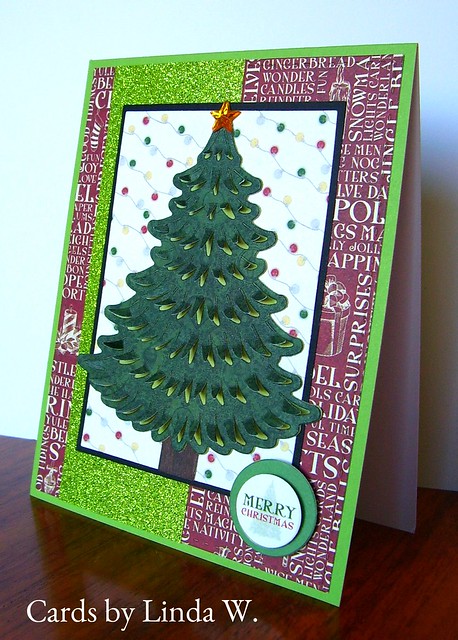
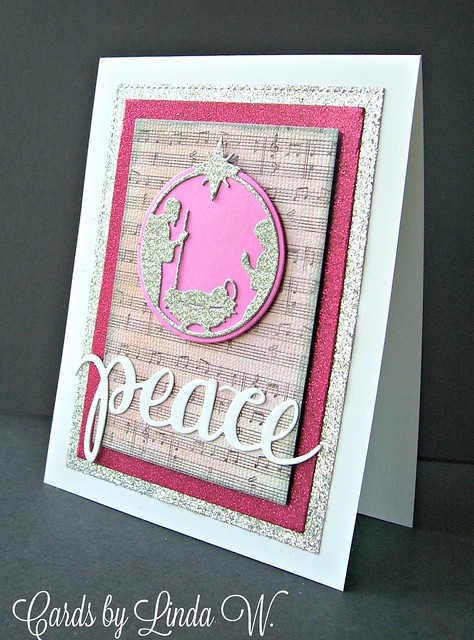
Flickr Group) back in 2011. Thanks to Hero Arts for including me in their Hostess family and on this fun hop!! I'm delighted to showcase some new goodies from their 2016 winter catalog. I found so many great products I couldn't resist. One such item - Kelly's Winter Planner; I just love the little winter icons in this set. I started with the bitty Christmas tree and Merry Christmas sentiment, adding them to the new Infinity tag dies (they are amazing!). The Infinity Rectangles dies made layering a breeze! And I just had to use a PEACE die cut (my new favorite word die). I must mention how much I love Hero Arts Layering Paper - I have every color but especially adore the Pool used here.

Peace
Paper - Hero Arts PS640 Pool Mixed Layering Paper, BoBunny Altitude 6x6 pad, American Crafts glitter
Ink - Tim Holtz Dusty Concord Distress Ink, Ranger Archival Watering Can by Wendy Vecchi

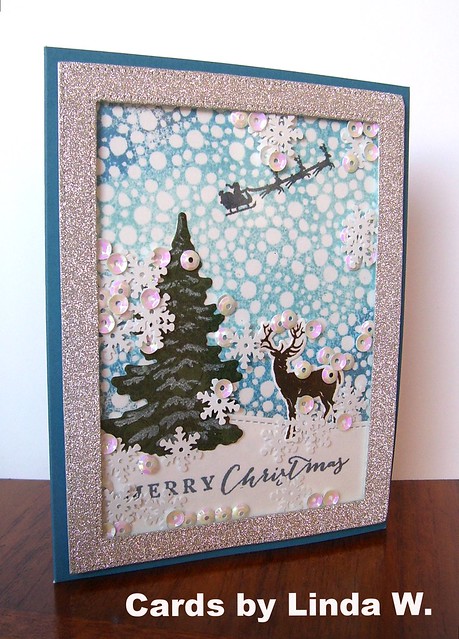
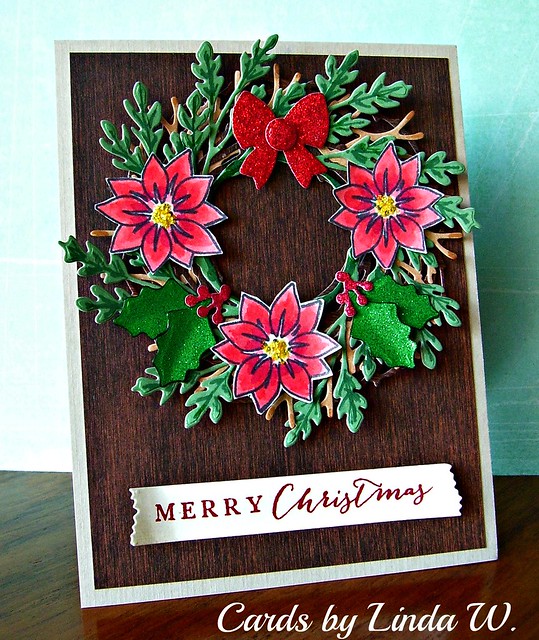
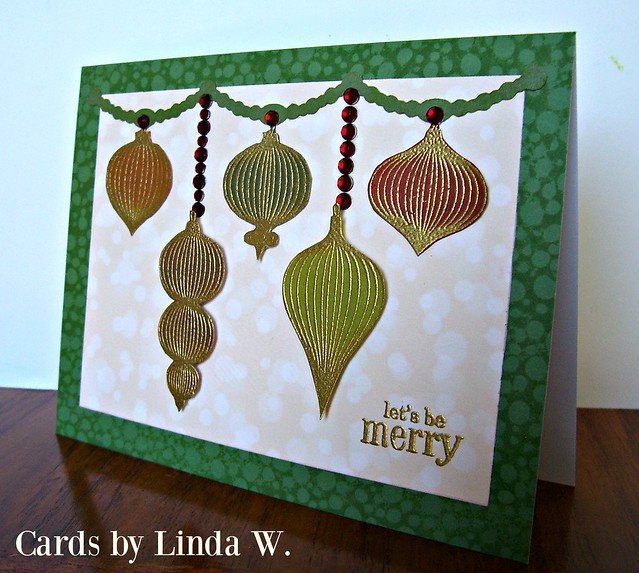
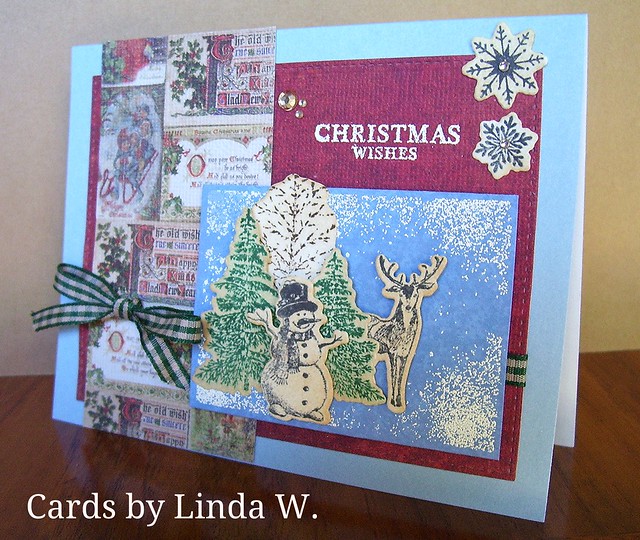
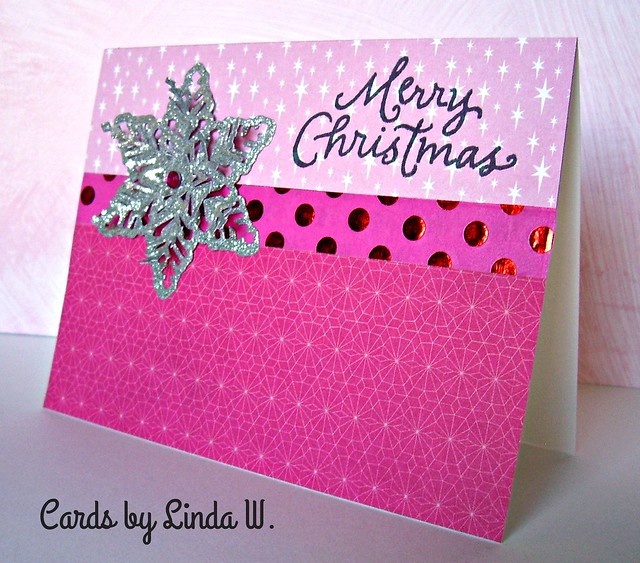
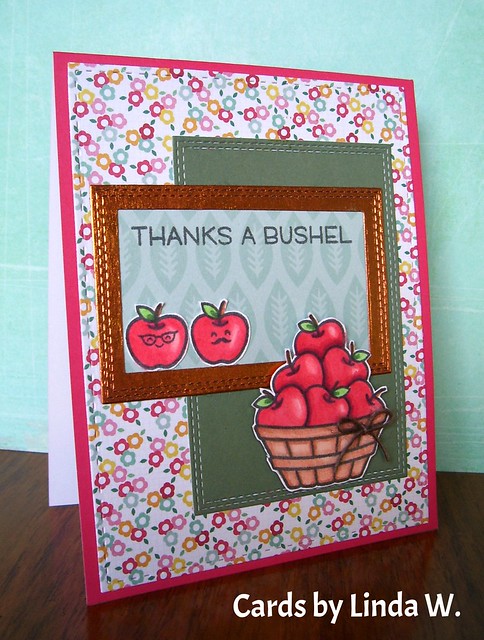
Next up - a card with 
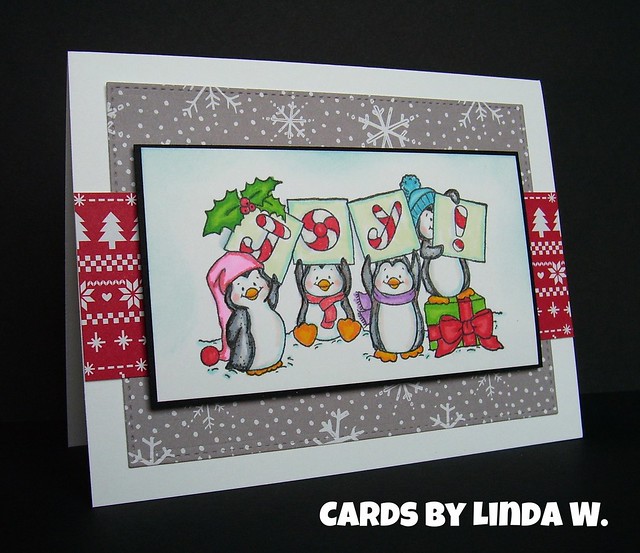
CG697 Blizzard Bold Prints - my new favorite background! I just love the 6x6 size and it's so perfect stamped on the card base behind the gold embossed ornaments from DC186 Ornaments Stamp & Cut (layered on a piece of bokeh paper). The Let's Be Merry sentiment came from CM100 Christmas Messages - I just love this set for its variety. More layering paper - I used Pine for this card base.

Merry ornaments

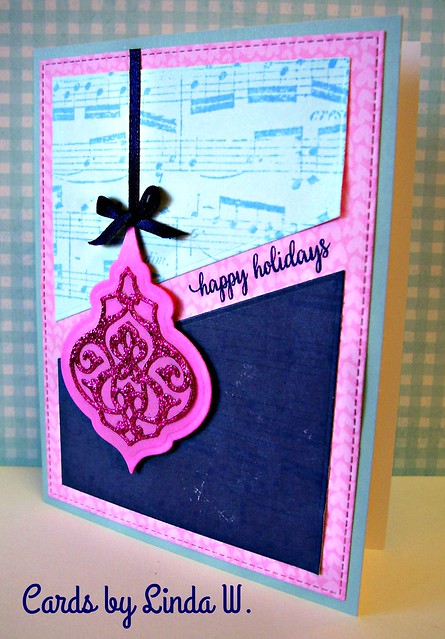
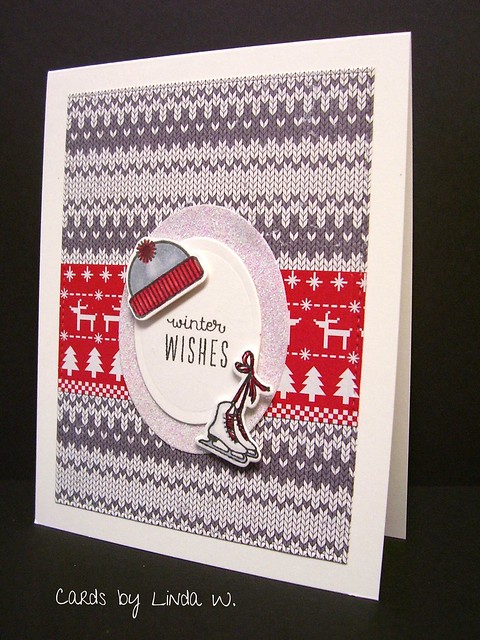
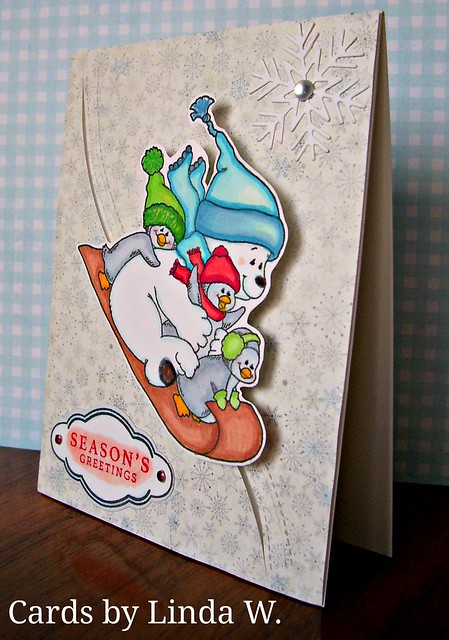
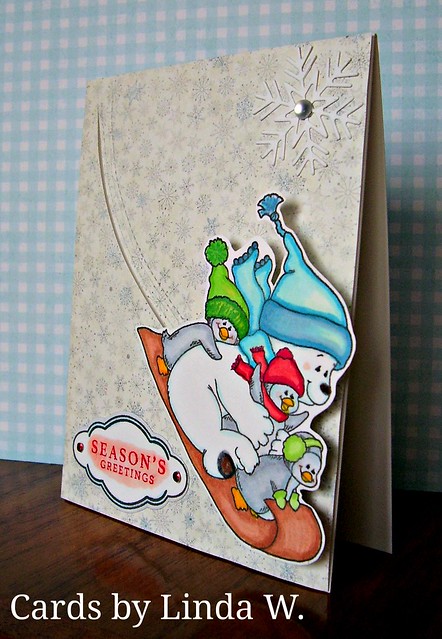
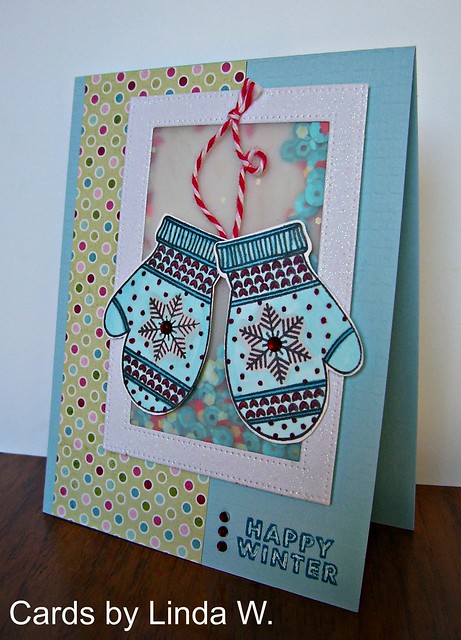
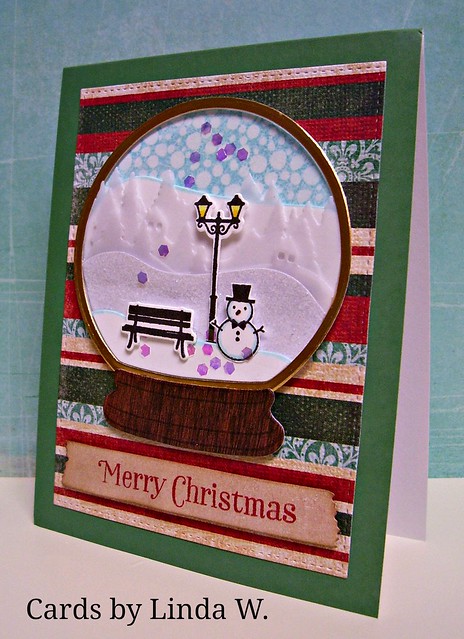
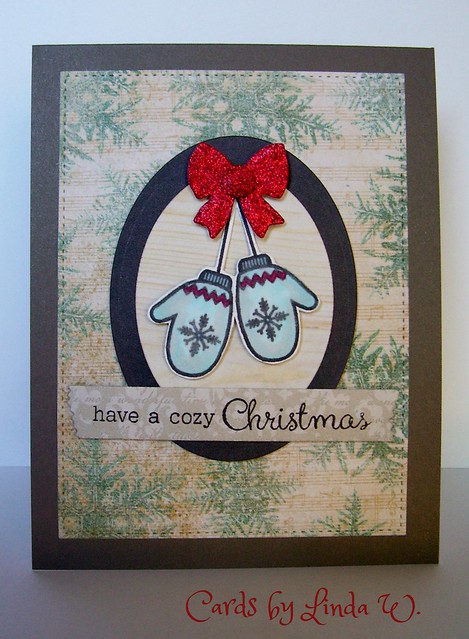
And finally, here's a shaker card using the darling mittens from CL999 Holiday Mittens. The sentiment comes from DC193 Kelly's S'mitten Stamp & Cut. The Rectangle Infinity dies helped immensely when creating my shaker!! The shaker elements are a mix of sequins and chunky glitter I bought at Michael's. The vellum covering the shaker window came from a Hero Arts monthly card kit; it's not available in their store.

Mittens shaker

Your next stop is the delightful Sally Sherfield's blog Created by Sally. And here's the list of all the stops on today's hop for maximum inspiration:

Linda Wetterlin - you are here!

You can find yesterday's Day 1 here. Remember to leave comments on the Hop posts by 11:59pm Pacific Time on October 30th 2016 for the chance to win Hero Arts prizes!!

Thanks for stopping and thanks for the kind comments! Thanks to Hero Arts for the goodies they sent and for the great customer service & inspiration they always provide! And special thanks to Virginia Lu who coordinated us this time and to all my hostess sisters for their friendship!!

Monday, October 24, 2016

Hero Hostess Alumni Blog Hop Day One

Hi all - many of the former Hero Hostesses will participate in a two day Blog Hop showcasing new products from Hero Arts!!


I'm delighted to be a part of this Hop tomorrow. Here is today's line-up of incredibly talented women:


Be sure to stop at today's Hero Arts Blog post for details on prizes they will offer as part of this Hop!! To celebrate today's hoppers, I created this card using the oh-so-fun Christmas Trimmings Stamp & Cut set DC195:

Merry Christmas with holly

I die cut one of Hero Arts Rectangle Infinity Dies DI198 and adhered this glitter panel to a Mocha folded card (from Hero Arts' Earth Mix PS572). Then I die cut elements from Christmas Trimmings and a Spellbinders Oval. All glitter paper was from the Paper Studio. Talk about crisp die cuts with this set - the Merry Christmas cuts so easily despite the delicacy of the script!!  I could've cut an oval out of the center of my rectangle but instead cut a oval from a separate scrap. I wanted the contrast of the darker oval, rather than a window to the mocha.

Thanks for stopping by and I hope to see you tomorrow too for my day on the Hop!

Sunday, October 23, 2016

City of Lakes Chorus 8th in the Sweet Adeline World

Hi all - just returned home from Las Vegas where Sweet Adelines from all over the world gathered for our International competition and convention. I sing with the City of Lakes Chorus and we came in 8th this time. While we had hoped to improve our finish from the 6th in 2014, we learned a lot in the last two years and were delighted to be in the top ten in a contest full of exceptional choruses. The best choruses in each Region, plus some high scoring "wild cards" compete at the International level. After a semi-finals round, only the top ten go on to the finals. If you'd care to see our performances, go here for semi-finals and here for finals. In the finals, I'm the "Blue Leader" who has a speaking part so look for me at the mic! My friends Val and Ellen were the "Red Leader" and "Misty Middleground (in a Red/Blue combo) respectively. I enjoyed acting with them.

Our director works so hard that I wanted to wish him well as we headed into the contest. Here's the card I made him:

Good luck leaf

Supplies: Paper - Target dollar bin 6x6 pads; Hero Arts kraft card
Dies - Impression Obsession Good Luck; Simon Says Stamp Bundle of Stitched Shapes (rectangle); 
Hero Arts Paper Layering Maple Leaf DI302
Other - copper twine from Target dollar bin (thanks Betty!); May Arts string twine

Just love this fun leaf which I cut directly into the copper/kraft two sided paper and then folded over the kraft side. I backed the opening with plaid paper from another one of the dollar bin pads.

The Rönninge Show Chorus won the chorus contest. They were so amazing - see their finals set here. There was also a quartet contest. Those who know me may remember I sang in a quartet, Chord Company, that competed at the International contest 9 different years. We retired in 2010. The winning quartet this year was Frenzy. See their finals round here.

I don't often blog about my singing stuff so thanks for stopping!

Saturday, October 15, 2016

Vintage Snowglobe

Happy Saturday everyone! I was excited to find the October 2016 My Monthly Hero kit (sold out) in my mailbox today! Oh my goodness - this kit is an amazing value and includes:
  • A 4″x6″ clear stamp set
  • Dies for creating a snowglobe, snowdrifts and other background elements
  • Seven coordinating Frame Cuts dies to match the stamp set
  • Three pigment ink cubes in White, Silver and Baby Blue
  • Eight White Cards and Envelopes
  • Polar White Flower Soft
  • Buttons Galore Shaker Mix
  • Acetate Sheets in 4″x4.5″ (7) and 4″x6″ (1) for creating shaker cards
  • Light Blue Gems
I made my snowglobe a faux shaker since I didn't have a lot of time to put foam tape around that narrow foil border! I didn't even bother to put acetate over the scene - just left it open to the elements :) Here's the card:

Vintage Snow Globe faux shaker
Supplies: October 2016 My Monthly Hero kit (globe and base dies, bench and lamp stamps & dies, hills and trees)
Stamps - Hero Arts CM100 Christmas Messages (sentiment), CL727 Lisa's Mix and Match Messages (snowman), & 
CG697 Blizzard Bold Prints
Paper - the Paper Studio Old World Winter, Hero Arts Pine Layering Paper and vellum, American Crafts glitter paper, Authentique Cozy 6x6 pad, Target 6x6 no-name paper (globe base), DCWV Foil Cardstock, Neenah Solar White cardstock
Dies - My Favorite Things Die-Namics Blueprints 20 (stitched rectangle) and Blueprints 13 (washi label), 
Hero Arts DI199 Circle Infinity Dies and DI329 Snowy Drifts Fancy Dies
Other: foam tape, Michaels' Reflections chunky glitter, Copic markers
Ink - Tim Holtz Tumbled Glass & Fired Brick Distress Inks, Ranger Archival Watering Can (Wendy Vecchi)

It took me a couple hours to put this one together - I spent a lot of time playing with all the snowglobe die cuts. I die cut all the hills and trees from the kit and the add-on dies with vellum but only used some of them. I also cut some with the Neenah and the glitter paper to mix in. I chose to add the little snowman from Lisa's mix and match set from 2012 because I thought he looked perfect beneath the lamp.

I'm entering this in the current Hero Arts challenge (Holiday) which runs through 11/15/16 and this week's Merry Monday challenge (Retro/Vintage) which ends tomorrow.
hc_landing_2  

Thanks for stopping by and I hope you're having a crafty weekend!!

Tuesday, October 11, 2016

Think Pink

October is Breast Cancer Awareness Month and I always take extra time this month to remember my maternal grandmother who died from breast cancer which had metastasized. This was over 30 years ago and medicine has come a long way in treatment options. I know this will help a friend who was recently diagnosed with breast cancer. I made this card for my friend; hopefully it will bring a smile.

Hope
Supplies: Paper - Neenah Solar White, American Crafts glitter paper; Ink - Hero Arts Neon Pink
Stamps - Hero Arts CL926 Spring Hello by Lia (flowers) and CG445 Big Words (heart), Amuse Studio Fight Like a Girl
Dies - My Favorite Things Blueprints 20 (stitched rectangle); Hero Arts DI198 Rectangle Infinity Dies

I did some second and third generation stamping with the flowers while making this background. The MISTI came in very handy when I was composing it. Thinking of my friend, who is also a card maker, and sending positive energy as she gets treatment.

Thanks for stopping by!

Monday, October 10, 2016

Vintage Christmas Wishes


Merry Monday everyone! This week on Merry Monday Lori challenges us to create a vintage/retro Christmas card. How fun and I have the perfect stamp set from Hero Arts 2016 Christmas release! Here's my vintage card:

Vintage Christmas Wishes
Supplies: Stamps/Dies - Hero Arts SB124 Vintage Wishes Stamp & Die Combo
Paper - Neenah Solar White, scrap of blue (unknown), Hero Arts Powder Blue Card, the Paper Studio Old World Winter (red and vintage images; Other - May Arts ribbon, foam tape, gems
Inks - Tim Holtz Distress Ink Antique Linen, Pine Needles, Walnut Stain; Ranger Archival Watering Can

I stamped the images on white paper, then distressed them with Antique Linen ink - much more vintage-y looking! I just love the array of vintage images on the patterned paper I found in the Old World Winter pad. Some odd lighting on my photo left the card base looking like a soft teal to blue ombre but it really is a powder blue color - darned camera!

Hope you're having a crafty day and thanks for stopping! Be sure to check out all the wonderful cards by Merry Monday's Design Team this week - so inspiring!!

Tuesday, October 4, 2016

Merry Elves


Hey everyone - Linda challenges us on Merry Monday this week to use an elf or elves on a Christmas card. Aren't those the cutest little elf cookies in the inspiration photo?! I'd have a hard time eating them!

Well, I have one elf stamp set - the fabulous Santa's Elves Stamp & Cut by Hero Arts. It was released last year but remains a fave. I decided to stamp and color all three elves in the set and add them to a winter scene with pines.

Here's my card:

Christmas Wishes elves
Supplies: Paper - Neenah Solar White cardstock, Penny Black Holiday Trimmings 6x6 pad (striped); 
Hero Arts PS622 Foliage layering paper (darkest shade - Pine)
Stamps - Hero Arts DC160 Santa's Elves Stamp & Cut, CM101 Christmas Wishes (sentiment)
DI038 Christmas Trees Stamp & Cut (2012 HA/Archiver's Exclusive retired)
Inks - Tim Holtz Distress Ink Tumbled Glass, Twisted Citron, Mowed Lawn, Pine Needles; 
Picket Fence Distress Paint; Ranger Archival Wendy Vecchi's Watering Can
Dies - Hero Arts DC160 Santa's Elves Stamp & Cut and DI198 Rectangles Infinity
Simon Says Stamp Bundle of Stitched Shapes (large rectangle); Lawn Fawn Stitched Hillside Borders
Other - gems, puffy paint, Copic markers, foam tape

I started with a white rectangle panel and stamped a row of trees, masking along the way so they'd be connected. Then I sponged around them a bit with Distress Ink and popped a stitched hill,stamped with the sentiment, along the bottom. I layered this panel onto a stitched rectangle cut from diagonally striped paper - so yummy! After stamping and die cutting the elves, I colored them with Copics and put puffy paint on the hats. Does it bother anyone else that white puffy paint looks ivory and browns easily with heat? Really bugs me!! So, once puffed up, I painted it with Picket Fence Distress Paint to whiten it - much better!

Such a fun theme - thanks to Linda for the inspiration! Thanks for stopping and have a crafty week!

Saturday, October 1, 2016

Happy World Card-making Day!

Hi everyone - hope you're enjoying World Card-making Day as much as I am! I've been making cards since this morning using some new goodies from Hero Arts and My Favorite Things. First up - a Halloween card:

Happy Halloween
Paper - My Mind's Eye Mischievous 6x6 pad (from 2011 - I've been hording it), the Paper Studio glitter, 
Neenah black cardstock, orange is from Target's bargain bin
Other - craft google eyes and sequins

Thanks to Hero Arts for sending me this fabulous set, an add-on to September's My Monthly Hero (sold out). I went with the Christmas Trimmings add-on when I bought the kit and regretted not getting the Halloween set. Now I have it! Thanks again Hero Arts!! And if you don't have a set of stacking rectangle dies, Hero Arts' Infinity set is a great bargain - 16 dies from 4.25x5.5" down to .5x1.75" - LOVE!!

Next up, a friend card. In a couple weeks I'll be seeing a friend from California whom I haven't seen in a year. I made her this card:

100_6896

I used a new-to-me My Favorite Things Die-namics Blueprints set (#8), along with a set (#20) I've had for a while and love, plus another Hero Arts Rectangle Infinity die and a Simon Says Stamp stitched rectangle (the large one). The darling leaves are from the September My Monthly Hero kit from Hero Arts - I finally got a chance to make some cards with the pile of leaves I've been cutting! Some of the papers I used to die cut the leaves came from Target's bargain bins. Card stock (Orange and green) is by Hero Arts and the glittery washi is Scotch tape from 3M. I have quite a few colors of this glittery washi and just love it! Doodlebug manufactured the enamel dots.

Thanks for stopping by and Happy World Card-making Day!!

Tuesday, September 27, 2016

Another Pink/Silver card for Merry Monday

I couldn't resist doing another pink and silver card for this week's Merry Monday challenge. Over the weekend I bought a Penny Black Nativity die and decided to try it with silver backed in pink. A bit unusual but I had fun with it.

peace nativity
Supplies: Paper - Neenah Solar White, the Paper Studio glitter and Old World Winter (music)
Penny Black Manger 51-254, My Favorite Things Blueprints 20
Ink - Tim Holtz Distress Spun Sugar, Hickory Smoke (on the music paper); Other - 3M Foam Tape

Hope you're making progress on your Christmas cards - I'm nearly done with what I need for my list!
Have a great day!!

Monday, September 26, 2016

Pinks with grey or silver

Photo source

Kristie returns to Merry Monday this week for a Guest Challenge to use light and dark pinks with grey or silver. I just love the fun patterns in the inspiration photo and Kristie's card captured them perfectly!! I found some fun pink patterns of my own and went with a silver snowflake and grey stamped sentiment to finish the card.

Merry Christmas pink and silver
Supplies: Paper - Neenah Solar White (card base), Basic Grey Juniper Berry,  
Penny Black Holiday Trimmings, the Paper Studio glitter paper
Die - Hero Arts DI196 Paper Layering Snowflakes w/Frames; Stamp - Hero Arts CL469 Swirl Christmas (sentiment)
Ink - Ranger Archival Watering Can (Wendy Vecchi); Other - Washi Tape (Target brand), Darice gem

It was a bit gloomy when I took my photo so the top pattern (Penny Black) looks a bit purplish but it's a nice pale pink. I just love the deeper pink from Basic Grey and the washi I bought at Target. The foil dots in the washi tape look a bit red in the light but they look dark pink to me in real life. I die cut the paper layering snowflake (one of a set of three) along with its frame using glitter paper and popped up the layered elements for a 3d look.

Thanks to Kristie for the fun challenge and thanks to you for stopping by! I hope you have a crafty day!!

Monday, September 19, 2016

Keep Warm!

Photo source

Happy Monday everyone - I hope you're enjoying your day! I blew out a tire on the weekend so spent the morning getting a new one. Still had time to check out the latest Merry Monday challenge for this week - Kathy wants us to "Keep Warm" - fun!! I recently received two different mitten sets I ordered from Hero Arts and knew they'd be perfect for this challenge! I set to work right after I got home. Here's my card:

Cozy Mitten Christmas
Supplies: Paper - Hero Arts Latte, Paper Studio Old World Winter, Authentique Glistening, Theresa Collins Santa's List
Ink - Ranger Archival Watering Can (Wendy Vecchi); Other - Copic markers, 3M foam tape
Stamps - Hero Arts CL999 Holiday Mittens (sentiment) & DC193 Kelly's Mitten Stamp & Cut (pair of mittens)
Dies - My Favorite Things Blueprints 13 & 20, Spellbinders Classic Ovals, Hero Arts DC195 Christmas Trimmings (bow)

I stamped and die cut the mittens but was a bit off in my cut so trimmed them out, then colored with Copics. I had a bunch of colors of bows die cut for other possible cards but, of course, hadn't yet cut the red I wanted. Quickly did that along with the ovals, a stitched rectangle and a washi sentiment label. The card came together easily. Another Christmas card done - yay!

Thanks for stopping by and have a crafty week!!

Monday, September 12, 2016

Inspiration Photo Challenge at Merry Monday


Photo Source


Hi all - it's a gorgeous day in Minnesota and time to check for another Merry Monday challenge. This week, Debbie challenges us with a beautiful inspiration photo. If you go to the photo source link, you can find oodles of other decorating ideas for Christmas. I usually don't go this fancy for my holiday dining but I certainly enjoy how gorgeous this dining room looks!! I just love all the red and white but can you imagine trying to keep those chairs clean?!

Great colors for a card though - here's what I created:


Peace snowflake
Supplies: Paper - Neenah Solar White card stock and red vellum, Hero Arts glittered vellum, DCWV glitter
Other - Michael's Reflection gems, Doodlebug enamel dot; Darice striped embossing folder, foam tape

I started out embossing a piece of red vellum with a striped folder. The vellum came in a package of several colors which I bought at Walmart. The vellum tore along some of the embossed stripes so I decided to go with it and tore it into more strips. I used them to make a background on my card. To soften it and make my sentiment pop, I added the glitter speckled vellum. To hide the glue at the top, I added another bit of the torn vellum - looks a bit pinky in the photo but it's a true red. After die cutting the snowflake I popped it with foam tape and added the embellishments. I started with a Merry I had previously die cut in the red glitter paper but it was too delicate, ripping as I tried to adhere it. I then used Peel 'N Stick on a white card behind the red glitter paper and die cut the Peace. The die was out from a previous project so I went with it, rather than looking for my Merry die. 

Hopefully this doesn't look too much like a circus tent - LOL! Thanks for stopping and have a crafty day!!

Tuesday, September 6, 2016

Harvest thank you

Hi all - over the Labor Day weekend I had dinner with friends - yummy hamburgers on the grill with all the fixings! I had a thank you card ready but I decided make a different one. I just got a new Lawn Fawn clear set last week and it called to me! Here's my card:

Thanks a bushel
Supplies: Paper - Hero Arts punch layering paper, Pink Paisley "Hello Sunshine" paper, Target's $ bin paper; 
Stamps - Lawn Fawn Thanks a Bushel; Other - Copic Markers, May Arts string twine; foam tape
Dies - My Favorite Things Die-namics Double Stitched Rectangles; Simon Says Stamp Bundle of Stitched Shapes 
Ink - Ranger Archival - Watering Can (Wendy Vecchi)

How cute is that basket of apples?! I couldn't resist it when I spotted the new Lawn Fawn release. And the set comes with a bunch of little faces, including two that reminded me of my friends. The coppery paper for the sentiment frame came from the Target bin (kraft and foil papers), as did the leafy paper and green behind the basket. These 6x6 paper pads were $3 and have no listed manufacturer but they're very nice! I bought 3 different pads the other day and will use them often this fall.

Thanks for stopping and I hope you're having a crafty week!!