Welcome to my blog!

Thanks for visiting my blog. As the title suggests, I love to scrapbook, stamp, and sing! I will share cards and scrapbook pages I create, as well as information about my music - Barbershop harmony.
Showing posts with label Silhouette. Show all posts

Wednesday, August 12, 2020

Partridge in a Pear Tree - Take Two!

 Hey there! I'm playing along again at CAS Christmas Challenge where the current theme is Twelve Days of Christmas. I thought yesterday's card was maybe a bit too busy for the challenge so I decided to do a simpler version. I left off the large sentiment and instead stamped a small Christmas sentiment. Also left off the offset mat for the tree and put everything right on the card. I added a pot for my tree, having seen some of the stamped partridge & pear trees in little teapots and boxes. Here's my update:

Supplies: Paper - Neenah Classic Crest Solar White 110 lb;
BoBunny Yuletide Carol 6x6; Paper Studio Glitter
Stamps - Hero Arts CL803 Family & Friends (sentiment) &
S5100 Woodgrain Pattern (on tree trunk) - both retired
Silhouette Designs - ID280002 Partridge in a Pear Tree Ornament (Carina Gardiner)
ID77044 Garden Tool Set (Megan Hardy)
Other - Copic Markers, white gel pen, foam tape, black gem

For this one I cut two sets of everything thinking I'd make two cards. Well, one trunk didn't cut correctly so I decided to use both sets of leaves on one tree, especially since I wasn't using an offset mat behind the tree. As usual, I cut everything in white and colored to suit. Hope you enjoyed this version of my partridge in a pear tree!

Thanks for stopping and have a crafty day!

Tuesday, August 11, 2020

Twelve Days of Christmas!

Don't worry - I'm not posting twelve cards, although it sounds rather fun!! No, it's the current CAS Christmas Challenge theme - 12 Days of Christmas! You basically can use any element to tie into the song. Here's my card:

Supplies: Paper - Hero Arts pool (retired) formed to A7;
Neenah Classic Crest Solar White 110lb; Ms Sparkle & Co Woodgrain Neutral
Silhouette Designs - Design ID 280002 Partridge in a Pear Tree Ornament (Carina Gardinar) 
& Design ID 166786 12 Days of Christmas List (Kolette Hall)
Stamps - Hero Arts CL354 Let the Angels Sing (retired) - musical notes
S5100 Woodgrain Pattern (on tree trunk)
Other - Copic Markers; foam tape; black gem; white gel pen; gold washi

When the challenge was announced on the 3rd I was visiting my sister in Arizona. There was nothing in the crafty stash there to fit the challenge, nor did we find anything at her local stamping store. I found some Silhouette designs online, though, which I promptly downloaded. Didn't have my Silhouette with me so had to wait til I returned home to arrange & cut the files. On Monday I connected my Silhouette and nothing happened, it wouldn't go to Ready status. Arrgghh!! Troubleshot it and success!!

As usual, I cut everything in white cardstock and colored to suit. That took some time, plus I had chorus rehearsal on Zoom last night. Finally finished early this morning. Hope it's CAS enough - my "white space" has the wood planking but I couldn't resist it!! I used some pear and partridge images online for my coloring inspiration - not perfectly realistic but I thought I did ok. Not sure where the gold washi came from but I added it to ground the tree after I took a photo without it. Do you ever do that - photograph then decide it "needs something"??

Thanks for stopping and thanks to the CAS Christmas team for inspiration and a fun challenge!! You have until the 24th to play along so check it out! Limit of three entries so I guess I couldn't get all twelve days in anyway...

Thursday, July 4, 2019

Snowflakes for CAS Christmas

Happy 4th of July if you're celebrating! So happy to enjoy the freedoms we have in the great US of A!!

I had to laugh - just made a couple snowflake cards the other day and lo and behold - the July Challenge at CAS Christmas is Snowflake! Luckily my stash has a huge bunch of snowflake stuff so I quickly whipped up three cards last night and today.


My first card uses a snowflake flourish I cut on the Silhouette and had in my UFO box along with a pile of other snowflakes. I layered a couple more snowflakes onto the biggest one, added some gems and a diecut sentiment, called it a day! Very quick and easy.

Supplies: Paper - Neenah Classic Crest Solar White; Poptone Black Licorice
DCWV Ms Sparkle shimmer blue A2 card
Silhouette file - Design ID 23582 Flourish snowflake by Lori Whitlock
Dies - center snowflake from Lawn Fawn Stitched Snowflakes (next layer unknown)
Joy is from Sizzix Angel stamp & cut (retired)
Other - gems from Michaels

Next I used a Hero Arts snowflake ornament die. Had to have this one last year and never made a card with it until now! Typical.... Managed to use a couple more UFO box items - the glittery bow and Merry. The rest I cut specifically for this project.

Supplies: Paper - Neenah Classic Crest Solar White; Paper Studio glitter
DCWV Ms Sparkle shimmer green A2 card; Momenta Watercolor
Merry & bow from Hero Arts Christmas Trimmings Stamp & Cut

Other - Michaels gems

I was going through my stash trying to reorganize some stuff and sorting through some goodies my friend Jean sent me. Spotted a fun Penny Black set with snowflake ornaments - just had to use them for a third card. I stamped the Christmas with the dangling snowflakes and added a diecut merry. Super quick and easy!


Supplies: Paper - DCWV Ms Sparkle shimmer blue A2 card; Paper studio glitter
scrap of blue; Momenta Watercolor
Dies - My Favorite Things Blueprints (retired); Hero Arts Christmas Trimmings Stamp & Cut
Stamps - Penny Black Most Wonderful
Other - Michaels gems; Hero Arts Navy ink

Thanks for stopping and making it to the end of this post! I'm watching A Capitol 4th on public TV and then I'll switch over to watch Macy's fireworks show on NBC. Our local fireworks are good but I'd rather watch them without bugs!!

Sunday, June 16, 2019

Happy Father's Day

Hi all - I'm here with a Father's Day card I made my sweet dad. We'll be celebrating later today, probably by cooking something on the grill and playing Phase 10, a card game we love. Here's my card to Dad:

Supplies: Paper - DCWV Ms Sparkle Shimmer Blue A2 card;
Neenah Classic Crest Solar White; Poptone Black; Hero Arts blue; 
Basic Grey Bowties plaid; yellow scrap from an Authentique pad
Stamps - Hero Arts Dad's Day (retired)
Silhouette Design 61555 Happy Father's Day Phrase by Kolette Hall
Die - MFT Blueprints rectangle (retired)

I used a 2009 stamp set for the tools; it's long retired but I still love it! I stamped the tools and colored with Copics, adding glossy accents to the metal parts. I cut the sentiment on the Silhouette twice with black and with blue so I could mix & match and add shadows. The sentiment background came with the file and I cut it in white, then popped it with foam tape.

That's it for today. Hope you're having a wonderful if celebrating!!

Friday, June 14, 2019

Twofer Challenge = Bees!

Hey there - hope you're enjoying your week! I finally had a chance to play along at this month's Twofer Challenge #17. Here's my Twofer:


I have very few stamps with bees but I picked the bee image from a bug set by Hero Arts. I had an idea to cut a beehive on the Silhouette for one card and I found a flower cluster to cut for another. I always need birthday cards so I gave the flower card a birthday sentiment. Hmmmm - what occasion could I use on the beehive card?? I finally settled upon Hello because I wanted to use a little sentiment oval. There wasn't much room for anything else!

As usual, I cut a bunch of random shapes using white cardstock so I could color them as needed. I included a Bee Mine message to get a three-fer with a Valentine card! Here's each card separately with a supply list.

Supplies: Paper - Neenah Classic Crest Solar White; Lawn Fawn Perfectly Plaid - Spring;
DCWV Ms Sparkle A2 card; Poptone Black Licorice; scrap of poppy
Stamps - Hero Arts CL953 Mason Jar Bugs (and coordinating dies) - retired and
CM336 Hero Arts Hero Greetings Occasions 
Dies - My Favorite Things Blueprints 20 (retired); Hero Arts DC150 Happy Stamp & Cut
Silhouette Design ID 295641 Flower Corner by Wild Pilot
Other - Copic Markers, Stickles, foam tape

Supplies: Neenah Classic Crest Solar White; Lawn Fawn Perfectly Plaid - Spring 6x6 pad;
Paper Studio A2 card; Poptone Black Licorice
Stamps - Hero Arts CL953 Mason Jar Bugs (and coordinating dies) - retired and
Dies - My Favorite Things Blueprints 20 (retired); Hero Arts Nesting Oval Infinity Dies
Silhouette Design ID 274645 Beehive by Miss Kate Cuttables
Other - Copic Markers, Stickles, foam tape

Supplies: Paper - Neenah Classic Crest Solar White; Authentique Beloved Valentine 6x6 pad;
Memory Box Red Pepper A2 card; Poptone Black Licorice; scraps of red
Stamps - Hero Arts CL953 Mason Jar Bugs (and coordinating dies) - retired
Silhouette Design ID 113377 Bee Mine Card by Suzanne Cannon
Dies - My Favorite Things Blueprints 21 (retired)
Other - Copic Markers, Stickles, foam tape

Whew - glad to get three more cards completed for the stash. Thanks to Darnell & crew at the Twofer Challenge for another fun theme. Thanks for stopping by!!

Saturday, June 8, 2019

Grad cards

I'm back to share the grad card I made for my niece Annika who graduated high school last night. Her grad party is coming up soon and I'm looking forward to celebrating with her! My mom and I actually made cards together a couple weeks ago and I photographed both cards together (background is my parents' couch - LOL). I look for things to do with my mom when I visit - we put together a lot of puzzles and occasionally make cards.

Supplies: Paper - DCWV Ms Sparkle A2 card; Tim Holtz Kraft Metallic;
Doodlebug Hat's Off; Poptone Black; Shimmery Silver (brand unknown)
Dies - MFT Blueprints rectangles (retired); Hero Arts stars (retired);
Spellbinders Lacy Squares (retired); Poppystamps All Star Collage;
Momenta alphabet
Silhouette Design 82725 Graduation by Studio Ilustrado
Stamps with dies - Stampendous Everyday Chicks
Other - Paper Studio Graduation stickers; Copic Markers

I have a little envelope full of different elements for grad cards, plus a pile of 3D stickers with a grad theme. I grabbed those, some card bases and grad papers. Then I crammed tools like a diecutting machine, paper trimmer, stamping tool, ink, stamps, etc into some Thirty-One bags and hit the road. Ready for a fun crafty day with mom. She chose her elements and papers and I helped her a bit with some of it. Her card is on the right.

After mom picked her elements, I chose from the remainders. Really loved the little chickie grad I had stamped, colored, and cut a while ago. Thought she'd be cute perched on a grad scroll sticker. Decided to echo my mom's choice of a star by cutting the star collage into my grad paper. It cut a bunch of stars too which I saved for a future project. The sentiments on both cards are strips from the Doodlebug paper pad - really made finishing these cards easy!

Thanks for stopping and have a great weekend!!


Friday, June 7, 2019

Gifts at CAS Christmas

Hi all - it's been ages since my last post and I missed the May CAS Christmas Challenge - boo hoo!! My Christmas card production lags behind last year so I need to step it up! This month the ladies at CAS Christmas are featuring gifts for the June Challenge.


For my first card I cut the Stacked Gifts by Sophie Gallo on the Silhouette. Take a look:

Supplies: Paper - DCWV Ms Sparkle pastel A2 card; Penny Black Holiday Trimmings;
Paper Studio glitter paper; Neenah Classic Crest Solar White; scrap of neon green
Silhouette Design ID 70463 Stacked Gifts
Die - Our Daily Bread Mini Tags (retired)
Stamps - Mini Tag Sentiments (retired)

I cut two Stacked Gifts from glitter papers and decided to work with a green one first. I backed the different gifts with papers from Penny Black and used a white offset mat. Because there were some pastels in the papers, I went with a pink card for a non-traditional color combo. The mini tags and sentiments made adding a gift tag a breeze!

When I cut the white offset mat for the gifts, I cut a bunch of other white shapes - I often do this to use up my paper. I figure the shapes can always be colored to fit the project. I cut a bunch of snowflakes this time, including the word JOY with a snowflake in the O. The Penny Black paper happened to have a page with a bunch of icons in circles (stocking, ornament, etc). One was a pile of gifts so I decided to use the JOY word and cover the O with a layered circle topped with the gift circle. Here's that card:

Supplies: Paper - DCWV Ms Sparkle pastel A2 card; Penny Black Holiday Trimmings;
Neenah Classic Crest Solar White
Silhouette Design 110035 Joy Phrase by Sarah Bailey and
Design 67447 Three Snowflakes by Sophie Gallo
Stamp - Hero Arts Holiday Florals Bold Prints

I colored the J and Y with a wine colored copic, then stamped over it for texture. Layered my circles for the O, plus a snowflake from a different file (saved the O snowflake for another project). Since the pink cards were out, I used another one!

I started working with a red Stacked Gifts, playing with solid scraps of paper to form the "wrapping paper". As primary colors came out, I decided to make it a birthday card! Shame on me when I'm supposed to be adding to the Christmas stash - oh well.... The only change besides the gift papers were a background mat cut using BoBunny Believe papers and a Memory Box red pepper A2 card.


That's it for today! I'm off to enjoy the nice weather we're having and get a coffee. My niece graduates from high school tonight so later this weekend I hope to blog the card I made her. I won't go to the ceremony as they barely get enough tickets for the immediate family. Darn!

Thanks for stopping and I hope you have a crafty week!!


Sunday, March 24, 2019

My March CAS Christmas entry - Deer baubble

Hi all - skating in almost at the eleventh hour (well, about 7 hrs left) to post an entry for this month's CAS Christmas Card Challenge. I almost thought I wouldn't make it since I was out of town most of the past two weeks, then home for a meeting this afternoon. Meeting ended early and I had time to make use of items I had cut last week potentially for this challenge (use a deer).

Supplies: Paper - Neenah Classic Crest Solar White; Poptone Black Licorice
Silhouette Design ID 70497 Circle Flourish Reindeer
Die - Spellbinders Ribbon Banners
Stamp - Hero Arts CL343 Holiday Sayings (retired)
Other - Tumbled Glass, Broken China, & Black Soot Distress Oxide Inks; Stickles

I started with a Silhouette design I used once almost four years ago (see card here). That was for a vintage challenge; this time I was going with white on white but ended up coloring my offset layer with shades of blue Distress Oxide ink. I tried stenciling some birch trees behind but rejected that idea as too busy, given the flourishes on the deer. I spritzed the blue with a bit of water but the effect is very subtle. Wanted to use diamond stickles on the deer but the bottle was empty - dang! Instead used crystal ones which turned out fine. I had cut a bunch of white and black deer so decided to layer for a slight shadow effect.

Sorry for the bad photo; it was already clouding up here after a fairly sunny day. Thanks to Loll, Bonnie & team for another fun challenge!! And a big Happy Birthday to this fabulous challenge blog - one year old and going strong!!
Monday, September 11, 2017

Merry Monday #256 Favorite Holiday Movie

Merry Monday everyone - time to go to the movies with Nina this week for Challenge 256. Woo Hoo!!


As a young child I always watched Rudolph the Red-nosed Reindeer on television every Christmas season - it remains a favorite to this day. I remember hiding my face when the nasty Abominable Snow Monster came on screen - yikes! Then he turned into a sweetie at the end and Rudolph with his red nose saved the day by leading Santa's sleigh. A classic!! I found a darling & ridiculously cheap Rudolph stamp set at Michael's after Christmas last year - perfect for this challenge! Here's my movie inspired card:

Supplies: Paper - Neenah Classic Crest Solar White, Teresa Collins Sweet Afternoon (blue pattern)
Basic Grey Juniper Berry (black pattern)
Stamps - Inkadinkado Rudolph, Impression Obsession Wooden Plank
Silhouette Design ID 112156 Santa's Workshop A7 card 
Dies - Lawn Fawn Hillside Borders & Impression Obsession Snowflakes Cutout
Tim Holtz Distress Inks - Hickory Smoke, Lucky Clover, Pine Needles, & Black Soot
Other - Stickles, Copic Markers, foam tape, Sizzix plaid embossing folder

The set has 5 of the movie's characters - Rudolph, Sam the Snowman, Hermey the elf who wants to be a dentist, the Abominable Snow Monster, & prospector Yukon Cornelius, plus a snow covered tree and 3 snowflakes. I decided to feature just three of the characters - of course, one of them had to be Rudolph! I stamped all three, colored with Copics & fussy cut. I stamped the tree image three times using two shades of green ink and fussy cut. I thought Hermey would be cute looking out a workshop window at Rudolph & Sam so I went searching for a Silhouette Santa's Workshop design. Found a cute one that includes an A7 card but I just folded my own card stock to A7 size. I selected some of design's pieces and cut them in white, coloring them as necessary with Copics. I embossed the walls and roof for some texture and stamped the shutters with a wood plank background. I added Icy Stickles to the icicle layer of the Silhouette design. The design came with a heart for above the window but I chose a snowflake as the finishing touch. Oops - forgot I was going to hand write DENTISTRY on Hermey's book - just like in the movie. Oh well, I'll add it later.

Thanks for stopping and be sure to check out all the fabulous cards of my Merry Monday team mates! I'm having a blast on my Guest Designer tenure!!


Saturday, September 9, 2017

Another retirement card!

Wow - a third person retired from my old workplace! I attended a party back in July and there were two in August - had to miss both of those parties due to other commitments but I sent cards. I didn't blog the July card because it was similar to the cat birthday card from May. The first retiree loooooves cats! Only difference was a butterfly instead of the balloon and a congrats sentiment. I posted the first August retirement card here and today I'm sharing the final card - for my friend Jim:

Supplies: Paper - DCWV A7 card, Poptone Black Licorce, 
Neenah Solar White, & a scrap of Basic Grey grid
Stamps - Hero Arts CG279 Musical Clef, Impression Obsession MC185 Fore Retirement
Silhouette files - Design ID60862 Acoustic Guitar & 
Design ID37683 Music Flats Etc, plus text of a B and two 2s

Jim has played the guitar for years - in fact, we used to sing duets back in the day during our on-the-job training after college. Our group lived in an apartment complex during the 3 month training - we called it "Compound W" (real name Westwood Village) because the buildings reminded us of Army barracks!! As recent grads we didn't have a lot of money so we spent time gathered in each other's apartments drinking cheap wine and enjoying Jim's guitar playing. He's a huge Bob Dylan fan and we even got to see Mr. Dylan in concert! Jim & I ended up in different Wisconsin offices but our paths crossed again a few years ago, both working in St Paul MN. I'm sure he got a kick out of the card when he received it on Wednesday.

I've used the sentiment from a golfing retirement set before - it says "Best Wishes Fore Your Retirement" - I just cut the "Fore" out and used a teeny "on" from another set. The guitar Silhouette design comes with a lot of layers - I tried a version making a kraft colored layered guitar but didn't like it. I found the simple black silhouette worked best for my puny "Too sharp to be flat"!

That's it for today. Thanks for stopping by and I hope you'll be back on Monday for the next Merry Monday challenge - my second week as a Guest Designer and my card is ready to go!

Monday, July 17, 2017

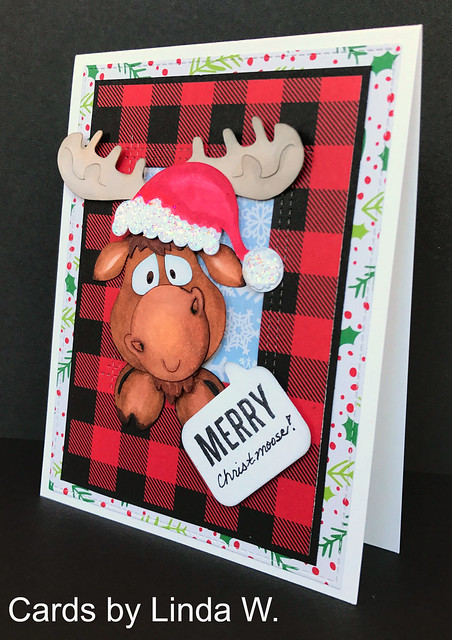
Merry Moose 3

Hope you're not sick of the moose cards - I've been having fun with them! When I made last week's card for the Merry Monday Summer Link-up, I had a bunch of moose parts left over. So I decided to make a moose peeking out of a window frame. The moose theme was from Challenge 254 a few weeks ago.

Christmoose
Supplies: Paper - Neenah Classic Crest Solar White, American Crafts Christmas
DCVW calendar pack (snowflakes in window)
Silhouette Designs - 12000 Forest Moose by Sarah Bailey & 
69563 A2 Moose Card by Jamie Cripps (Santa hat)
Stamps - Hero Arts Christmas Crystals (retired) for the Merry
Dies - My Favorite Things Die-Namics Blueprints 13 & LJD Rectangle Peek-a-Boo Window,
Hero Arts Speech Bubble Frame-cuts (retired)
Other - Copics, Stickles, foam tape

I'm a great one for not waiting while things dry! Can't tell you how many times I smudged the wet Stickles putting the Santa hat on Mr. Moose!! Then I got some black speckles on his face and had to blend those in - oh well.... I hand wrote the Christmoose on the speech bubble since I didn't have a stamp with it, nor was I energetic enough to build it with an alphabet set.

Merry Monday

Thanks for stopping by and be sure to check out Merry Monday if you need to build your Christmas card stash! I have over 60 cards made already and still going strong!!

Thursday, June 1, 2017

Birthday Fun

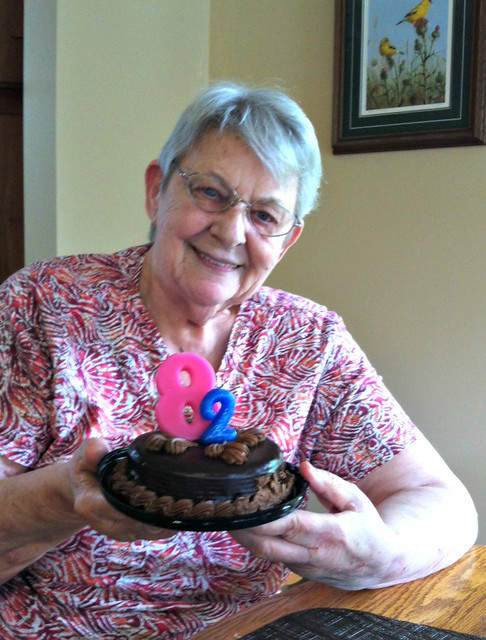
As I mentioned in yesterday's post, my Mom had a birthday on Tuesday (the "real" Memorial Day, she always says). We celebrated with a pizza from Papa Murphy's (the Cowboy, in case you're wondering, with some modifications) and a sweet little birthday cake from the bakery. LOL - I had a jumbo 8 from her 80th bday cake but the store didn't have that style anymore so I ended up with a smaller 2 - thought it looked cute though!

Mammy bday 2017

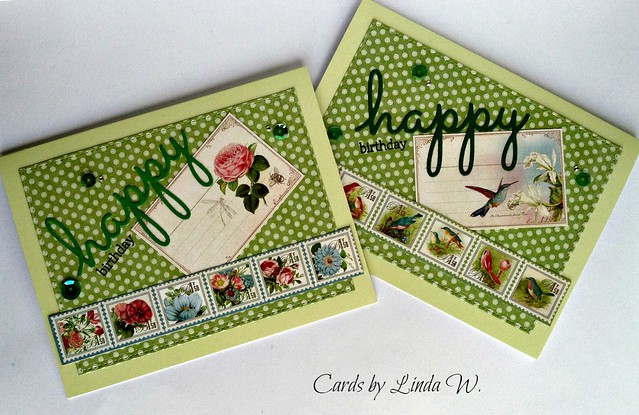
I made two birthday cards using a lovely Graphic 45 8x8 paper pad - one went to Mammy and the other to her sister-in-law, my Aunt Marie. Mammy loves both birds and flowers but she got the bird card since Aunt Marie prefers flowers. Don't laugh - the stamp set I used has a happy die but I couldn't find it! Had to use one from MFT to go with the birthday I stamped...

Botanical Tea bday cards
Supplies: Paper - Hero Arts Foliage Layering Paper (lightest shade); Michael's green paper; 
Graphic 45 Botanical Tea Collection (patterned papers)
Stamps - Hero Arts DC150 Happy Stamp & Cut (birthday)
Dies - My Favorite Things Die-Namics Blueprints 20 (stitched rectangle) & Blueprints 26 (happy)
Other - Hero Arts sequins, Michael's gems

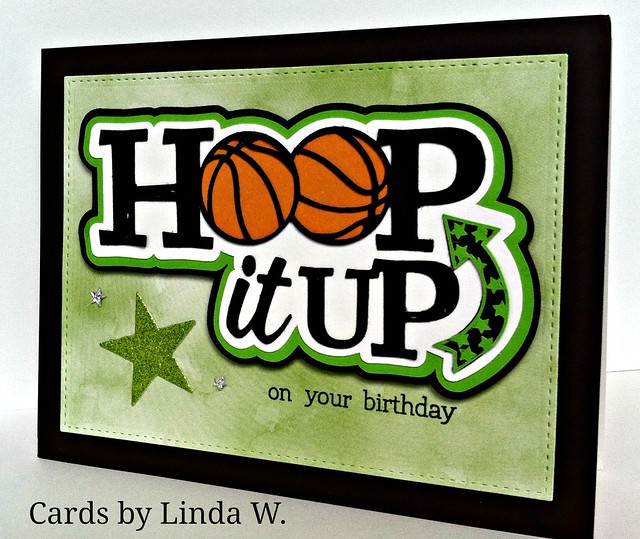
My nephew Michael celebrated his 15th birthday last week and I struggled to decide what to make for a teen-aged guy! He loves playing basketball so I found a fun Silhouette design to try. I just loved how it turned out with all the layers!

Hoop it Up
Supplies: Paper - Pop tone Black, Neenah Classic Crest Solar White, the Paper Studio glitter, 
Michael's green & orange, My Favorite Things Watercolor Wash
Stamps - Hero Arts DC150 Happy Stamp & Cut (birthday); DC149 Congrats Stamp & Cut (on your)
Dies - My Favorite Things Die-Namics Blueprints 20 (stitched rectangle) & Blueprints 18 (star);
Silhouette Design ID 150551 Hoop it Up Title from Miss Kate Cuttables
Other - Michael's star gems, foam tape

That's it for today. I'm off to clean up my crafty supplies so I'll have a fresh slate to make Father's Day cards. Hope you're having a wonderful week!

Wednesday, May 31, 2017

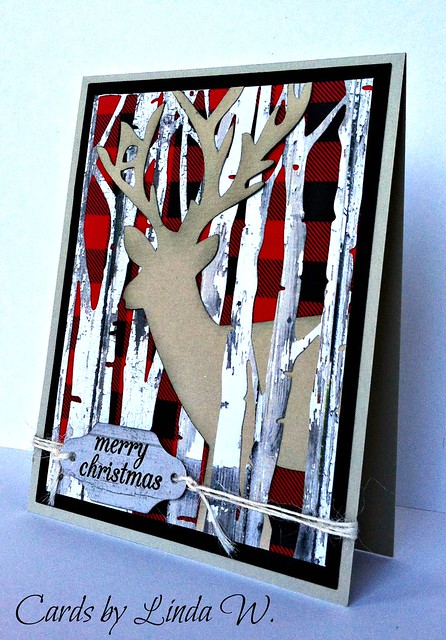
Rustic Christmas

Hi all - Happy Wednesday! After a rainy holiday weekend, we're enjoying some nice sunny weather today!! I'm getting a chance to play in this week's Merry Monday challenge from Deanne to do something rustic on a Christmas card.


When I think of rustic, birch trees always come to mind and I love the birch bark candles in the inspiration photo! I knew I had a birch cutting plate around here somewhere (but not in the drawer where it was supposed to be). After about an hour of searching, I found it - yay! But I couldn't find the matching deer set. Then I spotted a deer I had cut on my Silhouette - it would work! I also knew I wanted to use some buffalo plaid paper because that screams rustic to me, plus some twine. Here's what I came up with:

deer in birches
Supplies: Paper - Stampin' Up kraft; American Crafts Christmas (Target bin); 
My Mind's Eye On the Bright Side 6x6 pad (woodgrains); Pop-tone Black
Stamp - Hero Arts CL722 Merry Christmas Messages
Dies - My Favorite Things Die-Namics Blueprints 21Silhouette Design ID14718 Deer
Taylored Expressions Birch Tree Cutting PlateHero Arts DC201 Number It Stamp & Cut
Other - May Arts string twine

I visited my parents for the holiday weekend and yesterday was my mom's birthday. She wanted pizza for her b-day lunch so we bought a Papa Murphy's pizza to bake at home. Then we celebrated with a little cake I got at the grocery - yummy chocolate!! If I get a chance tomorrow, I'll try to blog the party and the card I made her.

That's it for today. I'm off to lunch with a friend who I don't see as often as I'd like. Thanks for stopping and have a crafty day!!

Wednesday, March 8, 2017

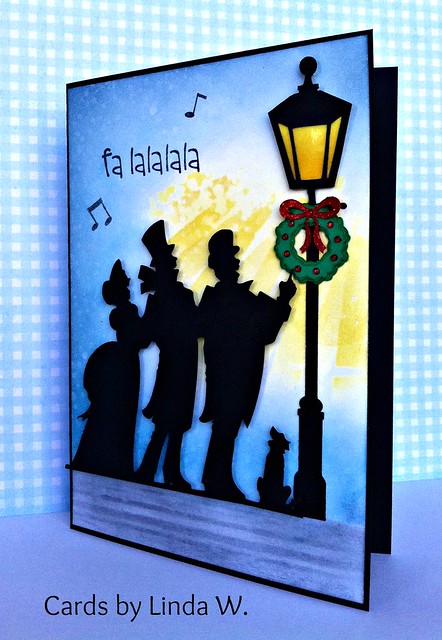
Fa La La La La

Hey everyone - back with another entry for this week's Merry Monday challenge to use a lamppost (decorated and with bling) on your Christmas card. I was inspired by all the Design Team cards and I drew special inspiration from Deanne and Debbie for my card. I've been working on it off and on since Monday and finally finished it this morning.

Carolers under lamppost
Supplies: Paper - Poptone Black, Neenah Classic Crest Solar White
Digital files - Hero Arts Carolers Silhouette (Silhouette Design ID 15043), 
Miss Kate Cuttables Christmas Street Lamp (Silhouette Design ID 71068)
Stamps - Hero Arts (retired) CL354 Let the Angels Sing (sentiment and musical notes)
Inks - Distress Inks - Mustard Seed, Scattered Straw, Tumbled Glass, Stormy Sky, Picket Fence & Black Soot, 
Broken China Distress Oxide Ink; Picket Fence Distress Spray
Stencils - Tim Holtz Layering Stencils Stripes THS004 and Rays THS003
Other - Copic markers, Glossy Accents, Xmas Red Stickles, Michael's gems (colored red with a Copic)

When I was admiring the Design Team cards, Debbie's card with the Silhouette file (New Orleans Gas Lamp) caught my eye - love it! I remembered a caroler card I made a few years ago with a Silhouette Online design - thought it had a lamppost, nope. So, I headed to the online store to find the file Debbie used (got it) and then found this darling lamppost with wreath I thought would be perfect with the carolers. But what to do for a background?? Deanne inspired me to create my own background! I pulled out Distress Inks and stencils and had fun. Then I decided to stamp some snow. Here's what happened:

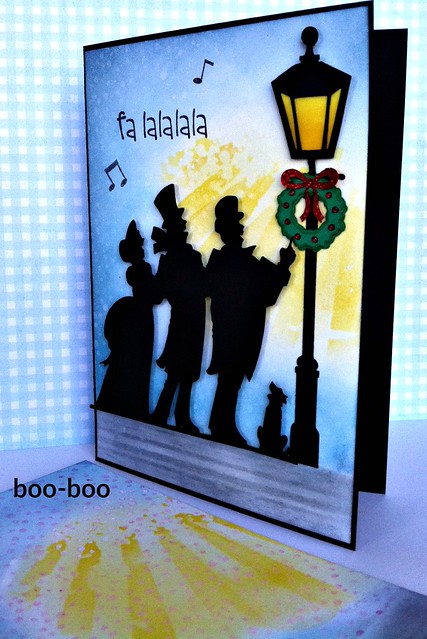
Carolers with Boo boo panel

Ugh - guess I didn't clean off my stamp - it had Picked Raspberry on it from a birthday card. So my panel was covered with pink dots!!! Plus my white ink pad now had pink on it - disaster! You can see where I tried to color a few of the dots with a white gel pen but it just wasn't working and there were too many dots! Anyway, started from scratch and, really, the second attempt turned out better. The white stamped snow was very subtle so I also sprayed some Distress Stain on the panel. Really liked how this turned out. Then I stamped the sentiment after I'd assembled everything. Usually this is a recipe for disaster but today it worked just fine - phew!!

Thanks for stopping by and hope you're having a lovely day!! Be sure to check out Merry Monday for Christmas inspiration!!
 

P.S. It's Day 8 of Kathy's 30-Day Coloring Challenge and I still need to color something. My lamppost glow was colored with Copics but that was yesterday just before midnight and I don't count the inking I did today on my background. Hey - I also stamped some fun adult beverage images from SSS yesterday - off I go to color some....

Tuesday, June 14, 2016

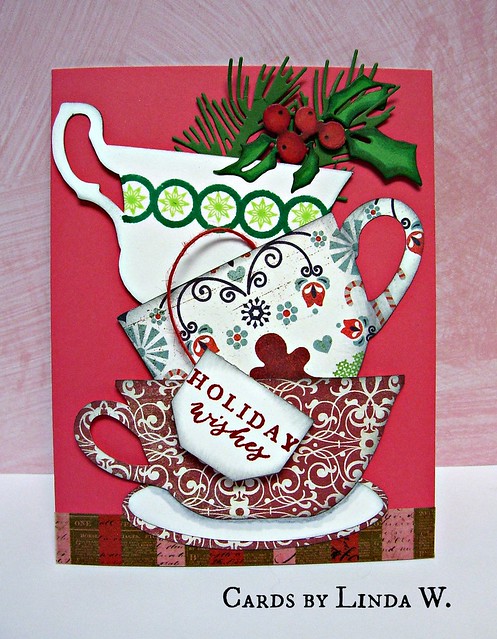
Stacked teacups


Hi all - this week's Merry Monday challenge from Lesley has a great inspiration photo - just love the stacked teacups!! I couldn't wait to play along and here's my card using some Silhouette cuts and die cuts:

Holiday Wishes cups
Supplies: Hero Arts Punch card; Basic Grey papers - Nordic Holiday & Sugared; Bazzill cardstock
Silhouette files: #9702 "4 Teacup Silhouettes" (cups and saucer); #79076 "Stacked Teacups Card" (tea bag)
Dies: Impression Obsession "Pine Branch Die"; Penny Black "Red & Green"
Stamps: Hero Arts CL803 Family & Friends (citron flower on top cup) CL887 Color Layering Christmas Tree (sentiment); Hero Arts w/Studio Calico 331232 Spread Joy (circle border on top cup)
Ink: Tim Holtz Distress Inks - Fired Brick, Lucky Clover, Twisted Citron; Black Soot
Tim Holtz washi; May Arts string twine; Copics - for shadow and definition

I had fun mixing patterns on two cups and stamping on the third one. The Tim Holtz washi was the perfect anchor to my stacked cups. Hope you're having a crafty day and thanks for stopping! Be sure to check out Merry Monday for loads of inspiration.

Wednesday, June 1, 2016

Baggin' It!


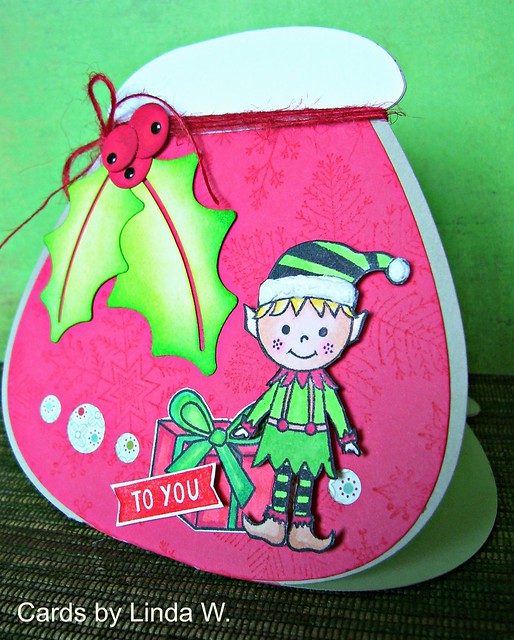
Hi all - this week's Merry Monday challenge from Nina is to include a bag on your card. I chose to make the card base a bag since I had a fun Silhouette design I thought might work. This is a bottom fold card which is intended as a gift card holder (I just skipped cutting that part). Here's my card:

Santa bag with elf

Supplies: Stamps - Hero Arts DC160 Santa's Elves Stamp & Cut; CL644 Bring on the Merry (present);
CL803 Family and Friends (sentiment tag "To You"); CG685 Hand Drawn Snowflakes (texture on bag)
Paper: Hero Arts Punch Layering paper; Anchor Paper kraft; Neenah Solar White; Basic Grey
Other: Silhouette Design ID#111031 Port Gift Card Bag; Copic Markers; May Arts String Twine
Distress Inks - Twisted Citron, Lucky Clover, Candied Apple; Liquid Applique; foam tape
Michael's brand metal accents (black dots on berries)


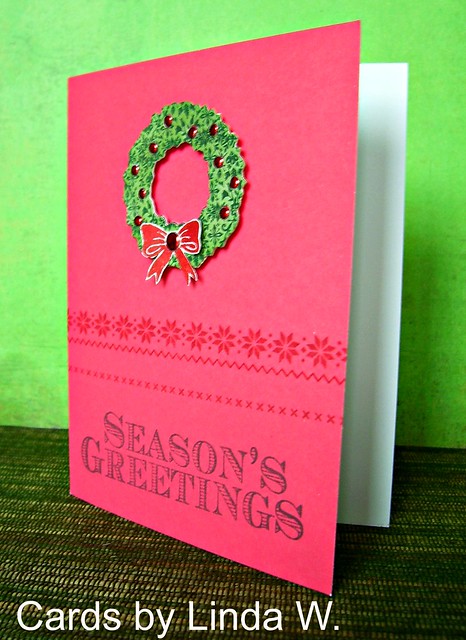
While dusting today (imagine that?!) I found a little wreath I had die cut last year for Merry Monday. Never finished that card so thought I make one today. I used some fun cling border stamps I got for my birthday from my friend Heather Maria.

Wreath with bow
Supplies: Stamps - Hero Arts CL787 Holiday Petals and Leaves (bow); CL619 Greetings for the Holidays (sentiment); Urban Stamps 907946 Tall Urban Stamp Craft Christmas (borders); Distress Inks - Pine Needles and Candied Apple; Silhouette Design # unknown for wreath; Hero Arts Punch layering paper

Be sure to stop in at Merry Monday for loads of inspiration to get your Christmas cards done early. Thanks for stopping by!

Tuesday, May 24, 2016

More Nativity cards

Hi all - back again with more Nativity cards for this week's Merry Monday challenge. Supposed to be making a birthday card but I can always to that later today :)


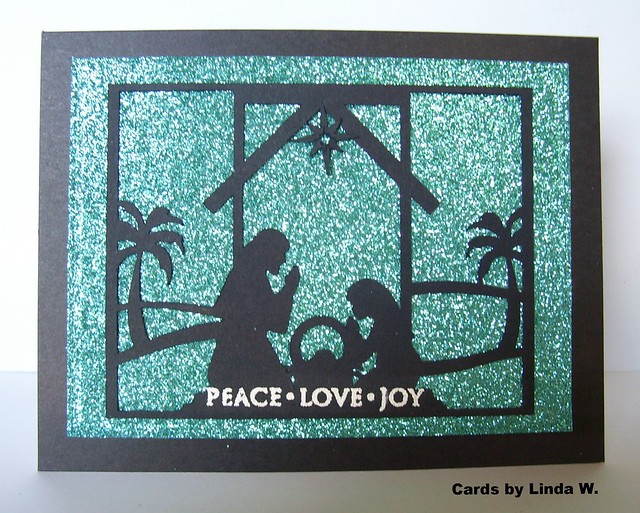
Card 1 was made with another one of the Silhouette images I cut yesterday. This one had a little torn bit on the star so I snipped it off altogether and used a different star that I had cut. Oh, it also was a three-panel card and I snipped out the nativity portion. I just love to modify things! This card also uses a My Favorite Things Blueprint set I first saw on Deanne's blog. Finally got one of my own last week - thanks for the enabling Deanne!

100_6694
Supplies: 
Hero Arts black folded card; Reflections black cardstock; Heidi Swapp glitter paper
Dies: My Favorite Things Blueprint 20 (stitched rectangle); Silhouette Design ID #109795 Nativity Triptych Card
Design ID #70556 Full Nativity (star I replaced from the other design)
Stamp: Hero Arts CL343 Holiday Sayings (sentiment); embossing ink and Ranger Seafoam white embossing powder
Tools - Silhouette, Vagabond, Darice embossing tool

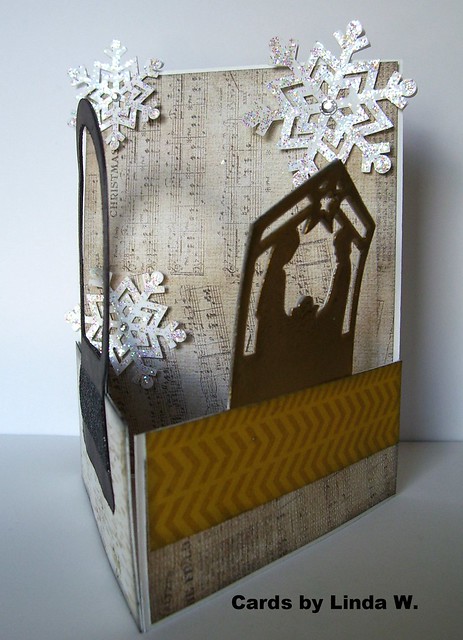
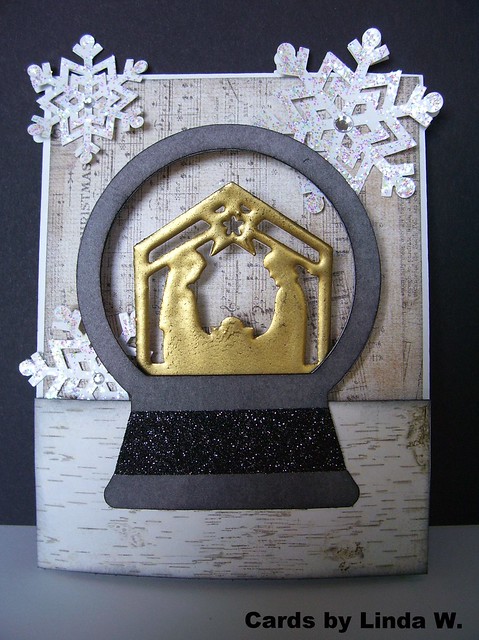
Card 2 was one I considered for last week's snow globe challenge using a Lori Whitlock snow globe card. This is another three panel card but I left it intact. I also used the one I cut yesterday that cut off the page. I just snipped off the nativity part, embossing it with gold ultra think embossing powder. I glued it over top of the card base one. Here's a shot of the card partially open:

Snow Globe nativity tri-fold

Here's the card while closed:

Snow Globe Nativity
Supplies: 
Paper - Reflections (Michael's) white card stock; Basic Grey Aspen Frost (birch bark); 
The Paper Studio Old World Winter (music background); BoBunny Christmas Collage (gold chevron on inside)
Dies - Silhouette Design ID #106816 Snow Globe Nativity Card
Other - 3M washi tape; Suze Weinberg's Gold Ultra-thick embossing enamel
Tools - Silhouette; Darice heat tool

The gold embossing got an interesting mottled black texture in spots (user error, I'm sure) so I enhanced it with some Black Soot Distress Ink. Inside behind the nativity panel I stamped the sentiment "Jesus is the reason for the season".

Thanks for stopping by! Crazy as it may seem, I may have a few more Nativity cards in me. Who knew?! There's still time to play at Merry Monday this week - be sure to check it out!