Welcome to my blog!

Thanks for visiting my blog. As the title suggests, I love to scrapbook, stamp, and sing! I will share cards and scrapbook pages I create, as well as information about my music - Barbershop harmony.

Friday, May 27, 2016

Birthday florals

Hi everyone - I expect a busy summer so I'm trying to make cards ahead of time for upcoming birthdays. I was really inspired by the very talented Yana Smakula's post about her go-to card formula. I decided to try it with a twist. She uses gold metallic frames - I chose a glittery one and a plain card stock one for the two cards I'm sharing today.

Card 1 is for my great niece, Abby, who turns 18 - yikes!! Thought she'd like a little glitter this year.

Abby birthday flower
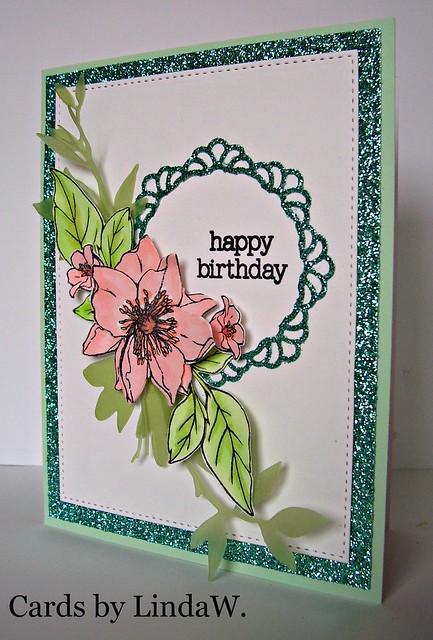
Supplies: Paper - Hero Arts pool and Neenah solar white; Anchor Paper vellum (pale green); Heidi Swapp glitter paper
Stamps: Hero Arts CL661 It's Your Day (sentiment) and April 2016 My Monthly Hero (flowers/leaves)
Dies: Simon Says Stamp and My Favorite Things stitched rectangles; Hero Arts Spring Branch; 
MFT doily with the center cut out with a circle die.
Other: Copic Markers; Memento Tuxedo Black ink; Wink of Stella

Card 2 was made for a 24-hr Scramble going on over at the Hero Arts Flickr group, hosted by Lisa. She offered a lovely floral inspiration photo with lots of teals and purples. The Scramble started at 1p EDT today so you still have plenty of time to play. This card was completed, photographed and uploaded within 90 minutes as the Scramble rules require. I decided to use the same formula since all the stuff was still out on my craft space.

Happy birthday teal flower
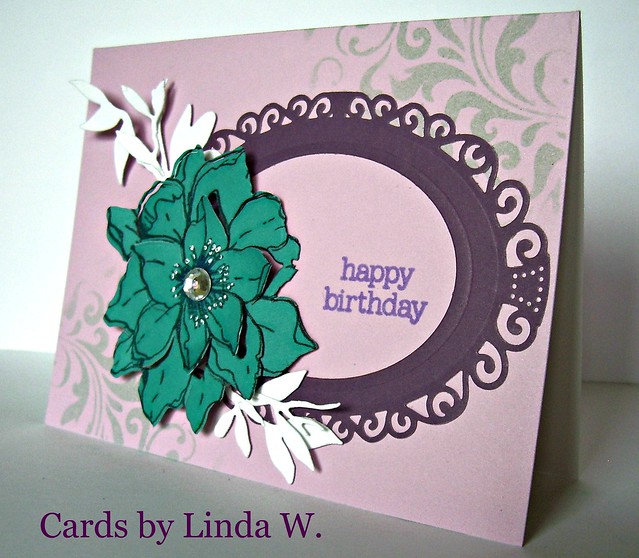
Supplies: Hero Arts Mixed Floral layering paper (purples); teal paper from stash; Neenah Solar White
Dies: Spellbinders Elegant Ovals (S4-425) and nested oval (to cut the hole); 
Hero Arts April 2016 My Monthly Hero kit (flower stamp and die); Spring Branch
Tim Holtz mini-stencil; Cracked Pistachio and Wilted Violet Distress inks; gem from Michael's

Now I'd better get busy on Father's Day cards, then I'm good for June at least! Thanks for stopping by and I hope you're having a great day!!

Tuesday, May 24, 2016

More Nativity cards

Hi all - back again with more Nativity cards for this week's Merry Monday challenge. Supposed to be making a birthday card but I can always to that later today :)


Card 1 was made with another one of the Silhouette images I cut yesterday. This one had a little torn bit on the star so I snipped it off altogether and used a different star that I had cut. Oh, it also was a three-panel card and I snipped out the nativity portion. I just love to modify things! This card also uses a My Favorite Things Blueprint set I first saw on Deanne's blog. Finally got one of my own last week - thanks for the enabling Deanne!

100_6694
Supplies: 
Hero Arts black folded card; Reflections black cardstock; Heidi Swapp glitter paper
Dies: My Favorite Things Blueprint 20 (stitched rectangle); Silhouette Design ID #109795 Nativity Triptych Card
Design ID #70556 Full Nativity (star I replaced from the other design)
Stamp: Hero Arts CL343 Holiday Sayings (sentiment); embossing ink and Ranger Seafoam white embossing powder
Tools - Silhouette, Vagabond, Darice embossing tool

Card 2 was one I considered for last week's snow globe challenge using a Lori Whitlock snow globe card. This is another three panel card but I left it intact. I also used the one I cut yesterday that cut off the page. I just snipped off the nativity part, embossing it with gold ultra think embossing powder. I glued it over top of the card base one. Here's a shot of the card partially open:

Snow Globe nativity tri-fold

Here's the card while closed:

Snow Globe Nativity
Supplies: 
Paper - Reflections (Michael's) white card stock; Basic Grey Aspen Frost (birch bark); 
The Paper Studio Old World Winter (music background); BoBunny Christmas Collage (gold chevron on inside)
Dies - Silhouette Design ID #106816 Snow Globe Nativity Card
Other - 3M washi tape; Suze Weinberg's Gold Ultra-thick embossing enamel
Tools - Silhouette; Darice heat tool

The gold embossing got an interesting mottled black texture in spots (user error, I'm sure) so I enhanced it with some Black Soot Distress Ink. Inside behind the nativity panel I stamped the sentiment "Jesus is the reason for the season".

Thanks for stopping by! Crazy as it may seem, I may have a few more Nativity cards in me. Who knew?! There's still time to play at Merry Monday this week - be sure to check it out!

Monday, May 23, 2016

Believe


Merry Monday everyone! I'm playing along with Lori's challenge to feature a Nativity on your Christmas card. Here's my card:

Believe Nativity
Supplies: Silhouette images - Design ID #111625 Nativity Ornament & Design ID #52457 Believe Nativity
Paper: Hero Arts black; American Crafts glitter paper (star); the Paper Studio Old World Winter (behind Nativity); 
My Mind's Eye Lost & Found Christmas (background); BoBunny Christmas Collage (banner)
Other: foam tape; black pearl. Tools: Silhouette, paper rounder

Last week when we were doing snow globes on Merry Monday, I spotted a Silhouette image of a Nativity in a snow globe. I had considered trying to make it as my second card but didn't even start it. So I considered it again and got as far as cutting it. When I cut it, though, part of the image ran off the paper - oops... I'm still considering how to salvage that bit!

Not to worry, I had cut another page filled with various nativities, including one I was planning for a long card. Carrying the pieces to my work counter from the Silhouette, I lost my shepherd - oh no! So I picked a different Nativity for this card. I had to modify this one too because it was to cut as an ornament and, again (what's my problem?!), the image cut off the paper. So, I snipped off the bow and hanger from the top to make it a simple circle. The word Believe came with a different Silhouette Nativity design - I cut that one too - they are addictive!!

Thanks for stopping and be sure to check out all the gorgeous nativities by the Design Team over at Merry Monday!

Tuesday, May 17, 2016

Snow Globe card

Happy Tuesday everyone! I'm sharing a card for Merry Monday - Linda presented the challenge to use a snow globe; I decided to make my entire card a snow globe. I sized it to fit an A2 envelope.

Deer in Snow Globe
Supplies: Hero Arts Cerulean layering paper; Doodlebug twine; Reflections chunky glitter; Icy stickles; foam tape
Silhouette files: Snow Globe Nativity Card #106816 & Christmas Deer Snow Globe #107653
Stamp set: CL541 Snowman Christmas (sentiment)
Ink: Mermaid Lagoon Distress Ink; Ranger clear embossing powder
Tools: Silhouette; WeR Memory Keepers Fuse with Waterfall Photo Sleeves


Using a Silhouette, I started out by cutting two of the Christmas Deer Snow Globes in white (I reversed the second one for a front and back). Then I slathered Stickles over both of the scene parts, not the globe parts. Once dry I glued them back-to-back for stability and snipped off the globe base. Then I put the deer scene panel inside a photo sleeve and Fused it, leaving an opening to add glitter. Added the glitter, Fused the opening shut, and trimmed it.

I cut two cerulean snow globes (second one reversed for the back since this paper is white on the inside - love it!) on the Silhouette using the Snow Globe Nativity Card file. The file contains a trifold card with the nativity and then you put the snow globe overlay on the front. I used just this overlay to be my card base. I sized the overlay right over the deer globe to get the right fit before I put it on its own page for cutting. I scored the back globe at the base so I can put a small inside message. I stamped and clear embossed the sentiment on the front, then assembled the card. First I put foam tape on inside of both halves of card base globes and stuck the Fused scene between them. The finished card would've stood up on its own had I scored the front too. As it is, it's a bit top heavy but it will stand alone if the front is along a table edge. Added the twine - done! The Fused pouch doesn't allow a lot of room for movement of the glitter. As you can see in the photo, quite a bit has hung up on the deer antlers and towards the top. It might've helped to use some sequins and to add anti-static inside the pouch. Oh well, live and learn!

This really wasn't all that much work once I figured out my design. I had a busy day yesterday but I took the steps between doing other things. Finally finished it late last night and then took a daylight photo this morning - there's a bit of glare off the pouch but not too bad.

Thanks for stopping by and be sure to check out all the inspiration over on Merry Monday - a great place for helping you get your Christmas cards done early!!

Monday, May 9, 2016

Woodgrain, Kraft & White at Merry Monday


Hi everyone - Busy week so I'm sharing a quick card made for the amazing Deanne's challenge at Merry Monday to use woodgrain, kraft and white on a Christmas card. Love this combo and the Design Team created some beauties for inspiration.

Here's my take on the challenge:

100_6679
Supplies: Paper - Authentique Winter (retired); Neenah Solar White; DCWV shimmer white 
Stamps: Hero Arts CL906 Color Layering Dimensional Bird (sentiment); Woodgrain (on sled)
Die: Hero Arts DC184 Ribbon Messages; Silhouette Design #23704 Classic sled by Jennifer Wambach
Embossing folder: Darice Wood grain Background; May Arts string twine; clear embossing powder
Tools: Vagabond, Silhouette, corner rounder; Ink: Tim Holtz Distress Ink - Gathered Twigs, Antique Linen

Thought it would be fun to do a more masculine card so left it fairly plain. I dry embossed a piece of Authentique kraft paper for the left panel and used a kraft and white pattern from the same 6x6 pad for the right. I inked both pieces with Gathered Twigs Distress Ink. Then I die cut the sled on my Silhouette and cut a white mat for it. I stamped the sled with a woodgrain stamp and popped it onto the mat with foam tape. I die cut the banner & stamped and clear embossed the sentiment. This one would be super simple to mass produce as you can cut pages of the sled and mat with ease on the Silhouette.

Thanks for stopping by and have a Merry Monday!!

Friday, May 6, 2016

Quilt cards

I'm sharing some cards made with a fun Taylored Expressions cutting plate - Quilted. My sister quilts for real and I like to text her photos of my "quilts" - LOL. I leave the sewing to her!!

My first quilt card was created for my dear friend Heather Maria who's having a birthday. Happy birthday, Heather! Of course I forgot to photograph the card before popping it into the mail but Heather took this lovely photo for me. Here's the card:

Happy Birthday Heather!
 Supplies: Dies - Hero Arts Happy Stamp & Cut; Taylored Expressions Quilted Cutting Plate
Paper: Hero Arts Mandarin Card; Penny Black Painted Blooms; Lawn Fawn Sequins
Hand-cut black flag stamped and white embossed (stamp is also from the Happy Stamp & Cut)

I cut the quilt from 5 different Penny Black papers in the Painted Blooms 6x6 pad and then mixed and matched them for 5 quilts. I used a white mat for my piecing. Funny thing - I put Stick-It on the paper I die cut. Why didn't I put it on the white mat??! I had to peal the release paper off the tiny triangles but after wearing out my fingernail, I figured out how to lift it with a paper piercer. I think I would have a hard time lining up the quilt frame onto the white mat if I put the release paper on the mat but I might try it some time. Meantime, here are a few more quilts:

Quilt cards
Supplies different from card 1: DC152 Thanks Stamp & Cut; pool card on left; 
paper - same as card one except the tiny triangles on left are Authentique paper

When I was cutting the Authentique paper, I ran off the paper with the top of the die so I salvaged it by trimming the quilt frame at the outer stitch line. This gave me a fun frame that I placed on a mat cut from Simon Says Stamp's stitched rectangle. Here's that card:

Mother's Day quilt card

I really liked the look of the open frame. The flowers are by Darice - bought them in the kiddie craft section at JoAnn's. If you're not sick of quilt cards, here's one final one. I cut five more quilts using Basic Grey Vivienne paper - here was the first finished one; I'm still working on the others :)

Thinking of you quilt

The banner and sentiment are from Hero Arts - DC184 Ribbon Stamp & Cut and an old clear set called Say it All. This card went to a quilting friend who had back surgery on Monday - again, I'll leave the sewing to her!!

Thanks for stopping by and putting up with my "quilts"!!

Monday, May 2, 2016

Ombre Snowflakes with Glitter


Seems like the only cards I get posted to my blog are ones linked to Merry Monday - oh well, I do what I can! This week Kristie brings us the challenge of using both ombre and glitter on your Christmas card. I love glitter and went to this Heidi Swapp glitter paper I bought at JoAnn's last week. I started out trying to stamp a text background stamp with an ombre ink pad. Didn't like how that turned out so I decided to try a trio of inks on a large snowflake background.

Here's my card:

Ombre Snowflakes
Supplies: 
Paper: Hero Arts Azure Layering Paper  Neenah Solar White cardstock; Heidi Swapp Glitter paper
Stamps: Hero Arts CG685 Hand Drawn Snowflakes & CL896 Winter Scene (sentiment)
Inks: Hero Arts Cornflower, Stone-wash, Navy; Gems from Michaels
Dies: Simon Says Stamp Stitched Rectangle; Snowflakes by ??; old Quikcutz label

My ombre was created with three inks - might've like a fourth lighter color at the top, oh well, and the stone-wash to navy is rather subtle. It's hard to see in the photo but the glitter frame is a stitched rectangle diecut. I put my sentiment label atop two snowflakes. The white one came from my friend Heather Maria - thanks again, Heather - and the silver one I cut myself but have no clue who manufactured the die. The packaging is around here somewhere but the die was sitting there in a pile next to my Vagabond so I went with it...

Thanks for stopping and hope you're having a great (and Merry) Monday!! Be sure to pop over to Merry Monday to check out the Design Team's fabulous cards!