Welcome to my blog!

Thanks for visiting my blog. As the title suggests, I love to scrapbook, stamp, and sing! I will share cards and scrapbook pages I create, as well as information about my music - Barbershop harmony.
Showing posts with label Challenge to Heather. Show all posts

Monday, August 29, 2016

Santa challenge

Hi all - it's the 9th and final challenge to my friend Heather (and anyone else playing along). We've been issuing Christmas card challenges during July and August while Merry Monday was on hiatus. Note: Lori's summer link-up is still active until August 31st so check on uploading cards that might fit past Merry Monday challenges. I've tried to do it whenever I remember....

Challenge #9 - include a Santa on your Christmas card

Merry Monday has used this challenge in the past and I had such fun with it, I decided it would be a great way to end our summer challenge. There's no deadline for making a card; after all, we're always looking to add to our Christmas stash!! Here's my inspiration card for Heather:
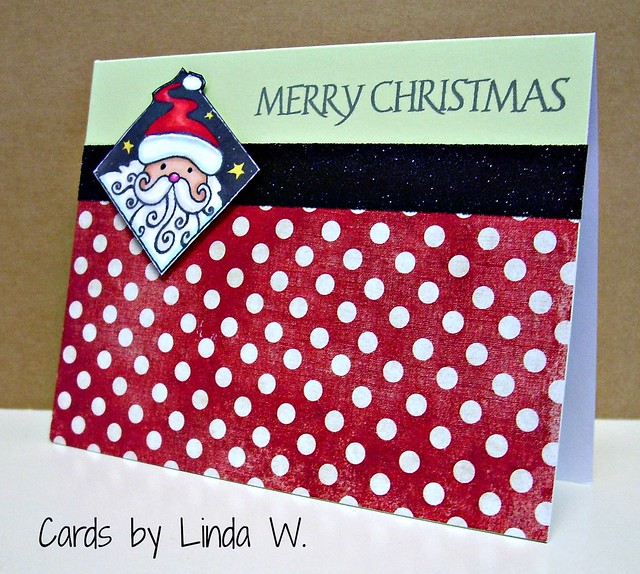
Santa head Merry Christmas


Supplies: Paper - Hero Arts celadon card, the Paper Studio Old World Christmas (dotted paper), Neenah Solar White
Stamps - Hero Arts CL114 Joyful Greetings - retired (Santa) and CL343 Holiday Sayings (sentiment)
Other - Copic Markers, Scotch glitter washi tape, foam tape; Ink - Ranger Archival "Watering Can" (Wendy Vecchi)

This was another super simple card, perfect for mass production. Added patterned paper to bottom of an A2 card and layered a strip of washi at the top. Stamped the sentiment on the card's top right in the open space. Stamped the Santa head on a scrap of Neenah Solar White (Copic friendly) and trimmed it. Colored with Copic Markers and popped it onto the card with foam tape. Done!!

I will add this card to Lori's link-up and look forward to the Merry Makers' return. Can't wait for Heather's final challenge to me. Thanks for stopping and have a crafty day!
Monday, August 22, 2016

Christmas Word Challenge

I'm back with another challenge to my friend Heather - only one left after this!

Challenge #8 - make a Christmas word the focal point

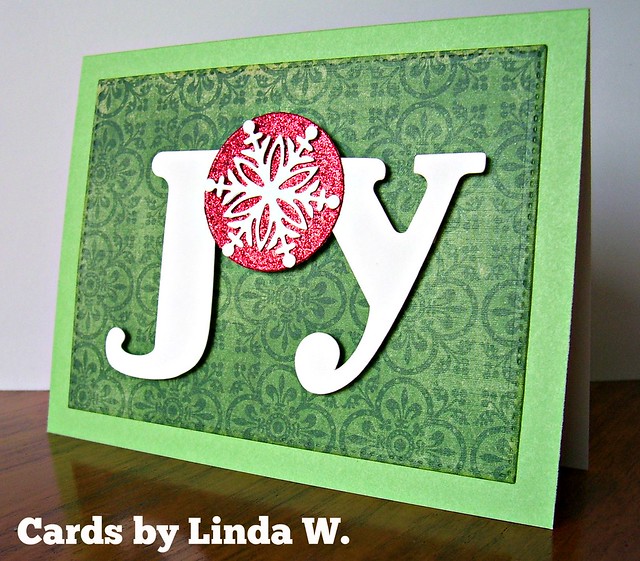
I really had fun with this one because it was so simple. I die cut the word on the Silhouette. The word was all one cut with the O containing a snowflake but I wanted a more elaborate one. I decided to put a die cut circle and snowflake over the existing O in the design for more contrast. Popped it onto a stitched rectangle and a card - done! Here's the card:

Joy snowflake

Supplies: Paper - the Paper Studio Old World Christmas; Neenah Solar White, the Paper Studio Christmas glitter, card from stash by unknown - I bought them individually at a stamping store in my hometown (I have lots of yummy colors!)
Dies - Silhouette Design ID #110035 Joy Phrase, circle and snowflake dies by unknown,
My Favorite Things Die-namics Blueprints 20 (stitched rectangle)
Other - foam tape

I really liked the green patterned paper - the brocade look of it appealed to me. The snowflake was another one Heather sent me - thanks again, Heather!! It may take me a while but I make use of everything my friends send me.

Merry Monday has used this as a challenge in the past so I'm adding my card to Lori's summer link-up. The Merry-makers will be back in September with more Christmas card challenges. I appreciate them even more for all their hard work each week, after doing these challenges to Heather!! I appreciate Heather thinking up challenges for me this summer too. I can't wait to see what she dreams up for me this week and what she creates with my challenge - whenever she can get to it, no rush!!

Thanks for stopping and enjoy your day!

Monday, August 15, 2016

Frame it for Christmas!

It's time for another challenge to my friend, Heather. We're both adding to our Christmas card stash - no need to rush to fulfill the challenge in the same week it's made! :)

Challenge #7 - Frame It! - use a frame on a Christmas card.

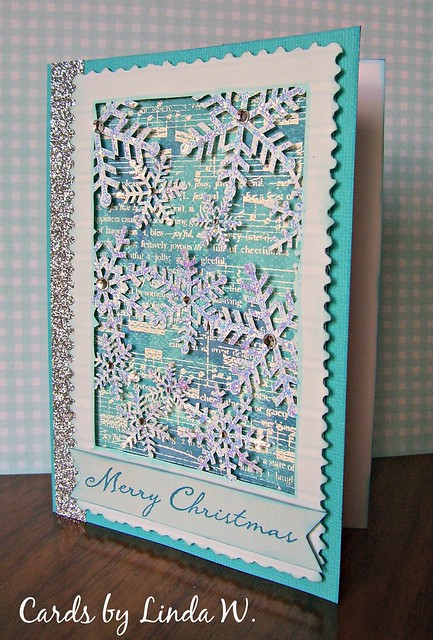
I made a card using this Silhouette design a few years ago and loved it. While I was searching my stash for something else, I found an extra die cut frame - yay! Thought it would be perfect for a challenge to Heather - I know she has many frames from which to choose. Here's my inspiration card:

Snowflake Frame

Supplies: Paper - Michael's Reflections Textured Brights card base (A7); Tim Holtz watercolor paper; pattern paper used to cut the frame - unknown (it has a faint horizontal blue stripe); Authentique Cozy (for sentiment banner)
Dies - Silhouette Design ID #15303 Snowflake Stamp (Hero Arts)
Stamps - Hero Arts CG376 Collage Music Background, CL241 Three Tree Christmas (sentiment)
Ink - Versamark; Tim Holtz Distress Inks - Tumbled Glass, Broken China, Salty Ocean
Other - 3M washi glitter tape; Stickles; Michael's Reflections clear gems; Ranger White Embossing Powder, foam tape

I stamped the music background in Versamark and white embossed it on watercolor paper. I sponged the various blue inks on it, blending them with water. The Silhouette frame is very detailed and I remember having to size it large enough so I could separate the snowflakes without tearing them. As sized, it needed a 5x7 or larger card base; I used an A7 card and added the washi tape to fill in the left side. After I anchored the frame over the dried music background using foam tape, I thought that this would've made a fun shaker card. LOL - I made this card before Heather's challenge to me last week to do a shaker. Funny huh, I must have been sending her a telepathic message!

Can't wait to see Heather's creation and her next challenge to me! Thanks for stopping!!

Monday, August 8, 2016

Tag - You're it!

Time for another summer Christmas challenge to my friend, Heather - this week I was delighted to use a tag die I got from her. Thanks again, Heather!! One note - although we put challenges out each week, we may not get to play them in the same week. Just depends on how busy the week is! Lately, Heather has been quite busy and is still working on challenge 5 - no worries - I'm posting this one for whenever she can play. :)

Challenge # 6 - Use a Tag on your Christmas card

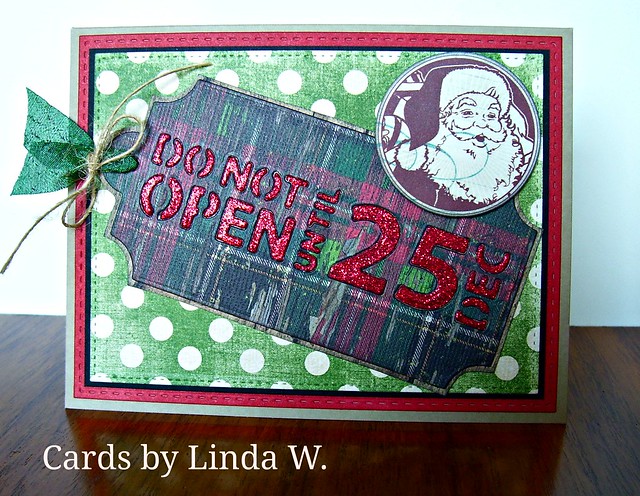
I used the inlay technique to fill the tag's cut out lettering which was a bit tricky. I tried a product called Peel 'N Stick which was super sticky - it was not forgiving if you put your letter in at a wrong angle! I had to recut a few letters and put glue on them, after struggling to get the misapplied letter out!! Not to mention getting my fingers stuck in the open spots while I was filling in others. I definitely liked Stick-It better for this type of project. Here's my inspiration card:
Do Not Open tag


Supplies: Paper - Kraft card by unknown, Anchor Paper black; the Paper Studio Pine St. Square & Old World Winter patterned papers and glitter paper; My Mind's Eye Lost & Found Christmas (special edition) - for the Santa head; 
Dies - Xcut Do Not Open Tag, Simon Says Stamp Bundle of Stitched Shapes, My Favorite Things Die-Namics Blueprints 20, Circle die by unknown; Other - May Arts ribbon and string twine, foam tape

The tag alone on the card layers looked a bit plain so I decided to put something in the top corner to anchor it. I found the perfect vintage Santa in a circle on a piece of MME paper - yay! I really liked the addition.

How are your Christmas cards coming along? I have over 40 cards made already - I'm so excited!!

Thanks for stopping and have a wonderful Monday!


Monday, August 1, 2016

Same stamp challenge

Happy Monday and, wow, it's August already!! I'm back with another Christmas card challenge to my friend Heather. We're doing this for July and August while Merry Monday takes a break (remember you can still upload to Lori's Summer Link-up here).

Challenge #5 - Use the same stamp - Penny Black's Snow Family

I know Heather has this stamp because she stamped off a few images and sent them to me to color. Thanks again, Heather!! I have a nice pile of various images to color when I have a chance and this sweet snowman trio caught my eye for this week's challenge. Here's my card:

Snow Family circle

Supplies: Stamps - Penny Black's Snow Family; Hero Arts CL343 Holiday Sayings (sentiment); 
Our Daily Bread Snowflake Background
Dies - Simon Says Stamp Circles (2 sizes); My Favorite Things Die-Namics Blueprints 28 (banner)
Ink - Hero Arts Unicorn White; Distress Ink - Salty Ocean
Paper - Card Base by unknown, the Paper Studio glitter paper; Other - Copic Markers

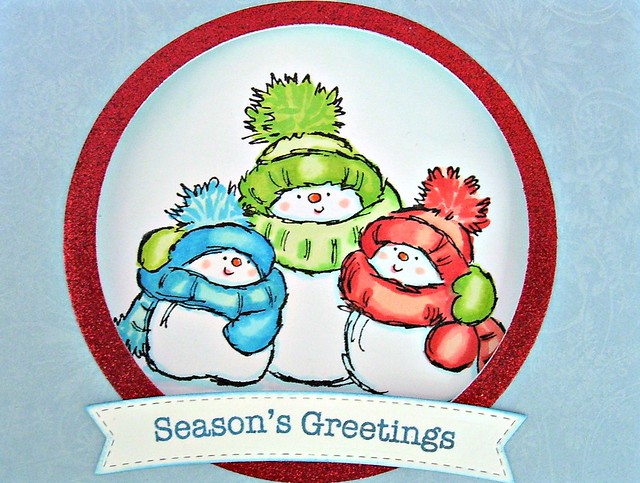
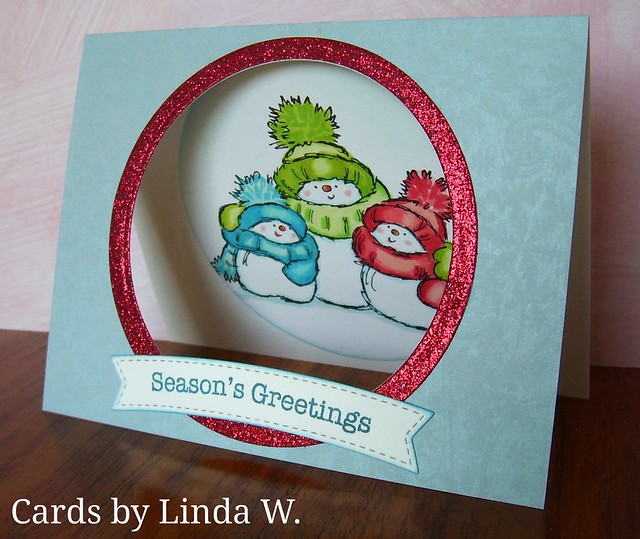
I colored the image Heather sent me with Copic Markers, then die cut it into a circle. I cut a hole in the top of the card base using a smaller circle and stamped it with the snowflake background, then added a glittery border cut using both circles. I adhered the snow family on the inside of the card, then added a sentiment banner across the opening. Here's how it looks propped open:

Seasons Greetings Snow Family

Any snowman image would do if someone is playing along and doesn't have the Snow Family. I can't wait to see what Heather's creates and also what she has in store for me this week!

Happy creating everyone and thanks for stopping by!

Monday, July 25, 2016

Another Christmas in July Challenge - Emboss/Resist Technique

Time for another Christmas in July Challenge to my friend Heather (and anyone else playing along).

Challenge #4 - use the Emboss/Resist Technique on your Christmas card


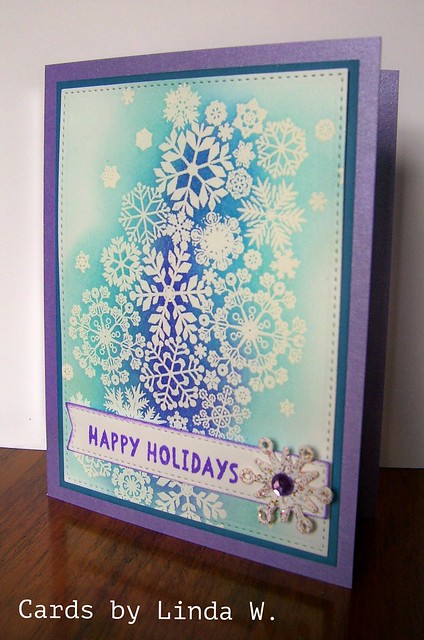
A couple weeks ago, Heather made a delightful blue snowflake card with dry embossing. I was inspired to create a similar card using a stamp & the emboss/resist technique. I made a couple emboss/resist panels and put them on two different colors of card base. Here are the cards:

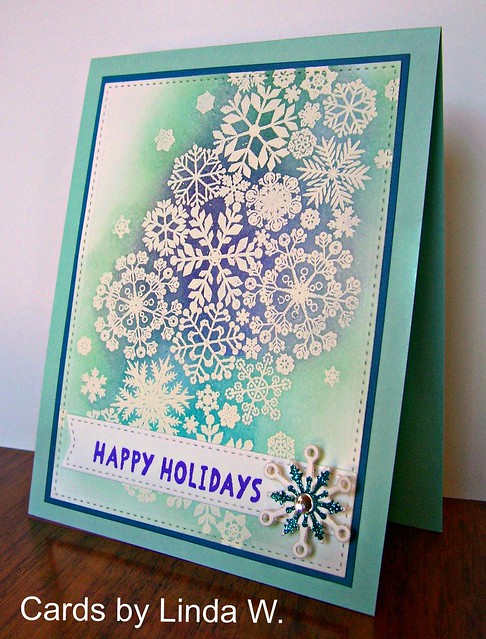
    Snowflake Happy Holidays  Happy Holidays snowflakes 2
Supplies: Stamps - Urban Stamps "Snowflake Lace"; Hero Arts CL803 Family & Friends (sentiment)
Dies - Spellbinders Holiday Greetings (smallest snowflake); MFT Die-Namics Blueprints 20 (stitched rectangle & banner)
Paper - Anchor Paper purple card; Hero Arts Azure layering paper; Neenah Solar White card stock
Ink - Tim Holtz Distress Inks Tumbled Glass, Salty Ocean, & Wilted Violet; Perfect Medium
Embossing Powder - Detail White by Stampendous; Icy Stickles, Hero Arts Floral mixed accents (gem)

I found this gorgeous snowflake background on a recent visit to CF Stamps while traveling to visit my parents. After stamping the snowflakes with Perfect Medium and heat embossing it with the Detail White powder, I sponged it with the three Distress Inks. Then I die cut the panel with the stitched rectangle, adhered it to a blue mat and onto the card base. I love how changing the position of the die changed the look between the two cards! I die cut the banner, then stamped the sentiment on it using my mini-MISTI. I applied Stickles to one snowflake, plus a gem; to the other I added a sticker snowflake (Hobby Lobby) that already had a gem on it. Although purple is my favorite color, I rather like the aqua version better.

I'm eager to see Heather's beautiful creation and I can't wait to see what she's cooked up for me this week!!

Sunday, July 24, 2016

One more one-layer Christmas card and a sympathy card

Back with another version of my challenge card to Heather earlier this week. She did any amazing job with the challenge - see her card and tag here!!

Yesterday I went to an all day workshop with our Region of Sweet Adelines International - so inspiring with an amazing guest clinician, Tori Postma! I came home and relaxed a bit with another Hallmark movie but still had some energy from the exciting day. I spotted the stamp set I used on Monday's challenge and I couldn't resist trying another one-layer. This time it was a true one-layer as all the inking was with inks that don't bleed through the paper. Here's my card:

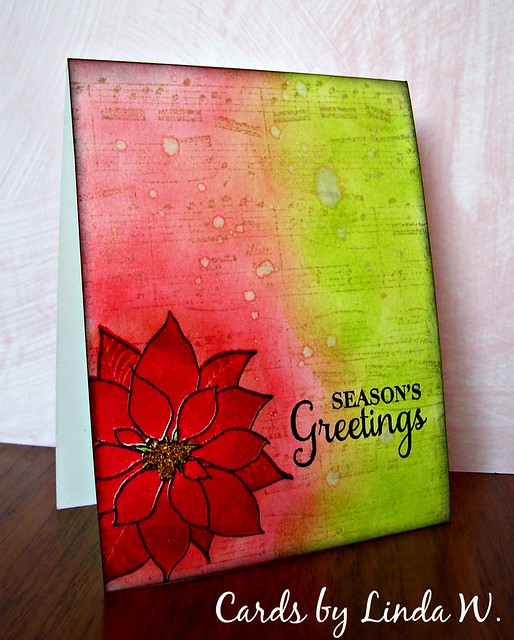
Seasons Greetings one layer

Supplies: Stamps - Hero Arts CL796 Peace Poinsettias; CG222 Music Background
Paper - Neenah Solar White; Other - Bronze Distress Stain; Mustard Seed Stickles
Inks - Distress Inks - Candied Apple, Spun Sugar, Fired Brick, Twisted Citron, Black Soot; Memento Tuxedo Black

I decided to use the solid poinsettia image with Distress Inks and then stamped the outline over top - so easy with MISTI! Then I sponged Distress Inks around the flower, masked it, and stamped the background. I used bronze Distress Stain mixed with a bit of water for some splatters - quite a nice shimmer, even if some of the splatters got a bit splotchy. Some Stickles for the flower center and some shading around the card edge - done! The colors really are this vibrant and I ended up loving how it turned out.

So - another Christmas card added to the stash! Be sure to stop back tomorrow for the next challenge to Heather - I made a couple of versions of the inspiration card. I can't wait to see what she has in store for me!

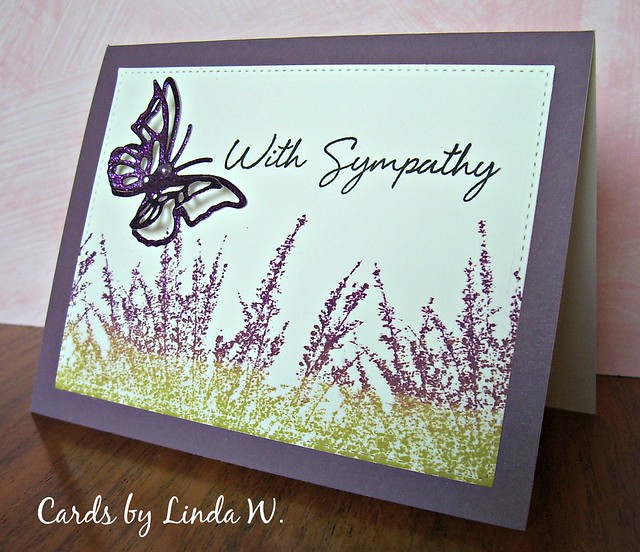
I learned some sad news - a former coworker passed away on Friday. I retired from work almost four months ago but Colleen was still working for another year. I was shocked and saddened to learn that she won't be enjoying the fruits of all her years of hard work with a blissful retirement. I made this card for her family:

With sympathy butterfly

Supplies: Stamps - Penny Black Pastoral; Hero Arts CL574 Say it All; Dies - Xcuts 3D Butterfly; MFT Blueprints 20
Inks - Distress Inks - Seedless Preserves, Frayed Burlap
Paper: Hero Arts Aubergine; Neenah Solar White; DCWV glitter paper

I hope the card brings some comfort. Thanks to Heather for sending the yummy butterfly die I used and thanks for stopping!!

Monday, July 18, 2016

Christmas in July Challenge 3 - One layer card

Wow - it's time for Christmas Challenge #3 to my friend Heather already! We are adding to our Christmas card stash this summer by challenging each other to make various themed Christmas cards.

Challenge 3 - Create a one layer Christmas card

Here's my card:

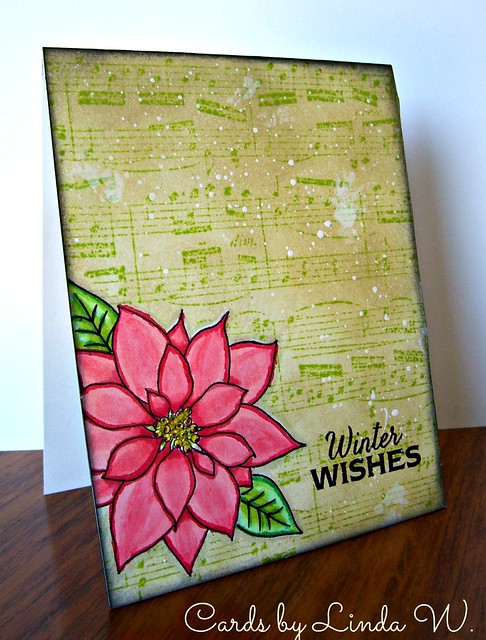
Winter Wishes poinsettia
Supplies: Stamps (all Hero Arts) - CG222 Music Background; CL796 Peace Poinsettias; DC113 Let it Snow Stamp&Cut. Retired from Hero Arts' shop but all available at Simon Says Stamp and probably other sites. 
Other - Copics; Stickles; Distress Inks; Distress Paints; Memento Tuxedo Black Ink

Process:
Cut a 4.25x5.5 white panel.
Stamp the poinsettia with Memento Tuxedo Black Ink.
Mask the flower and stamp the leaves (same ink). Using the MISTI made it so easy!!
Mask the flower and leaves, then stamp the musical background with Twisted Citron Distress Ink.
Once dry, sponge the background with Old Paper Distress Ink.
Add splatters of Picket Fence Distress Paint (I blotted any large splatters into blotches).
Remove mask & dry panel thoroughly (I left mine overnight).
Stamp the sentiment with Black Soot Distress Ink.
Color the flower and leaves with Copic markers of choice.
Ink the panel edges with Black Soot Distress Ink.
Add Stickles to flower berries.
Adhere panel to an A2 top folding card base; I didn't stamp directly onto a card base since I knew I'd need to cover up the Copic bleed through - is that cheating for a one-layer? So be it!

Merry Monday had a one-layer challenge earlier this year and I hated my card! I'm hoping I redeemed myself with this one and am adding it to Lori's summer link up. The Merry Makers will be back with new challenges in September.

Hope Heather (and anyone else who wants to play) enjoys this challenge. Happy crafting and thanks for visiting!


Tuesday, July 12, 2016

Christmas in July Challenge 2 - Dry embossing and Snowflakes

Hi all - back with the second challenge to my friend Heather Maria so we keep working on our Christmas cards this summer. Merry Monday is off (**see note at end) for July and August so we came up with this way to continue creating a weekly Christmas card. I'm calling the July challenges "Christmas in July".

Challenge 2 - use dry embossing and snowflakes on a Christmas card. 

I made the following card as inspiration:

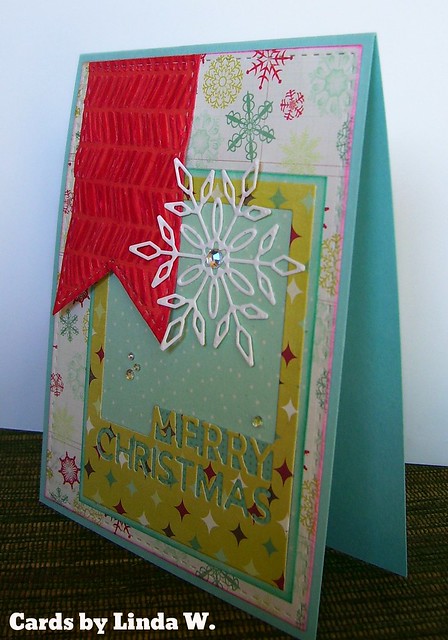
Merry Christmas polaroid
Supplies: Paper - Neenah Solar White; Basic Grey Juniper Berry; My Mind's Eye Mistletoe Magic; Anchor Paper Berrylicious card stock; scrap of teal behind the letters from my stash by ??
 Dies - Simon Says Stamp Bundle of Stitched Frames (frame and banner) & Holiday Frames (Polaroid); Snowflake by ?? (the die was loose in my box with no packaging
Embossing folder - Xcuts Herringbone Pattern

I embossed a piece of red paper using a herringbone folder Heather gave me when we got together in June. Thanks again, Heather - love it!! It embosses a 6x6 sheet but I decided to die cut it into stitched banners. I thought a banner worked well with the Polaroid.

I look forward to seeing Heather's take on my challenge and what she dreamed up for me to create this week. Anyone else want to play along? Just pop your link in the comments; I'd love to see your creations!

Wishing you a crafty day!! I'll be back later in the week with a card for Heather's challenge.

** NOTE: Lori from Merry Monday has posted a link-up for July/August if you want to upload new cards made using past challenges so you can keep the production going. I will definitely play along there too!!

Monday, July 4, 2016

Happy 4th & Christmas in July challenge

Happy 4th of July to all celebrating in the USA! I'm sure to be watching the fireworks tonight after a fun day with my family!! Hope you're having a great Monday whatever you're doing!

No Merry Monday today or the rest of this month and next. The Merry Makers have taken the summer off to relax and enjoy family. Wishing them all the best and I thank them for all the inspiration the rest of the year! But what's to be done about continuing the momentum of getting my Christmas card stash ready for December?? My friend Heather Maria has played occasionally in the Merry Monday challenges but her schedule had been too busy lately. She was ready to jump back in, only to discover the hiatus - she offered to throw challenges out to me every week, in lieu of Merry Monday. How great is that?!! I thought it would be fair to throw a challenge back to her! I'm calling the July ones "Christmas in July".

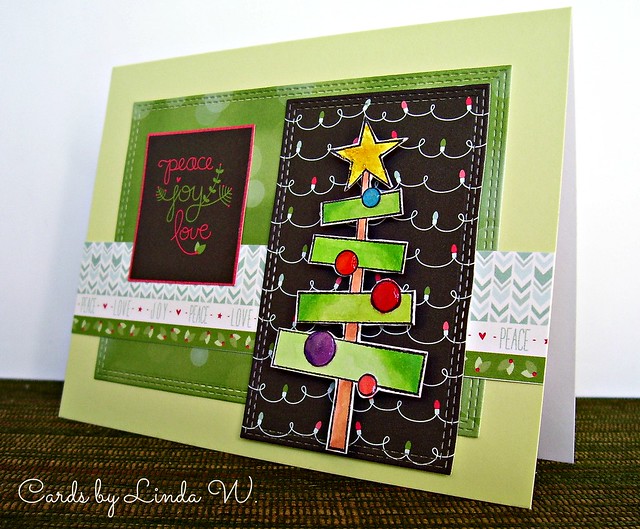
So here's my first challenge to Heather - make a Christmas card with a tree on it. Any tree will do but my sample card today features an artsy Christmas tree. I stamped the tree with a designer woodblock stamp created by Shari Carroll back in 2013 when she was still with Hero Arts - just love this one! And if you happen to need a challenge to keep your Christmas card momentum going, feel free to play along and share your link in a comment. No prizes, nothing formal like a linkup - just a little fun each week.

Peace Joy Love Tree
Supplies: Paper - Hero Arts Celadon folded card; Lawn Fawn's "Peace Joy Love" 6x6 pad
Stamp - Hero Arts woodblock G5805 Shari's Tree No.3 
Dies - My Favorite Things Double Stitched Rectangles
Ink - Memento Tuxedo Black; Other - Copic Markers; Glossy Accents; 
Distress Stickles (Mustard Seed); Foam tape under the tree for dimension

Can't wait to see what Heather (and anyone else who feels like playing along) creates!! And I'll be looking for her challenge to me so I'll have a second Christmas card done by the end of the week - yay!

Thanks for stopping by and if you need more Christmas inspiration, check out Merry Monday. While there are no current challenges there, you can get loads of ideas from the past ones.