Welcome to my blog!

Thanks for visiting my blog. As the title suggests, I love to scrapbook, stamp, and sing! I will share cards and scrapbook pages I create, as well as information about my music - Barbershop harmony.
Showing posts with label Tim Holtz Creative Chemistry 103. Show all posts

Thursday, August 11, 2016

Creative Chemistry 103 Day 2 homework

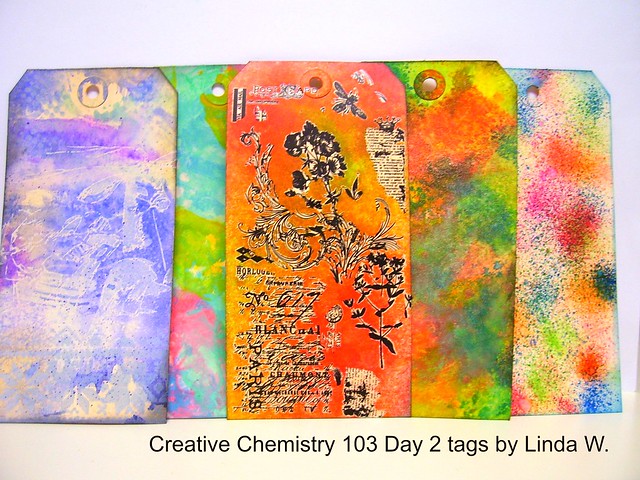
Happy Thursday! I was able to complete the homework for Day 2 of Creative Chemistry 103. The gallery closes tomorrow night so I'm happy to have one more day to add (prize winners will be chosen tonight). It's been a busy summer so I'll continue to work on the techniques as I'm able. Here's a photo of the tags I made for all five techniques Tim Holtz showed us that day (8/2):

Creative Chemistry 103 Day 2 tags

Left to right - Distress Paint Resist, Distress Paint Lifting, Distress Stain Rub Resist, Distress Luminous Mica, Distress Marker Spritzed Watercolor

I enjoyed these lessons too - I think my two favorites were the Remnant Rub Resist and the Mica Spray. Read on for a closer look and a supply list....

I combined the tags from the first two techniques into one photo to save time. My first try at the Paint Lifting wasn't so great so I did a second one (on the right ).
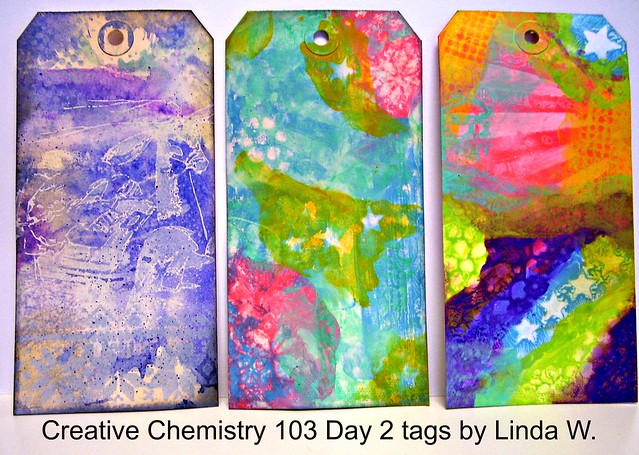
Creative Chemistry 103 Day 2 tags First two techniques
Tag one supplies: Stencils - Dot Fade THS006 and Holiday Knit THS028 
Distress Paints - Antique Linen, Weathered Wood
Distress Stains -Wilted Violet, Salty Ocean, Tumbled Glass, Shaded Lilac
Stamp - Stampers Anonymous Tim Holtz CMS141 Christmas Time;
Distress Ink for edges - Black Soot and definition;Ranger #8 Manila Tag
Tags two and three supplies: various TH stencils & Distress Paint colors; Ranger #8 Manila Tag

For tag one I stamped and stenciled the paints on (used a brayer on the stamp). This sent me on the merry chase to find my brayer - finally found it in with my embossing supplies - whew! Once dry I swiped the tag through the Distress Stains, then dried it. Can you see Santa and the reindeer? After I took the photos I added more Black Soot ink with a foam tool; this gave it more definition. Please tell me someone else out there uses a hair dryer as a heat tool.... (mine has a cool air feature and I use it on LOW).

Here are my tags for the final three techniques; again, I saved time by photographing them together.
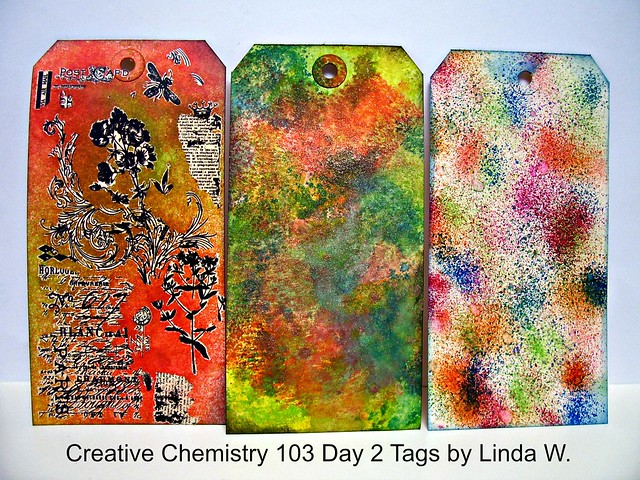
Creative Chem 103 Day 2 Last 3


Tag one supplies - Remnant Rubs (from Botanical and Elements), Distress Sprays - Fossilized Amber, 
Abandoned Coral, Twisted Citron; Black Soot Distress ink for edges; Ranger #8 Manila tag
Tag two supplies - various Distress inks; Distress Sprayer with water; 
Distress Mica Spray - Antiqued Bronze; Ranger #8 Manila Tag
Tag three supplies - Distress Markers (probably about 12 of them) and Distress Marker Spritzer; Ranger #8 Manila Tag

With the remnant rubs, the trick is to be random. I did ok but got a few odd bits in there. The photo doesn't capture the gorgeous shine of the mica spray on the middle tag - sooooo amazing! It was fun trying to pick up the misted inks off my craft sheet. I got a few blobs that a re-mist didn't help - oh well, I liked it anyway! My Spritzer technique needs some work but I did pretty well with most marker colors I picked. A couple of my markers just didn't want to play nicely so I skipped on to another one. I didn't try to cover the whole tag or blend it in any way. I just added a bit of Salty Ocean to finish the tag edges.

Thanks for stopping for another Creative Chemistry post - maybe I'll be able to blog the remaining homework when I get to it....
Wednesday, August 10, 2016

Creative Chemistry 103 - Day 1 homework

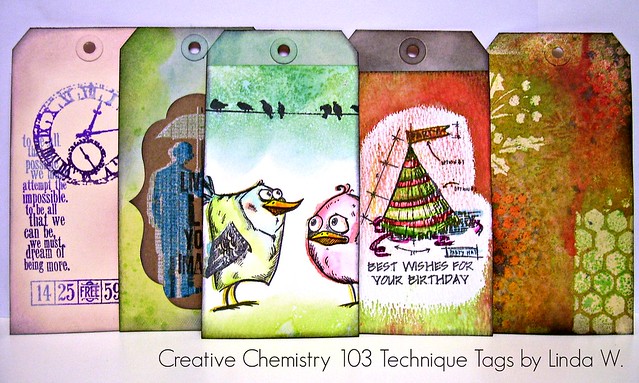
Hi all - I'm taking Tim Holtz's latest Creative Chemistry class (103 - started 8/1) and enjoying it thoroughly! Have reviewed all the lessons but am quite behind on the "homework". Last night I finally settled down to finish the Day 1 techniques. Tim has you do all the techniques on #8 tags so you can put the details on the back from a printed pdf  - very fun! Here are all 5 technique tags from Day 1:

Creative Chemistry 103 Day 1 tags
Left to right - Distress DIY Ombre, Distress Highlight Stamping, Distress Off-set Stamping, Distress Washed Watercolor, Distress Micro-Glaze Resist

Read further if you want to see each tag alone with a supply list....

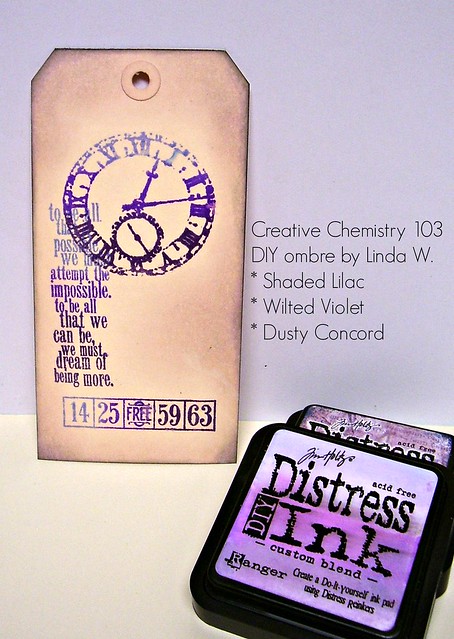
The first technique called for making and using a Distress DIY Ombre pad. I bought some custom ink pads when they first came out but had yet to use them - typical. On Day 1 of class, I couldn't wait to make an ombre pad with purples - used Shaded Lilac, Wilted Violet, and Dusty Concord refill inks. This was my first chance to stamp with it though. I stamped with 3 different clear stamps and really liked how it turned out. To finish, I sponged around the images with a couple other colors . A note about this stamp set - it's old - from 2009's Tim Holtz Visual Artistry Collection. If you search his line on Simon Says Stamp, you will see the images repackaged in different sets now. Here's a closer look:

DIY ombre tag
Supplies: Ink - Distress DIY ombre, Milled Lavendar, & Black Soot
Paper - Ranger #8 Manila Tag; Stamps - Tim Holtz Clear Stamp "Life's Possibilities"

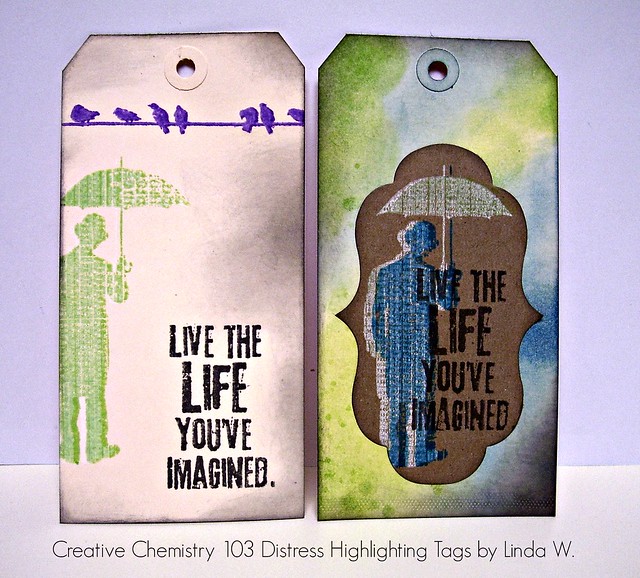
Next was the Distress Highlight Stamping technique. I've done this with other kinds of inks but this was the first time using Picket Fence - very fun. I had a pile of manila tags out and first did it on manila - oops. It was supposed to be on kraft. I probably have some kraft tags around here somewhere but I didn't want to waste time looking. So I cut a kraft label and did the technique on it, then added to a manila tag. Here's a photo of both versions - you can barely see the effect on manila but the Picket Fence still softens the colored ink. It's much more dramatic on the kraft.

Distress Highlighting Tags
Supplies: Ink - Distress Twisted Citron, Wilted Violet, Picket Fence, Salty Ocean, Milled Lavendar & Black Soot, 
Ranger Archival Wendy Vecchi Watering Can; Die - Tim Holtz Styled Labels
Paper - Ranger #8 Manila Tag, Hero Arts kraft; Stamps - Tim Holtz Clear Stamp "Life's Possibilities"

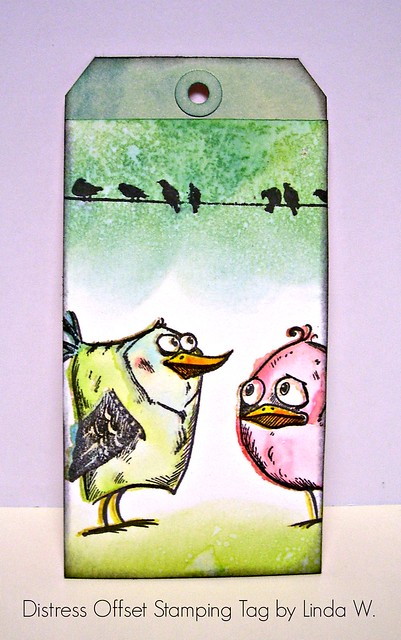
Third - Distress Off-Set Stamping. For this one, you stamp in a light ink, watercolor the image, then stamp again; a bit off-set, with an archival ink. I decided to color some Crazy Birds - so cute. To finish, I added birds on a wire - just for fun :)

Distress Offset Stamping Tag
Supplies: Ink - Distress Antique Linen, and a variety of other inks, Ranger Archival Wendy Vecchi Watering Can
Paper - Ranger #8 Manila Tag; Tim Holtz Watercolor Paper
Stamps - Stampers Anonymous Tim Holtz Collection CMS212 Bird Crazy, Tim Holtz Clear Stamp "Life's Possibilities"

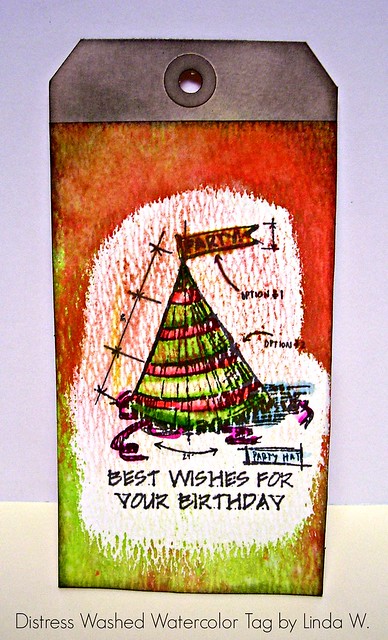
Fourth - Distress Washed Watercolor. Oh my, mine didn't turn out so great! I didn't get enough micro-glaze in the area around the top of the party hat. When I sprayed some Distress Stain, I got a bunch of droplets where I didn't want them - oh well...

Distress Washed Watercolor Tag
Supplies: Distress Stains - Abandoned Coral, Twisted Citron; Inks - Black Soot, various Distress Markers
Paper - Ranger #8 Manila Tag, Tim Holtz Watercolor Paper; Other - Distress Micro-Glaze
Stamps - Stampers Anonymous Tim Holtz Collection Simon Says Stamp Stamptember 2015 

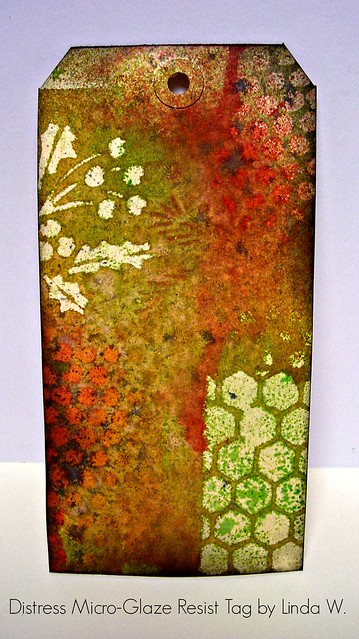
Fifth & Final - Distress Micro-Glaze Resist. This was such fun, even though I wasted a lot of time looking for my pile of stencils. I only managed to find a loose Christmas one and one packaged with a stamp set. Wow - I need to organize my stash!! For this technique you stencil with the micro-glaze and spray over it, dry it and repeat with more stencils and sprays. As you layer, the effects are more subtle since you do them over color. The first layer, once your wipe the spray off the glazed areas, is more stark with the manila tag showing through. Of course, you can leave some of the spray as I did on parts of my manila. To finish it, I highlighted some of the resisted areas with some Black Soot ink.

Distress Microglaze Resist Tag

Supplies: Ink - Distress Black Soot; Distress Sprays Abandoned Coral, Twisted Citron, Fossilized Amber, Hickory Smoke
Paper - Ranger #8 Manila Tag; Stencils - Stampers Anonymous Tim Holtz Collection THMM101 (a combo stencil and stamp set I found at Michael's), Festive THS029

I won't have a chance to blog all the homework but I enjoyed doing Day 1. The class is still open but once it ends with a live forum, you can still take the class at Online Card Classes. I love this option since we don't have any local places doing classes right now! Thanks for stopping and have a crafty day!