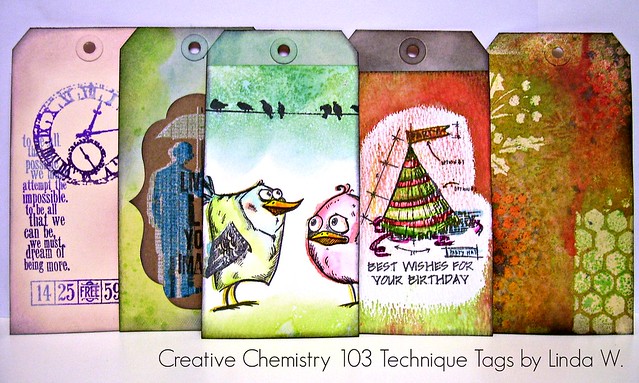
Left to right - Distress DIY Ombre, Distress Highlight Stamping, Distress Off-set Stamping, Distress Washed Watercolor, Distress Micro-Glaze Resist
Read further if you want to see each tag alone with a supply list....
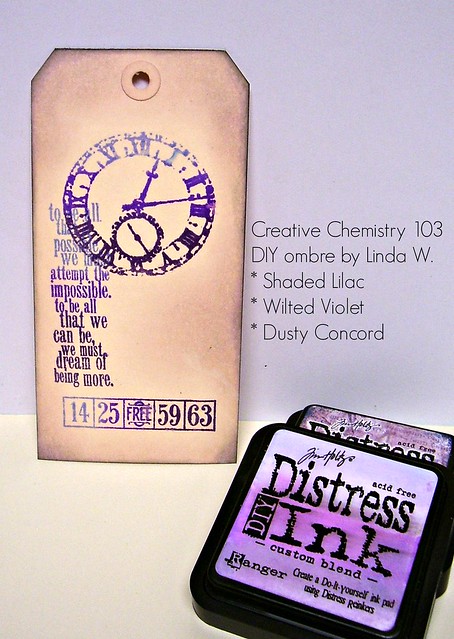
The first technique called for making and using a Distress DIY Ombre pad. I bought some custom ink pads when they first came out but had yet to use them - typical. On Day 1 of class, I couldn't wait to make an ombre pad with purples - used Shaded Lilac, Wilted Violet, and Dusty Concord refill inks. This was my first chance to stamp with it though. I stamped with 3 different clear stamps and really liked how it turned out. To finish, I sponged around the images with a couple other colors . A note about this stamp set - it's old - from 2009's Tim Holtz Visual Artistry Collection. If you search his line on Simon Says Stamp, you will see the images repackaged in different sets now. Here's a closer look:
Supplies: Ink - Distress DIY ombre, Milled Lavendar, & Black Soot
Paper - Ranger #8 Manila Tag; Stamps - Tim Holtz Clear Stamp "Life's Possibilities"
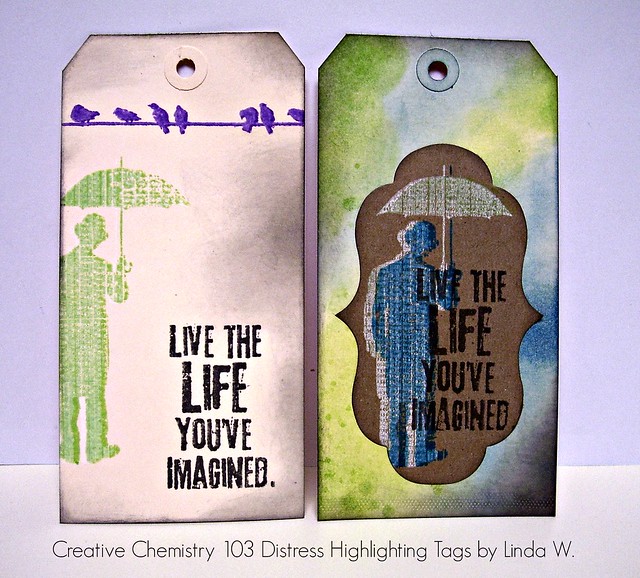
Next was the Distress Highlight Stamping technique. I've done this with other kinds of inks but this was the first time using Picket Fence - very fun. I had a pile of manila tags out and first did it on manila - oops. It was supposed to be on kraft. I probably have some kraft tags around here somewhere but I didn't want to waste time looking. So I cut a kraft label and did the technique on it, then added to a manila tag. Here's a photo of both versions - you can barely see the effect on manila but the Picket Fence still softens the colored ink. It's much more dramatic on the kraft.
Supplies: Ink - Distress Twisted Citron, Wilted Violet, Picket Fence, Salty Ocean, Milled Lavendar & Black Soot,
Ranger Archival Wendy Vecchi Watering Can; Die - Tim Holtz Styled Labels
Paper - Ranger #8 Manila Tag, Hero Arts kraft; Stamps - Tim Holtz Clear Stamp "Life's Possibilities"
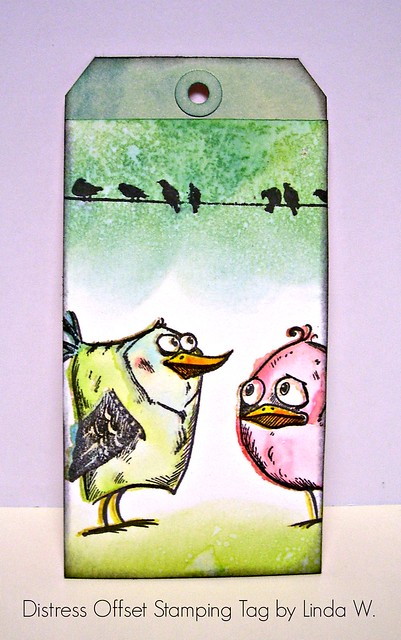
Third - Distress Off-Set Stamping. For this one, you stamp in a light ink, watercolor the image, then stamp again; a bit off-set, with an archival ink. I decided to color some Crazy Birds - so cute. To finish, I added birds on a wire - just for fun :)
Supplies: Ink - Distress Antique Linen, and a variety of other inks, Ranger Archival Wendy Vecchi Watering Can
Paper - Ranger #8 Manila Tag; Tim Holtz Watercolor Paper
Stamps - Stampers Anonymous Tim Holtz Collection CMS212 Bird Crazy, Tim Holtz Clear Stamp "Life's Possibilities"
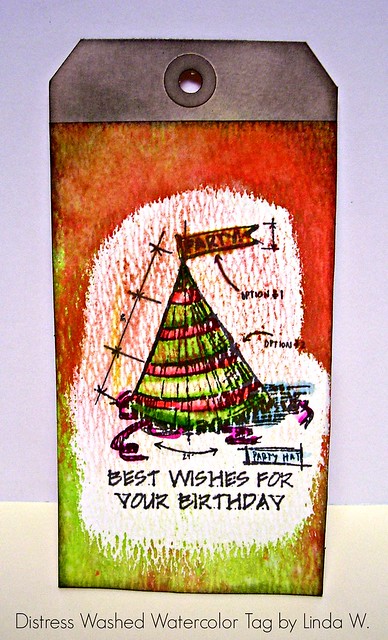
Fourth - Distress Washed Watercolor. Oh my, mine didn't turn out so great! I didn't get enough micro-glaze in the area around the top of the party hat. When I sprayed some Distress Stain, I got a bunch of droplets where I didn't want them - oh well...
Supplies: Distress Stains - Abandoned Coral, Twisted Citron; Inks - Black Soot, various Distress Markers
Paper - Ranger #8 Manila Tag, Tim Holtz Watercolor Paper; Other - Distress Micro-Glaze
Stamps - Stampers Anonymous Tim Holtz Collection Simon Says Stamp Stamptember 2015
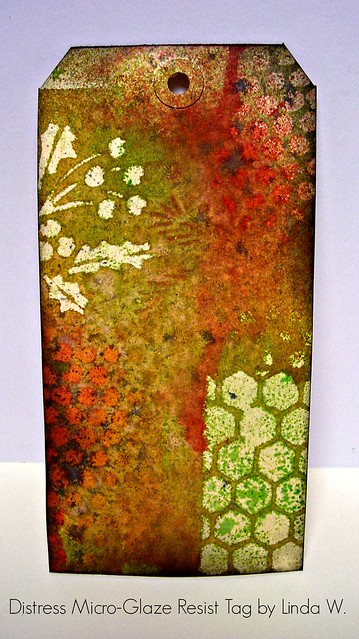
Fifth & Final - Distress Micro-Glaze Resist. This was such fun, even though I wasted a lot of time looking for my pile of stencils. I only managed to find a loose Christmas one and one packaged with a stamp set. Wow - I need to organize my stash!! For this technique you stencil with the micro-glaze and spray over it, dry it and repeat with more stencils and sprays. As you layer, the effects are more subtle since you do them over color. The first layer, once your wipe the spray off the glazed areas, is more stark with the manila tag showing through. Of course, you can leave some of the spray as I did on parts of my manila. To finish it, I highlighted some of the resisted areas with some Black Soot ink.
Supplies: Ink - Distress Black Soot; Distress Sprays Abandoned Coral, Twisted Citron, Fossilized Amber, Hickory Smoke
Paper - Ranger #8 Manila Tag; Stencils - Stampers Anonymous Tim Holtz Collection THMM101 (a combo stencil and stamp set I found at Michael's), Festive THS029
I won't have a chance to blog all the homework but I enjoyed doing Day 1. The class is still open but once it ends with a live forum, you can still take the class at Online Card Classes. I love this option since we don't have any local places doing classes right now! Thanks for stopping and have a crafty day!
5 comments:
looks like you had a fun stamping day Linda - that last tag is so pretty in those colors and love your goofy birds!
Looks like fun & they came out nice!
Well done Linda. I am not taking this class as I don't have a lot of the products used. But I am very impressed with your tags
What a class! May have to consider taking one like that--beautiful work!
You sure know how to use your stash and this class seems to be perfect! Love the Crazy Bird tag, so sweet... and I like it a bit off set. Well done, Linda!
Post a Comment