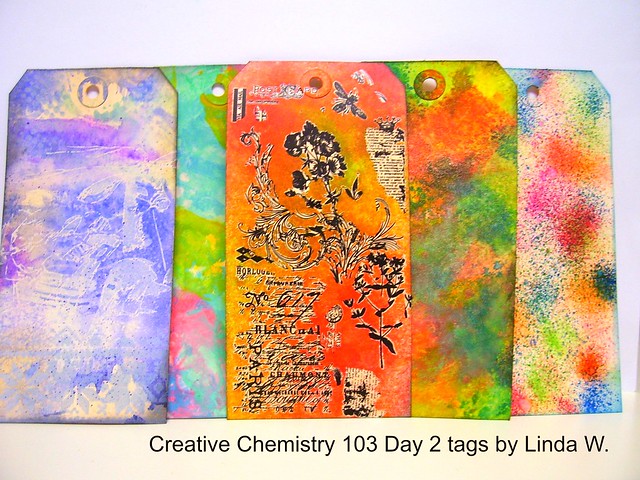
Left to right - Distress Paint Resist, Distress Paint Lifting, Distress Stain Rub Resist, Distress Luminous Mica, Distress Marker Spritzed Watercolor
I enjoyed these lessons too - I think my two favorites were the Remnant Rub Resist and the Mica Spray. Read on for a closer look and a supply list....
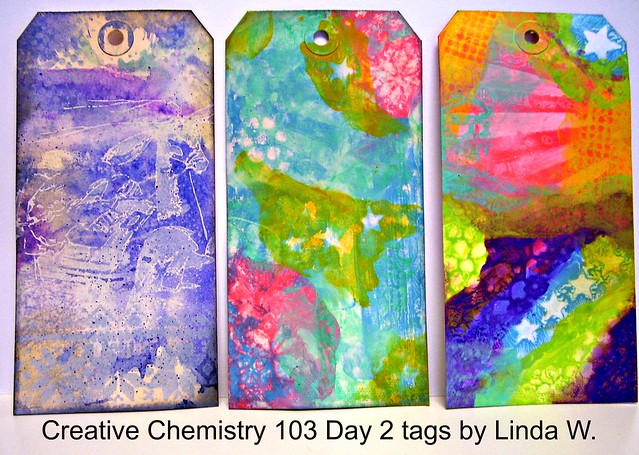
I combined the tags from the first two techniques into one photo to save time. My first try at the Paint Lifting wasn't so great so I did a second one (on the right ).
Tag one supplies: Stencils - Dot Fade THS006 and Holiday Knit THS028
Distress Paints - Antique Linen, Weathered Wood
Distress Stains -Wilted Violet, Salty Ocean, Tumbled Glass, Shaded Lilac
Stamp - Stampers Anonymous Tim Holtz CMS141 Christmas Time;
Distress Ink for edges - Black Soot and definition;Ranger #8 Manila Tag
Tags two and three supplies: various TH stencils & Distress Paint colors; Ranger #8 Manila Tag
For tag one I stamped and stenciled the paints on (used a brayer on the stamp). This sent me on the merry chase to find my brayer - finally found it in with my embossing supplies - whew! Once dry I swiped the tag through the Distress Stains, then dried it. Can you see Santa and the reindeer? After I took the photos I added more Black Soot ink with a foam tool; this gave it more definition. Please tell me someone else out there uses a hair dryer as a heat tool.... (mine has a cool air feature and I use it on LOW).
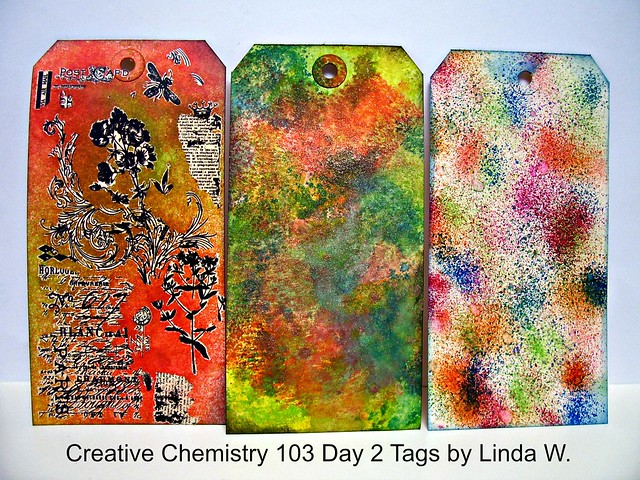
Here are my tags for the final three techniques; again, I saved time by photographing them together.
Tag one supplies - Remnant Rubs (from Botanical and Elements), Distress Sprays - Fossilized Amber,
Abandoned Coral, Twisted Citron; Black Soot Distress ink for edges; Ranger #8 Manila tag
Tag two supplies - various Distress inks; Distress Sprayer with water;
Distress Mica Spray - Antiqued Bronze; Ranger #8 Manila Tag
Tag three supplies - Distress Markers (probably about 12 of them) and Distress Marker Spritzer; Ranger #8 Manila Tag
With the remnant rubs, the trick is to be random. I did ok but got a few odd bits in there. The photo doesn't capture the gorgeous shine of the mica spray on the middle tag - sooooo amazing! It was fun trying to pick up the misted inks off my craft sheet. I got a few blobs that a re-mist didn't help - oh well, I liked it anyway! My Spritzer technique needs some work but I did pretty well with most marker colors I picked. A couple of my markers just didn't want to play nicely so I skipped on to another one. I didn't try to cover the whole tag or blend it in any way. I just added a bit of Salty Ocean to finish the tag edges.
Thanks for stopping for another Creative Chemistry post - maybe I'll be able to blog the remaining homework when I get to it....


2 comments:
Looks like you had fun, Linda! Beautiful tags with the various techniques!
Each tag is so unique and fun! I can tell that you are enjoying the class. These gorgeous and colorful tags show just that.
Post a Comment