Welcome to my blog!

Thanks for visiting my blog. As the title suggests, I love to scrapbook, stamp, and sing! I will share cards and scrapbook pages I create, as well as information about my music - Barbershop harmony.

Saturday, May 31, 2025

Last Day for Diva Watercoloring!

Hi everyone! I'm posting with the end-of-the-month team at Die Cut Divas today as inspiration for the last day of our May Watercolor ChallengeI couldn't resist doing the old watercolor print-making technique to create a background & embellishments for a Christmas card.


Supplies: Paper - Strathmore 300 Cold Press Watercolor;
Core'dinations A2 kraft card
Stamps - Art Impressions Woodland Critters Set
Dies - Art Impressions Large Snowflake Dies;
Other - Altenew 24 Pan set; 
Hero Arts Iridescent Shimmer Spray


Using a piece of watercolor paper as a work surface, I watercolored snowflakes that I'd die cut from watercolor paper. I did four snowflakes, moving the smaller ones around to add that color more places. I moved the snowflakes to a paper towel to add more color and to spray them with shimmer spray. Once dry, I die cut the work surface panel with a stitched rectangle & added it to an A2 kraft card. Stamped a sentiment from the Woodland Critters set & glued three snowflakes around it - done! I saved the fourth snowflake for future but you can see it off to the side in the photo.

For my bonus, I wanted to do a couple more pages for my mini watercolor journal started HERE. I already had two blank pages ready to go from that previous post; just not added to the journal yet.


Supplies: Paper - Strathmore 300 Cold Press Watercolor;
scrap of kraft
Stamps - Art Impressions With a Friend Window &
Dies - Art Impressions Mini Journal Template,
Other - Liquid watercolors & Altenew 24 Pan set

First I stamped the With a Friend Window image - one of AI's fabulous Windows to the World collection - onto watercolor paper. I watercolored it with leftover inks in my palette (mostly Altenew 24 pan), plus water.  Once dry, I die cut it with the back panel to the window frame die from the journal set. Then I cut the window frame from a scrap of kraft cardstock & layered it atop the watercolored panel. Added this to a journal page. I love how the window panes open to show more of the scene!

Next I stamped the mailbox from the Mini Journal stamp set & watercolored it, doodling some grass & flowers. Die cut it with the frame die that cuts an interior rectangle. Then I die cut a kraft frame to go around it. Glued this to the opposite page and added the pages to the journal. Here's a photo of how they fit:


There's room to add more artwork on the back sides of the pages I've completed, plus the insides of the covers and back. Kinda fun to work with the small scale.

Thanks for stopping by and I hope to see your watercolored project in the May Diva gallery by 9pm Pacific Time today!! Happy coloring!

Sunday, May 25, 2025

Kitty on a Quilt

Hello and welcome! Did you watch the Indy 500? Quite a race and a tradition for this holiday weekend.

I'm back with another stenciled card for Just Us Girls Anything Goes Stencil Week #776. I'm using new Waffle Flower I picked up last week on my Anchor Paper shopping spree.


Supplies: Paper - Paper Studio A2 card; 
Neenah Solar White; scraps
Dies - Waffle Flower Tiny Square Texture Die;
Stencil Waffle Flower Tiny Square
Die/Stencil Combo - Waffle Flower Fabric Lover
Other - various Hero Arts & Distress Inks;
printed sentiment strip (maybe SSS?);
Hero Arts iridescent shimmer spray

I started with a leftover pink A2 sized panel and die cut the tiny square texture. Stenciled the die cut with the coordinating three layers - 2 shades of pink and one grape. On the darker pink layer I also used shimmer spray over the stencil. Trimmed and layered onto an A2 card.

Next I die cut the kitty on fabric and stenciled with the coordinating stencils. I had a spare BPD birthday sentiment and a sub-sentiment strip in the bits box. Added them to the card.

I'll also add my card to Darnell's May NBUS Challenge #74 since my kitty and tiny square quilt supplies are newly used here.

That's it for today - back to my Sunday chores! Thanks for stopping by!!


Saturday, May 24, 2025

A Student Apple

Hi everyone - hope you're enjoying the weekend. Well, I did it again - watched Craft Roulette LIVE (Episode #268) and made my card during the show - woo hoo! It always reminds me of the old Hero Arts 90 minute Scrambles. Here's my 59th CR contribution:


Supplies: Paper - Recollections grey A2 card;
various scraps
Dies - Spellbinders May 2025 Small Die of the Month &
Classic Tales (DOML-Mar24) ;
Hero Arts Peeking Winter Bear (retired at HA,
Stencil - My Favorite Things Pastures, Ponds & Pools (retired)
Other - Taylored Expressions sentiment strip

Host Mary had another mother/daughter duo in honor of Mother's Day May - this week it was Crafty Al (‪@CallMeCraftyAl‬) & her daughter Presleigh who were also on the show last May. Crafty Al did a series of videos on her YouTube last December with Advent calendars & I faithfully watched her Spellbinders ones - so fun! 

As a reminder, they spin a wheel four times & you must incorporate the four items that the wheel lands on when making your project. The wheel was not very kind this week, in my opinion, but we made it work.


  • Project - Card for a Student: I included some books, one of which has STUDENT as the title.
  • Colors - Modern: I googled and found a palette with reds/greys/black, plus white which traditionally reads with black as modern. Sorry about the green leaves on my apple!
  • Element - Clothing: I gave my apple a scarf.
  • Random - Abstract Blob(s): I stenciled some blobs behind my apple & books. Hard to see the whitish one in the photo.

I had a box of new Spellbinders sitting beside me when the parameters were spun. I spotted the die set with the apple and some books, one of which had STUDENT so off I went. I die cut the apple parts, including glasses, and the book. I wanted another book, this time a larger one - so I pulled out an older Spellbinders die set.

Next, I went looking for an abstract blob stencil - nearest I could come was an MFT pond set. As I was going through my stencil box, I could hear Mary & the guests talking about a pond stencil - glad I was ok with using it! I recently made a bear card and the bear wore a scarf so I grabbed that die set to give my apple clothing. Presleigh made a grad cap and called it clothing so I suppose I could've use the cap die in the apple set. Oh well...

I picked a grey card and stenciled overlapping blobs (aka ponds) using white and grey inks. Added my assembled books and the apple with scarf. A printed sentiment banner finished the card.

I'll share my card at Darnell's May NBUS Challenge #74 since my apple set is newly used. 

Thanks for visiting and happy crafting!!


Friday, May 23, 2025

Framed Blooming Grace

Hey friends - TGIF!! I'm back with a stenciled card I made last night with two challenges in mind - Just Us Girls Anything Goes Stencil Week #776 and the May Pinkfresh Studio Challenge Frame it Up


Supplies: Paper - Paper Studio A2 card; scrap of green;
Neenah Solar White; Momenta watercolor print
Coordinating products - Pinkfresh Studio
Blooming Grace: stamps/dies/stencils
Dies - Pinkfresh Studio Essentials: Elegant Circles Die;
Other - Tim Holtz Dot Fade stencil;
various Hero Arts & Distress Inks

I popped over to my favorite local craft store Anchor Paper yesterday & found they have a May special on PFS products. I picked up a circle frame die set and the coordinating pieces of the Blooming Grace set. Perfect for both challenges and I thank my Diva teamie Cindy who inspired & enabled me on the circle frame with her beautiful card.

First I stamped, stenciled and die cut half of the Blooming Grace elements. Next I die cut the largest of the Elegant Circle Frames. I arranged three of the BG elements on & under the frame. I added it to a stitched rectangle on an A2 card. I had inked the rectangle's edges and stenciled some dots in a couple corners. 

I wanted another frame to focus the sentiment so cut the smallest circle. Added it to the large blossom spray. Stamped a sentiment from the BG set, fussy cut it and added it to the small frame. Done!

I'll also add my card to Darnell's May NBUS Challenge #74 since my Blooming Grace is new.

That's it for today! Hope you have a wonderful weekend - one with a Monday holiday in the USA to honor fallen military personnel. Many people go camping but I'll be crafting!

Thanks for stopping by!!


Thursday, May 22, 2025

A Steampunk Birthday Card

Hey friends - hope you're having a great week! We got several days of needed rain here but have a beautiful sunny day today - yay!

I mentioned being MIA due to an online event - BellaCon. I won a registration via a Craft Roulette drawing. There were four days of classes last week, broadcast LIVE via a private group, & I watched most of them. I had none of the materials, though, due to being "late to the party" as far as registering using my prize. A few of the classes involved card making and one had a Steampunk theme. I ordered the kit which included some dies and papers; it arrived on Monday - very quick service from Oregon, given just I took the class & ordered last Thursday! Here's my first card with the Paper Wishes class kit:


Supplies: Paper Wishes Steampunk Surprise Workshop &
A2 card formed from blue cardstock
Add'l supplies - MFT Blueprints 2 (retired);
Other - Black Soot Distress ink; TH kraft metallic; foam tape

When I ordered the workshop kit, I added the matching 6x6" paper pad so I'd have a smaller scale paper to coordinate with the included 12x12" papers. Good call as the larger papers have nice card front panels with a soft print on the reverse. I didn't mind cutting into the smaller scale panels to use the reverse print! Other papers have sentiments and other elements you can fussy cut so that's where I got my Happy Birthday. I die cut the gears from a copper paper, sanded them, then distressed with Black Soot, as I did the other papers.

I die cut a card front panel with a stitched rectangle and a background paper with a plain rectangle. Layered onto an A2 panel with some gears sticking out from behind the card front panel. Fussy cut the sentiment and added with foam tape. Done - very quick and easy.

I needed a birthday card for my cousin's husband who's birthday is next week. I thought he'd get a chuckle from the gnome-like guy with the vintage car! Since my gear dies and papers are new, I'll add my card to Darnell's NBUS Challenge #74.

That's it for today. I have received some other materials for more cards as shown at BellaCon so you'll see me again later... Happy crafting!


Wednesday, May 21, 2025

A Mini Watercolor Journal

Hi all - welcome! I'm posting the project below at Die Cut Divas today as inspiration for our May Watercolor Challenge


Supplies: Paper - Strathmore 300 Cold Press Watercolor;
Tim Holtz Gold Kraft Metallic
Dies - Art Impressions Mini Journal Template,
Mini Journal Set & Exclusive Sparrow 
(a freebie not sold; On the Sparrow Set would also work)
Other - Liquid watercolors & Altenew 24 Pan set


I love Art Impression who's our May sponsor - thanks AI! I wanted to use one of their mini journal die sets for my watercoloring. First I die cut the journal cover and pages from watercolor paper. I watercolored these with leftover green & yellow inks in my palette (mostly Hero Arts), plus water. I used a large flat brush and made a texture as I applied the ink. After the cover dried, I added the gold clasp and photo corners, cut from TH gold metallic. Here's a photo of the closed journal cover in my hand so you can see the scale:


Next I die cut two scalloped rectangles from the journal set to layer onto a couple pages. I stamped a sparrow on one and the birdhouse on the other. I watercolored these with Altenew 24 pan watercolors. The bird image was a freebie that came from AI with an order; they have wonderful freebies! I doodle painted some leaves on the branch and some grass below the birdhouse. Nothing special - I'm not good at watercoloring!! Glued them to the pages and glued the two pages together, overlapping at the center tabs. Here's a photo:


Finally, I glued this pair of pages (the journal packaging shows doing two) into the journal. I didn't do the flip sides of these pages yet; that'll be for another day. Here's a photo of the journal open with the above pages glued in. You glue another set of pages to the right side.


Since I did the journal and a couple pages, I don't have an additional bonus project today. I'll add my project to Darnell's May NBUS Challenge #74 since my journal dies are newly used. 

Thanks for stopping by and I hope to see your water colored project in the May Diva gallery!! Have a crafty day!


Friday, May 16, 2025

Stitched Ornament on 4Bar Card

Hi everyone - TGIF and it's really TGIFF for FUNN Friday at Craft Roulette! Here's my creation, made LIVE during Episode #267 - I love doing that!

Supplies: Paper - Neenah Solar White; scraps 
Stamps - Hero Arts Winter Wishes
Dies - Spellbinders ornament from Day 10 of
Elizabeth Craft Designs Pine Cones (retired
but found HERE at Frantic Stamper);
Sizzix Vault Festive Wreath (bow)
Stencil - Tim Holtz Dot Fade
Other - Hero Arts Dusty Blue  & 
Memento Danube Blue inks; DMC floss;
Honey Bee gems' foam tape

And here's the shareable poster that you can get when you're submitting at CR. Quick and easy way to have the parameters right with the card!


  • Project - 4 Bar: I formed a card by scoring 5x7" cardstock at 3.5" on the 7" side.
  • Colors - Craft Store: Anything goes, really!
  • Element - Sew(s)(ing)/Sewn: I used a Spellbinders stitching die & stitched it with embroidery floss.
  • Random - Stencil: I stenciled the corners of my mat layer with a dot pattern.

Host Mary Gunn Funn planned to have a different guest but that person fell ill. So Mary invited Brennan Keane of Brennan's Crafty Corner, a 17 year old who started card-making during Covid! So talented & he had no trouble with the parameters.

I've said it before but I do better submitting during the show when I use die sets. When the sewing parameter came up, I went for a Spellbinders stitching die set from 2024 that I hadn't used yet. I die cut the stitch-able ornament plus a solid backing from a scrap of pink card stock. I stitched it with navy floss and added gems to the holes that die cut in other rows of the ornament diecut.

Next I formed the 4 Bar card and added a mat layer that I'd stenciled with some dots. Die cut an ECD branch and a bow. Assembled everything onto the card and stamped JOY for a bitty sentiment. It's been ages since I've made a 4 Bar card - kinda fun!

I will link my card to Merry Little Christmas #62 where Anything Goes & to Darnell's May NBUS Challenge #74 since I used the ornament die for the first time here. And to Creative Crafters #88 where Anything Goes.

That's it for tonight, friends. If I've been MIA, it's because I'm doing the Bella Crafts Publishing BellaCon event online. I won it during a Craft Roulette prize drawing a few weeks ago. It started Wednesday and ends tomorrow - mostly during the daytime hours & the YouTube videos can be watched on replay if a participant can't watch live. They featured lots of different crafts like jewelry making, rope bowls, painting, as well as card making. Amanda from Pear Blossom Press made an adorable shaker card today using Lawn Fawn's blender die set. PBP has the battery operated light mechanisms but for BellaCon, Amanda created one that also vibrates. It jiggled the shaker elements without moving the card, plus the blender setting buttons lit up - so fab!!

Thanks for visiting & happy crafting!!


Wednesday, May 14, 2025

Cocoa with Gingerbread

Welcome back! Today I'm sharing my third and final card for the May Christmas Kickstart Challenge #98 featuring Winter Warmers. This was the direction I was heading when I pivoted and made my Colorado Craft kitty card on Sunday. I couldn't resist going back to this cute cocoa cup from Simon Says Stamp. I bought it a while ago and hadn't given it a go until now.


Supplies: Paper - Neenah Classic Crest Solar White;
Paper Studio Christmas Basics; Park Lane A2 card
Stamps w/dies - Simon Says Stamp Merry and Sweet Festive Fun;
Taylored Expressions Seasons Sweetings (dies)
Dies - Hero Arts Nesting Oval Infinity Dies;
Sunny Studio freebie snowflake
Other - Copic Markers; foam tape; 

I stamped & die cut the cup image, then colored with Copics. Die cut a stitched rectangle and adhered to A2 card. Die cut a patterned oval & solid mat layer. Added the cup to the oval & adhered to card. Added a die cut snowflake to the cup & the stamped/die cut sentiment to the background. Looking at it, the sentiment gets a bit lost among the candy canes in the background - might have to fix that!

I will also link my cocoa card to Merry Little Christmas #62 where Anything Goes & to Darnell's May NBUS Challenge #74 since I used the cup for the first time here.

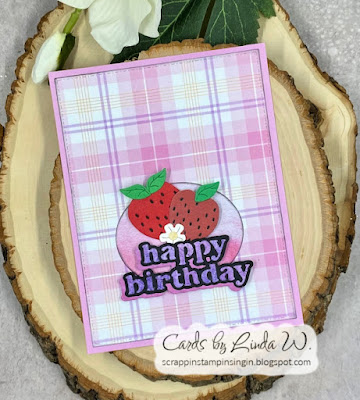
How about a bonus card! I had some leftover strawberry pieces from yesterday's creation. I made something quick and easy, inspired by Bonnie's sweet strawberry card (#2 HERE). I liked her simple pair of strawberries with the flower.


Supplies: Paper - Paper Studio A2 card; scraps;
My Favorite Things Orange Sherbet
Dies - Spellbinders Strawberry Patch DOML-Aug22 (retired);

Simple die cutting and assembly for this one! I'm adding it to Seize the Birthday #305 where you can do FLOWERS or ANYTHING GOES. Since I only have one flower here, I'll just pop it under Anything Goes!

And before I go, a quick photo of some real flowers. I have lilies of the valley that grow alongside my garage. I love these sweet flowers!! Nothing else is blooming in the garden yet...


That's it, friends! Thanks for stopping by and happy crafting!!


Tuesday, May 13, 2025

Strawberry Basket Birthday

Hey friends - After finishing yesterday's card, I started another for Just Us Girls #774 where the word is FRUIT! This my second of a possible three entries:


Supplies: Paper - Neenah Solar White;
Paper Studio A2 card; American Crafts Spring;
My Favorite Things Orange Sherbet; scraps
Dies - Spellbinders Strawberry Patch DOML-Aug22 (retired)
Other - printed sentiment (brand unk)

While I was searching through my Spellbinders yesterday, looking for the pomegranate set that Bobby used on her card, I found a strawberry die set. Perfect for another fruit card for JUGS! I die cut the basket plus multiples of the strawberries (3 sizes), leaves and flowers. Then I played with an arrangement until I was satisfied. Added a piece of woodgrain paper to the bottom of an A2 card along with a plaid "napkin". Added my assembled basket. Found a sentiment strip in the bits box - not sure which brand - and tucked it into the basket.

Since it's D for Dies week using Darnell's IDEAS schedule (see her inspiration HERE), I'm playing there too. Will also link up to NBUS #74 since my strawberry set is newly used - poor thing, it's already retired at Spellbinders!! I've mentioned before that I'm behind on using my Spellbinders...

Another quick post - I really need to work on my Diva post for next week! We're doing watercoloring for our May Challenge theme so check it out!

Thanks for stopping and have a crafty week!!


Monday, May 12, 2025

Lemon Branch Birthday

Hey friends - it's a beautiful day in Minnesota with a high of 84F expected - unseasonably warm but I'll take it! I made time this morning for crafting & created a lemony birthday card for Just Us Girls #774 where the word is FRUIT!


Supplies: Paper - Neenah Solar White;
Paper Studio A2 card; Momenta watercolor print;
Lawn Fawn Spring Perfectly Plaid; scraps
Dies - Spellbinders Citrus Spritz &
Hero Arts Infinity Arches (sold out)
Embossing folder - Spellbinders Summertime Citrus Twist
Other - Tim Holtz sentiment sticker

I'm signed up for the sold out Spellbinders Weekender event coming later this month. My box of supplies arrived while I was out of town but I opened it when I got home Thursday. A sweet lemon die set from this box came to mind when I saw the new JUGS challenge.

I wanted to do a lemon branch but couldn't find my Sunny Studio branch. Then I thought of the branch in the pomegranate set that Bobby used on her card. I just popped lemons and lemon flowers on it, instead of pomegranates! I die cut all the parts and assembled the branch. Die cut an arch and embossed it with the citrus slices & added to a plaid stitched rectangle on an A2 card. Added the branch, using foam tape under parts of the lemons and some flowers. Added a birthday die cut and sticker from the bits box.

It's D for Dies week using Darnell's IDEAS schedule (see her inspiration HERE) so I'm playing there too, as well as at NBUS #74 since my lemon set is newly used. So is the embossing folder, for that matter - I'm way behind on using some of my Spellbinders boxes!!

Quick post today - I have to put together a fruit salad for our chorus pot luck dinner tonight. We'll also be presenting longevity awards and I'm up for 45 years with Sweet Adelines International (I joined young - LOL!).

Thanks for stopping and have a crafty week!!


Sunday, May 11, 2025

A Cozy Cat Christmas

Happy Mother's Day to everyone celebrating today! I'm remembering my mom who passed away 3 years ago - she loved flowers and always was delighted with the hanging baskets we kids would gift to her every year. I spent part of this morning tending to my hydrangea bushes that are just starting to leaf - no flowers yet....

Today I'm sharing my second card for the May Christmas Kickstart Challenge #98 featuring Winter Warmers. I was going a different direction when  I spotted a Colorado Craft kitty that I'd already stamped & die cut. She looks so cozy in her warm stocking!


Supplies: Paper - Recollections A2 card;
Neenah Classic Crest Solar White;
Paper Studio Christmas Basics
Stamps w/dies - Colorado Craft Company Cozy Cat &
Meowy Christmas (retired)
Dies - Hero Arts Nesting Circle Infinity Dies;
Penny Black Wood Floors (HERE at Frantic Stamper)
Other - Copic Markers; foam tape; circle label from a TE kit

I colored the stamped & die cut kitty image with Copics. Covered an A2 card with striped paper, then added a white die cut floor. Added the kitty image to the floor. I added a stamped and die cut CCC sentiment (from Meowy Christmas, sadly retired) to a printed circle sticker. The sticker came with an old Taylored Expressions kit. I had stuck it down on a piece of Neenah white & die cut it with a larger circle for a border.

I will also link my kitty card to Merry Little Christmas #62 where Anything Goes.

That's all for today, friends! I appreciate you taking the time to visit and leave lovely comments. Have a wonderful day!!


Saturday, May 10, 2025

A Couple Christmas Cards

Hi everyone - I'm popping in with a card for the May Christmas Kickstart Challenge #98 featuring Winter Warmers. I went with a polar bear wearing a winter scarf, hat & mittens.


Supplies: Paper - Recollections A2 card;
Neenah Classic Crest Solar White;
Paper Studio O Holy Night; scraps
Stamps w/dies - Hero Arts Holiday Cheer Nov2024 kit
Dies - Hero Arts Peeking Winter Bear
(sold out at HA but one left HERE at Frantic Stamper)
Other - Copic Markers; foam tape; clear gems

First I die cut the bear and his accessories, then assembled. Added shading and details with Copics. Covered an A2 card with snowflake paper then added a plaid on the left. Added the bear to the edge of the plaid using foam only on the head. Added some snowflakes (unknown whose) from the bits box, then some gems to their centers. Pulled a stamped/die cut sentiment from a Hero Studio kit & adhered to the card with foam tape - done!

I will also link this card to Merry Little Christmas #62 where Anything Goes & to the May Stay Crafty with a Blog Named Hero Challenge (Eyes).

Next, I have a Christmas card I made during last night's Craft Roulette Live (Episode #266) featuring Gina K. (‪@GinaKDesigns-StampTV‬) & Rina K. (@RinaKDesigns) as guests.


Supplies: Paper - Neenah Classic Crest Solar White;
Paper Studio Heavyweight Pink
Stamps w/Dies - Hero Arts Holiday Sparkles Bundle
North Pole Express Bundle (retired at HA; HERE at FS)
Other - Copic Markers; TH Twisted Citron Distress Ink;
Paper Studio star gems

Here's what the wheel spun:


  • Project - A7 card: I formed one from cardstock.
  • Colors - Floral Wreath: I used pink/yellow/green from my Easter wreath.
  • Element - Lyrics: I used a sentiment with lyrics from a Christmas song.
  • Random - Cinco: I stamped 5 stars.

I started by stamping 5 stars and the sentiment on a piece of Neenah white cardstock. Trimmed the panel to layer onto an A7 card formed from pink cardstock. Colored the stars with Copics and inked the panel edges before gluing to the card. Added some star gems - done! I managed to get a photo and upload the card before the episode ended - I love when I can do that!

That's it for today, friends! Thanks for visiting & have a crafty weekend!!