Welcome to my blog!

Thanks for visiting my blog. As the title suggests, I love to scrapbook, stamp, and sing! I will share cards and scrapbook pages I create, as well as information about my music - Barbershop harmony.

Tuesday, April 26, 2016

Let it Snow!


Let it snow? Well, not really - please! We've had some cold rainy days this week but at least no snow!!

Wk 4 of retirement and I'm having some fun with Merry Monday today - Kathy's challenge is to create a snowy Christmas card. I couldn't wait to try a card using a new-to-me snowman set by Avery Elle. Just love this darling image and I ordered the matching die too.

Here's my card:

Let it Snow
Supplies: Stamps - Avery Elle's Be Jolly (snowman); Hero Arts DC164 Woodland Set by Lia (sentiment); Lawn Fawn Snow Day (row of trees); Simon Says Stamp Falling Snow. Matching dies to snowman and trees; Simon Says Stamp Stitched Rectangle. 
Inks - Memento Tuxedo Black; Tumbled Glass, Pine Needles & Mermaid Lagoon Distress Inks. Paper - Neenah Solar White; Hero Arts Azure. Copic markers; Doodlebug enamel dots; Ranger Black Enamel Accents, Blue Icy Stickles; Viva Decor Ice white Pearl Pen

Steps:
  1. Cut a white 3.5" x 4.75" panel.
  2. Stamped and clear embossed the sentiment in the lower right corner. Shaded it with Copic B00.
  3. Stamped the snowman image with its own "snowbank" directly on the card; shaded the snow.
  4. Stamped and white embossed the "falling snow". I shaded the "sky" portion with a bit of Distress Ink.
  5. Stamped the row of trees and the snowman on a scrap piece of white; then die cut each.
  6. Colored the snowman with Copics, added black Enamel Accents to the eyes and mouth, enamel dots over the stamped buttons and blue stickles on the hat. 
  7. Adhered the row of trees directly onto the card, then popped the die cut snowman with foam tape over the stamped image on the card. 
  8. Added pearl pen to the "snow".
  9. Matted the white panel with blue.
  10. Die cut a white stitched rectangle and adhered to a top fold A2 blue card.
  11. Adhered the matted snowman panel to the card.
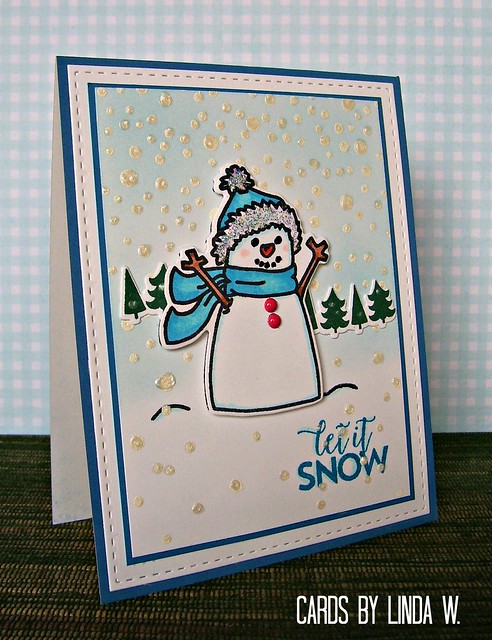
I enjoyed making this "snowy" card. Be sure to stop by Merry Monday and check out the wonderful creations this week!

Monday, April 18, 2016

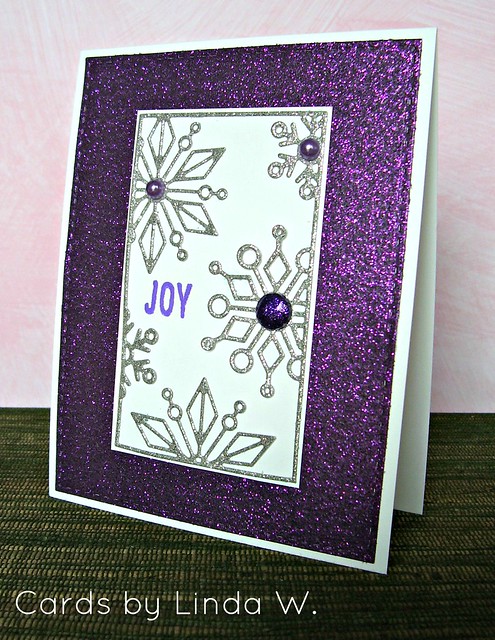
Purple/White/Silver at Merry Monday


Another Merry Monday to you! This week's challenge by Debbie - use purple/white/silver. Yay - purple is my favorite color!! Once again, I thought of one idea and by the time I started searching for supplies, went a totally different direction. Here's my card:

Joy Snowflake Block
Supplies - Cardstock - Paper Studio Glittered; Neenah solar white.
Stamp - Hero Arts CL802 (sentiment JOY); Ink - Wilted Violet Distress Ink
Dies - SSS stitched rectangle; Snowflake Block; gem/pearls

Busy day for me today so this is just a quick post. Be sure to stop at Merry Monday for the inspiration you need to get your Christmas cards done early!!

Monday, April 11, 2016

Merry Monday's 200th Challenge!


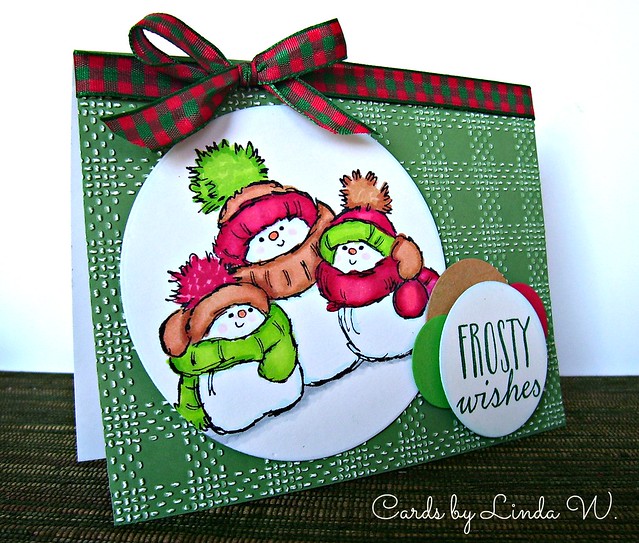
Congrats to Merry Monday - celebrating its 200th challenge this week with some special guests and the choice of four options for your Christmas card. Such great options too - see them at right - and it took me no time at all to decide on the Snowman Theme for my first card. I'm betting I'll be back later in the week to try one of the other options.

Be sure to stop by and check out all the great inspiration - both the Design Team and their special Guest Designers posted some beautiful cards using a variety of the options.

Here's my card:

Frosty Wishes
Supplies: Stamps - Penny Black's Snow Family, Hero Arts' Frosty Wishes; Copic Markers; 
Cuttlebug Kitchen Towel embossing folder; May Arts ribbon; Hero Arts pine card, Bazzill and Neenah cardstock

I had fun with this cute Penny Black snowman trio that my friend Heather Maria sent me. She knows I like playing at Merry Monday so stamped off several panels of the trio. Besides the Snowman Theme, I decided to use the color option - red, green, kraft & white. The reds look a bit pink in the photo but I used various shades of Copic reds. Just love the Kitchen Towel texture from the embossing folder - just picked it up last week at JoAnn's.

Thanks for stopping and hope you have time to create a Christmas card with the Merry Monday team!!

Friday, April 8, 2016

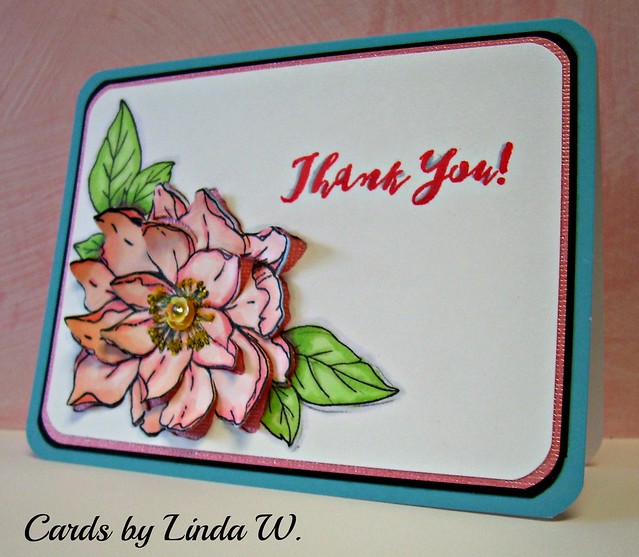
Thank you flower 2

Back today with another card made with the April 2016 Hero Arts My Monthly Hero kit. This time I stamped and colored the large flower image, masked it off to stamp the leaves, and then used the pop-up die on it. I added some sequins and stickles to the flower center and stamped the sentiment. Simple matting - done! Here's my card:

Thank you flower 2
Supplies: Stamps - Hero Arts: April 2016 MMH and DC178 Thank You Tag Stamp&Cut by Lia
Copic Markers; Stickles, Lawn Fawn sequins, Co'redinations Gemstone cs, Hero Arts Cerulean card

These pop-up dies are great for adding dimension without bulk - love them! Yay - another thank you card done! Off to make another one - maybe I'll try the water colors in the kit this time....

Thanks for stopping - hope you're having a great Friday!

Thursday, April 7, 2016

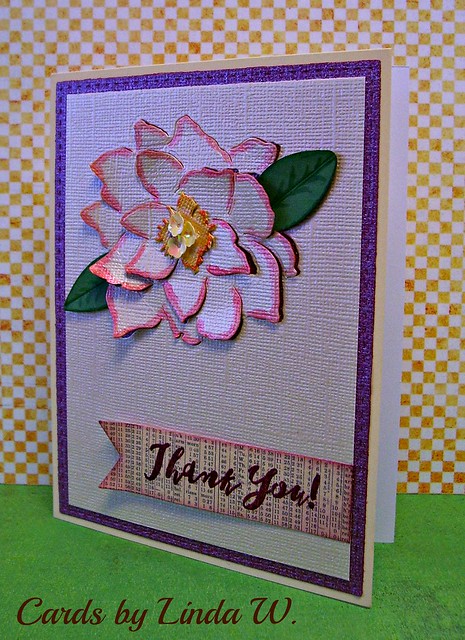
Thank you flower

Hi everyone - hope you're having a great week! I'm enjoying my first full week of retirement - lunching with friends, shopping, reading a book, and making cards. I was excited to get this month's My Monthly Hero kit from Hero Arts in today's mail - lots of gorgeous flower stamps and dies! It just launched on Monday and has already sold out!! I ordered the add-on stamps and dies too - can't wait to start creating with them.

The kit itself came with 5 dies and I started with the pop-up flower. I die cut the flower from a piece of cardstock just to see it in action and liked how it turned out. I ended up making a thank you card since I have many more to make and send for the retirement gifts I received. Here's my card:

Thank you flower
Supplies: Hero Arts April 2016 My Monthly Hero (pop up flower); DC178 Thank You Tag Stamp&Cut by Lia
Paper: Hero Arts Daffodil card; Co'redinations Gemstone cardstock; Basic Grey Herbs & Honey PP (banner)
Lawn Fawn sequins; Aged Mahogany Distress Ink; Simon Says Stamp Stitched Frame

After die cutting the flower, I added some Copic Marker to the edges. Then I added some die cut leaves I had in my stash, scoring the center line and then adding some hand-drawn lines with a Copic. I cut the flower center using the smallest die and accented it with a Copic and three Lawn Fawn flower sequins. The stitched mat is deceptively purplish in the photo - in real life it's closer to a mahogany color to match the ink on the sentiment. 

Thanks for stopping!

Monday, April 4, 2016

Guest Designer on Merry Monday!


I'm starting off my first week in retirement as the Guest Designer for this week's Merry Monday challenge! The lovely Colleen challenged us to create a Christmas card focusing on the sentiment and I had the perfect stamp set. I've really had fun with the bold trio of words in Hero Arts' JOLLY clear set - this time using the "MERRY".

After I stamped the MERRY a few times using my MISTI, I thought the word looked a bit plain. I "kissed" it with a background stamp inked with a darker red and restamped; this gave a nice striped texture (bit hard to see in the photo). Then I clear embossed it. I started out thinking about stamping some greens and berries around the word, then I spotted the Tim Holtz Christmastime set I used for last week's card. I thought the stars would add the perfect touch to my sentiment, then decided to add "& Bright" from a different set.

Here's my card:

Supplies: Stamps - Hero Arts CL620 JollyDC170 Merry Stamp&Cut; CG681 Candy Stripe Bold Print;
Tim Holtz Christmastime; Die - Stitched Rectangle from SSS Bundle of Stitched Shapes
Inks: Tim Holtz Distress Ink - Candied Apple, Fired Brick, Pine Needles, Fossilized Amber
Paper - Hero Arts pine layering paper; Neenah Solar white and black cs

I'm honored to have been a Guest Designer at Merry Monday!! Thanks for stopping and be sure to check out the beautiful creations of the Design Team.

Saturday, April 2, 2016

New Beginnings and a thank you card

Happy Saturday everyone! It's a new beginning for me - I retired from my career of nearly 38 years with the Social Security Administration yesterday!! I enjoyed the work thoroughly but felt it was time to leave - while I still have the energy to enjoy other things. Here I am with coworker Mai who gave me the sweet mini orchid:

And here's a photo from my work luncheon holding the springtime cake they provided:


After work I enjoyed Happy Hour at Joseph's Grill just across the Mississippi River from downtown St Paul. Coworkers, retired coworkers, family and friends joined me there for some delicious food & drink!

On my first day of retirement I was awake before 5a.m. - so much for sleeping in.... I made my card for next weeks Merry Monday post (I'll be guest designer) then I ran some errands. I came home in time for today's Scramble on the Hero Arts Flickr Group. Charlene's theme - Mix it Up (use stamps from multiple sets). Here's my card:

 Supplies: Stamps - Hero Arts: CL663 Thanks a Bunch, CL943 Color Layering Bouquet, 
plus a few bits from a couple other layering sets; Simon Says Stamp: Falling Hearts background
Inks: Tim Holtz Distress Inks; paper: Hero Arts Cerulean; Neenah Solar White

I have plenty more thank you cards to make for all the retirement gifts I received! I'll be kept busy for the first week anyway!! Thanks for stopping by!